Volvo S60: Offside Driveshaft Replacement
This documentation details how to replace the offside (drivers side/Right hand side) driveshaft on a 2003 right hand drive Volvo S60.
As far as I know, the process for Volvo V70's is exactly the same.
The offside driveshaft on the S60 is commonly damaged when replacing the Lower Control Arm - the shaft can easily be pulled out of the inner CV joint by accident. In order to resolve that, you need to remove the driveshaft and either rebuild the CV joint or put a new driveshaft.
I'm neither delicate nor patient enough to rebuild a CV joint, so I decided just to put a new driveshaft in.
This documentation details the process I followed.
Tools Required
- Rubber mallet
- Drift (socket extension bar will do at a push)
- 22mm Flat spanner
- 18mm Flat spanner
- Mole Grips
- Selection of sockets, including a shallow 12mm
- Ratchets and a T-Bar/breaker bar
- Large Flat head screwdriver
- Small flat head screwdriver
- Cable ties (or wire)
- New driveshaft (with new retention screw)
- New knuckle stretch bolts
Process
With the wheels still on the ground, use a small screw driver to prise the center cap off your wheel (if you've got steel wheels, just remove the hub cap) to give access to the driveshaft retention screw
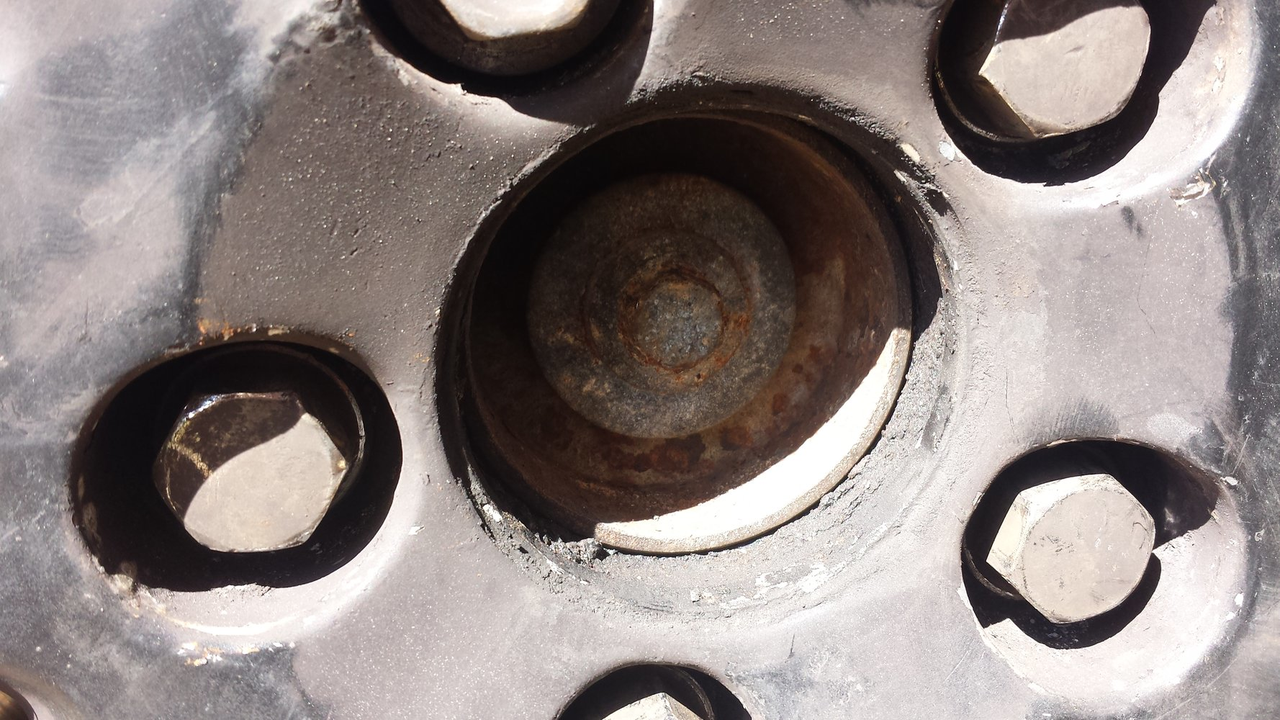
You'll need a 13mm socket and an extension bar to reach it. Make sure the socket is a tight fit (if not, try other sizes in case your screw is a different fit to mine). The screw is tight and you do not want to round it by accident.
Use a torque wrench to slacken the screw slightly.
Now loosen the wheel bolts, jack the car up (as high as you can) and support on stands.
Remove the wheel, and then fully remove the driveshaft retention screw
Now you need to carefully remove the ABS sensor. Be gentle with it, it should come out easily, but they're extremely expensive to replace.
First unhook the cabling from the suspension strut.
Then remove the (10mm) bolt holding it in, and get a small screwdriver into the screwhole to help loosen the sensor a little so that you can remove it:
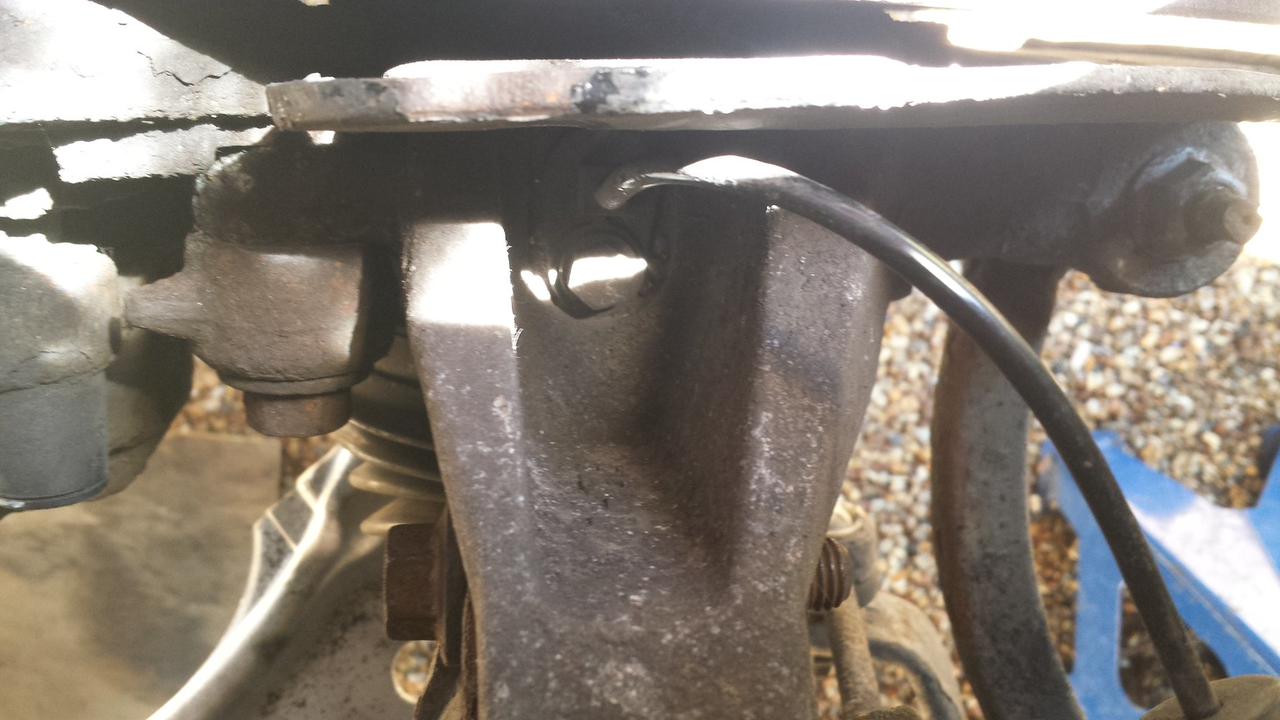
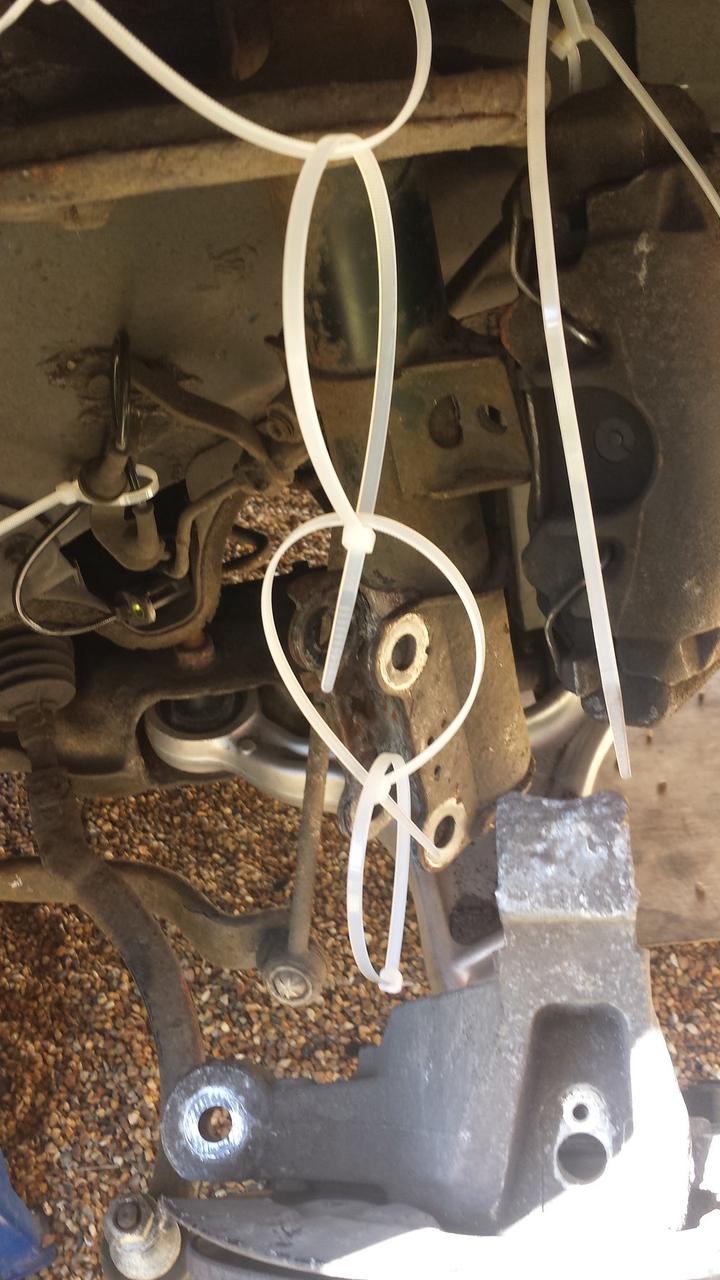
Cable tie the sensor out of the way so it doesn't get damaged.
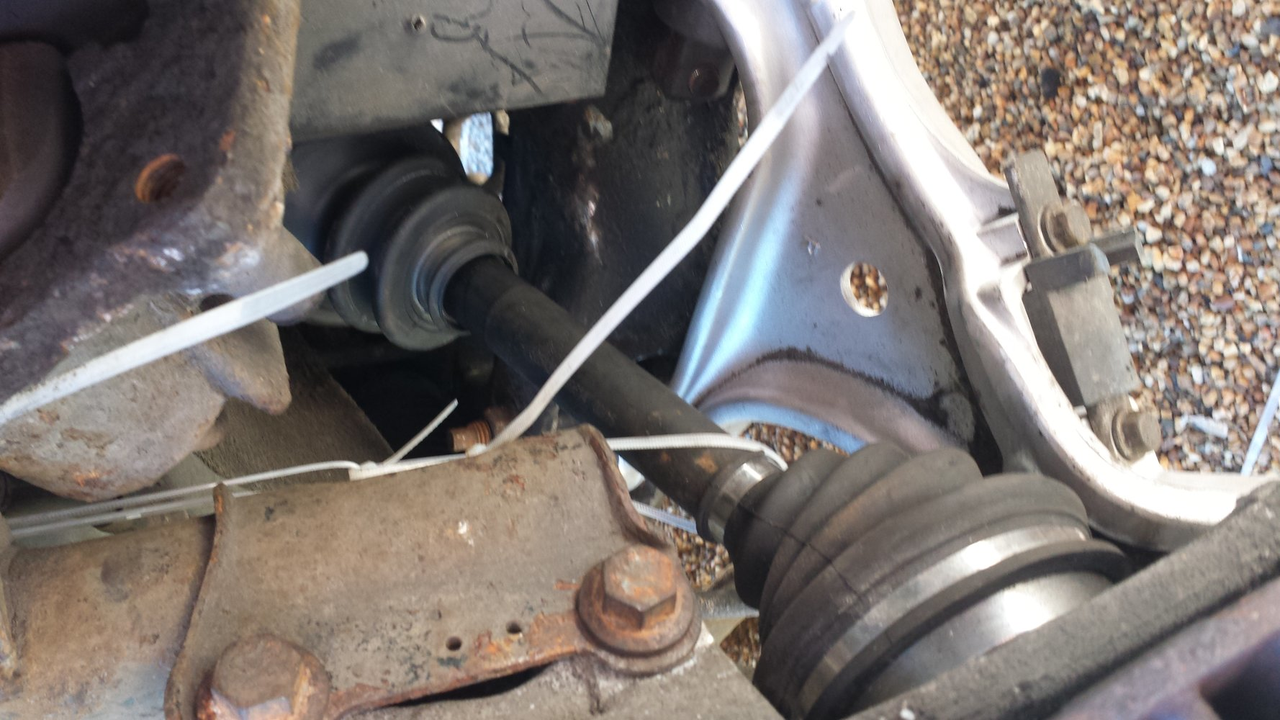
Next, I decided to deal with the intermediate bearing support bracket.
It's a bit of a pig to get to (particularly the top bolt), so it's best to make sure you can actually get the bolts undone before stripping anything else off the car.
You'll need to get under the car for this. The bolts should have a 12mm head.
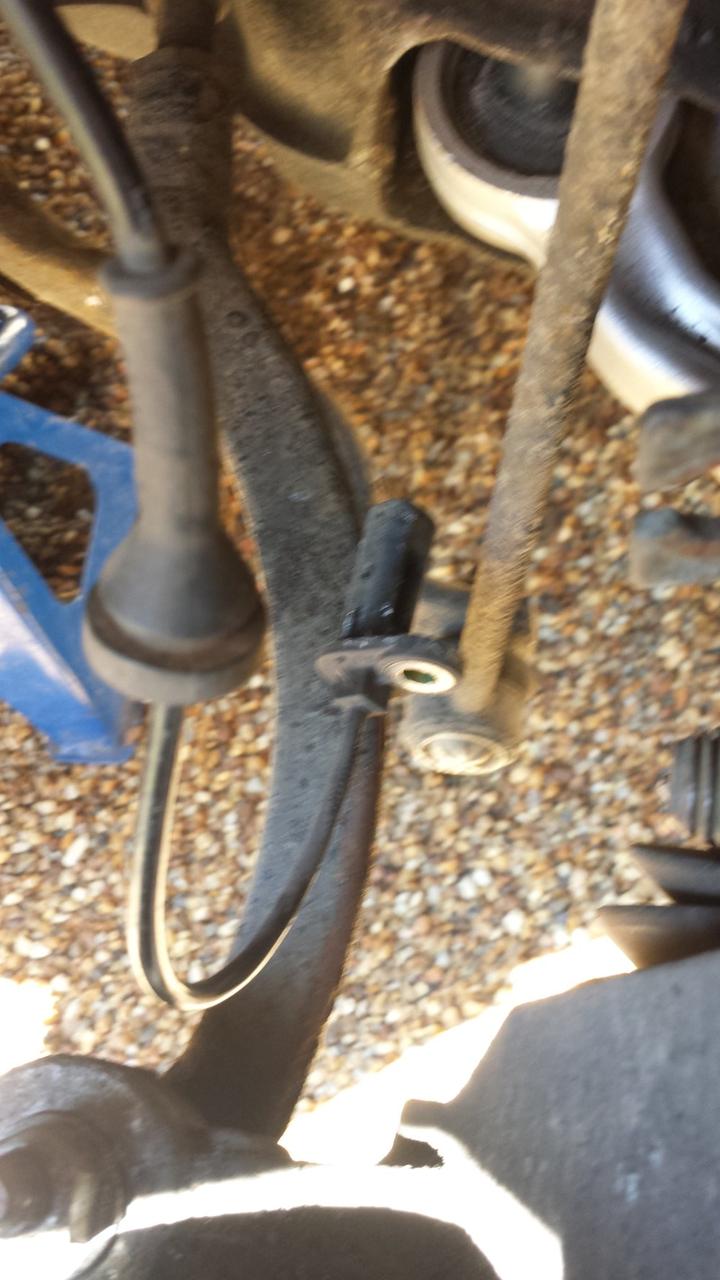
You'll find the bracket just behind the inner CV joint, and there will probably be some air-con pipes in the way - be careful of these. There's a bolt at the bottom of the bracket, and another at the top
I found I had to use a very shallow socket, on a fairly narrow ratchet (if you've one with a flexi head it makes it easier). Although initially quite tight, once I'd cracked the bolts they came loose quite easily.
In my case, that bracket has done 245,000 miles since it was last undone, so once the bolts were undone it stayed together. I had to get a cold chisel and lump hammer to give it a gentle tap and free it.
The bracket itself is essentially a metal C, and once it shifted a little came away quite easily.
Now it's time to free the driveshaft from the hub.
I've got a brand new control arm on there, and getting the balljoint seated is a big part of how I knackered the original driveshaft, so there's no way I was going to unseat the LBJ from the LCA.
Instead, I did the following:
Give the driveshaft a tap with a drift and a rubber mallet to start pushing it back out of the hub (it won't go far yet, but you want a little bit of movement just to get it started).
Undo the bolt from the top of the tie rod end and withdraw that from the hub.
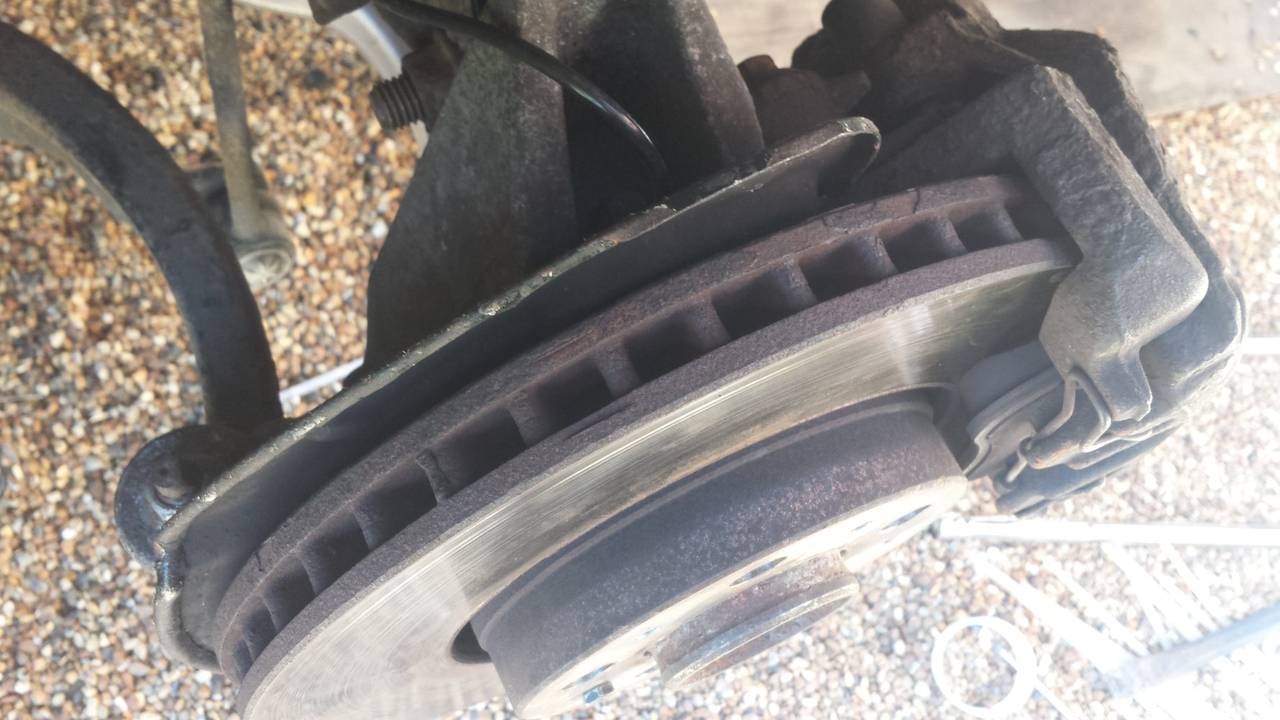
Undo the caliper mount bolts and carefully slide the caliper off the disk. Tie the caliper up out of the way with cable ties.
With a 22mm flat spanner and an 18mm socket, undo the knuckle bolts linking the stub-axle carrier to the suspension strut and then pull the carrier forwards.
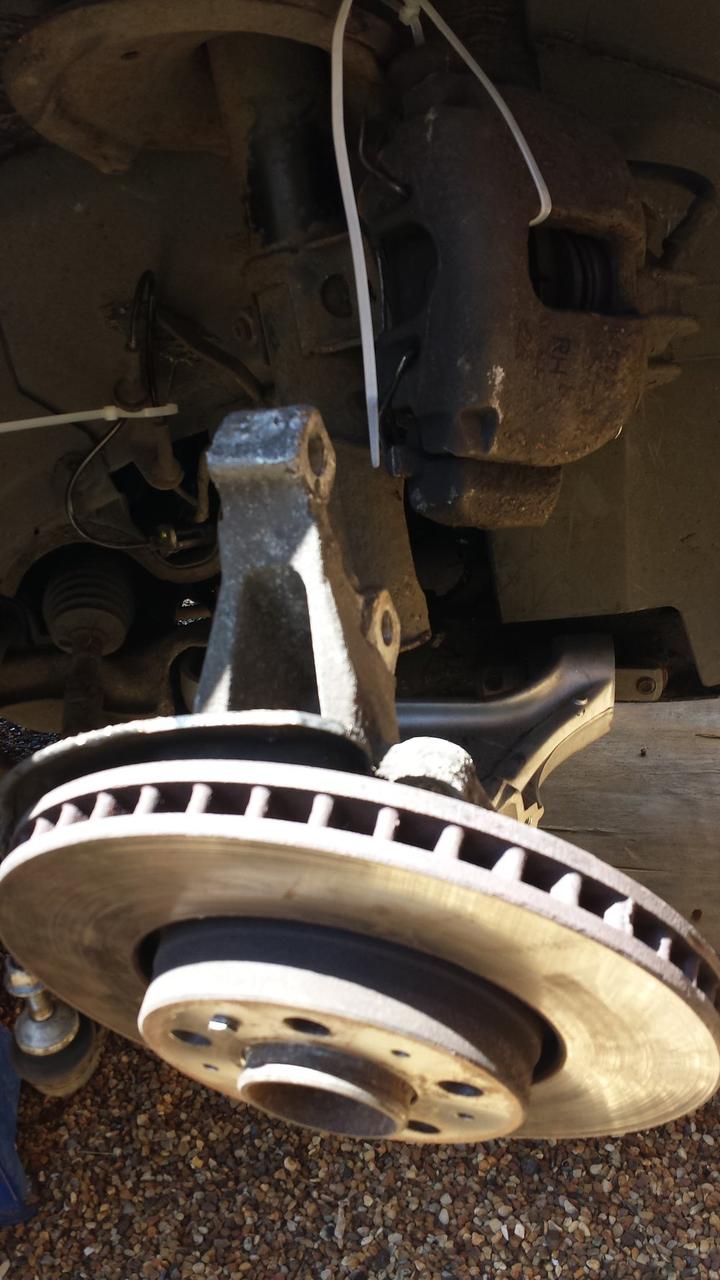
You now need to work the driveshaft out of the back of the carrier. It should come quite easily
Swing the carrier towards the rear of the car to move it out of the way, and carefully twist the Sus strut in that direction too.
Now you need to free the other end of the driveshaft from the gearbox. There's a splined end that goes into the gearbox, but as it does get a dose of gearbox oil it should move quite easily.
To help free it (if pulling isn't enough) carefully wedge a large screwdriver where it meets the gear box and gently lever it. It'll move a small amount, but once it lets go it does it suddenly (as the splines clear their receptacle).
Move back out from under the car and withdraw the driveshaft
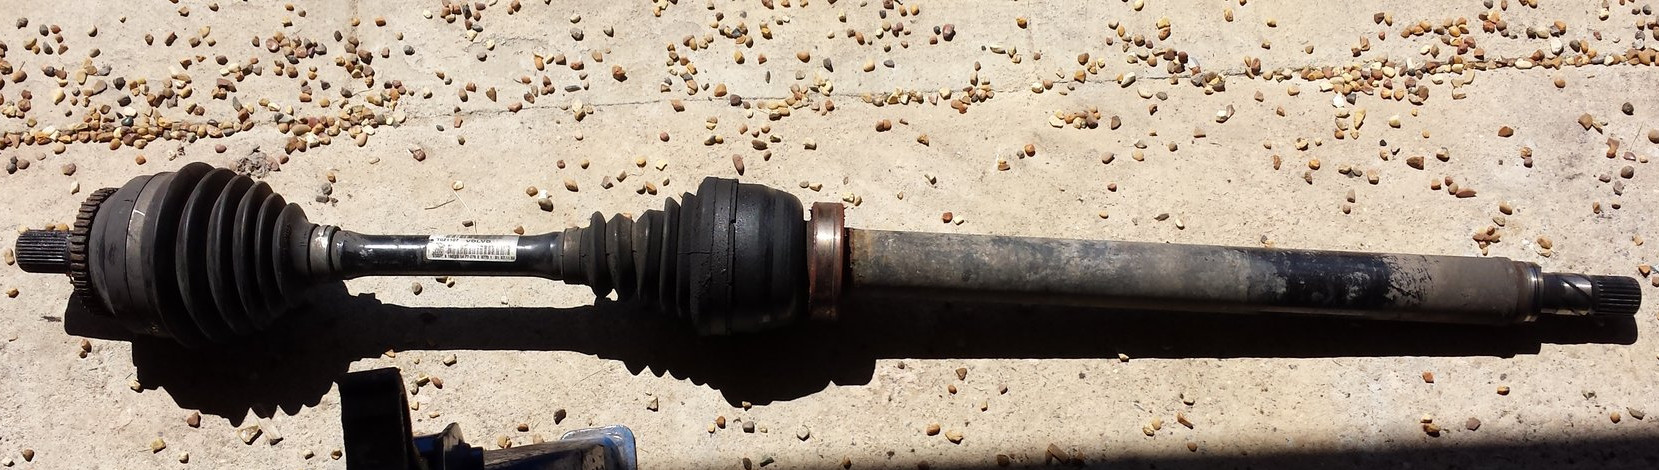
Installing the new Driveshaft
Given the reason for needing to replace the driveshaft, I was paranoid about accidentally separating the CV on the new driveshaft, so to reduce the risk I took a couple of precautionary steps:
Binding the CV together with electrical tape:

and putting some cable ties in place ready to be used to support the driveshaft end once I started installing it
The next step, obviously, is to start trying to guide the new drive shaft in. I carefully passed the splined end in through the wheel arch until it was almost in to place. As soon as the outside end was close enough, I supported it on my knee and wrapped a cable tie around it, before tightening the existing chain to take up the slack.
You can now, reasonably safely, climb under the car to guide the far end into place. It's easiest if you lift the bearing up to align with it's bracket first (just be paranoid about not accidentally pulling it away from the outer end). Once aligned, the splined end slides into the gearbox easily.
Just make sure to slide it all the way, otherwise you'll find yourself leaking gearbox oil.
There's a lip on the inside of the bearing bracket, once you're in correctly the bearing will be pressed tight against it.
I decided that it'd then better to try and get the outer end into the carrier a little way before doing the bearing bracket (as it should give a little more play without it), This takes a bit of time and patience, and you need to be careful not to let the sus strut damage the boot on the CV.
The way I did it was to push the carrier/sus knuckle back together (push down on the carrier a bit to bend the LCA down) and pass the lower bolt (you should use new bolts - I forgot to order them so will need to swap them out) back through. I didn't put the nut on the end, nor install the top knuckle bolt.
This helps hold the carrier upright a bit so that it's easier to get the driveshaft to go in straight. You then need to gently try and work the driveshaft in, pressing on the top of the knuckle to get some leverage to help drive it in. Don't expect it to come all the way through yet.
Press until you're able to slide the top knuckle bolt in.
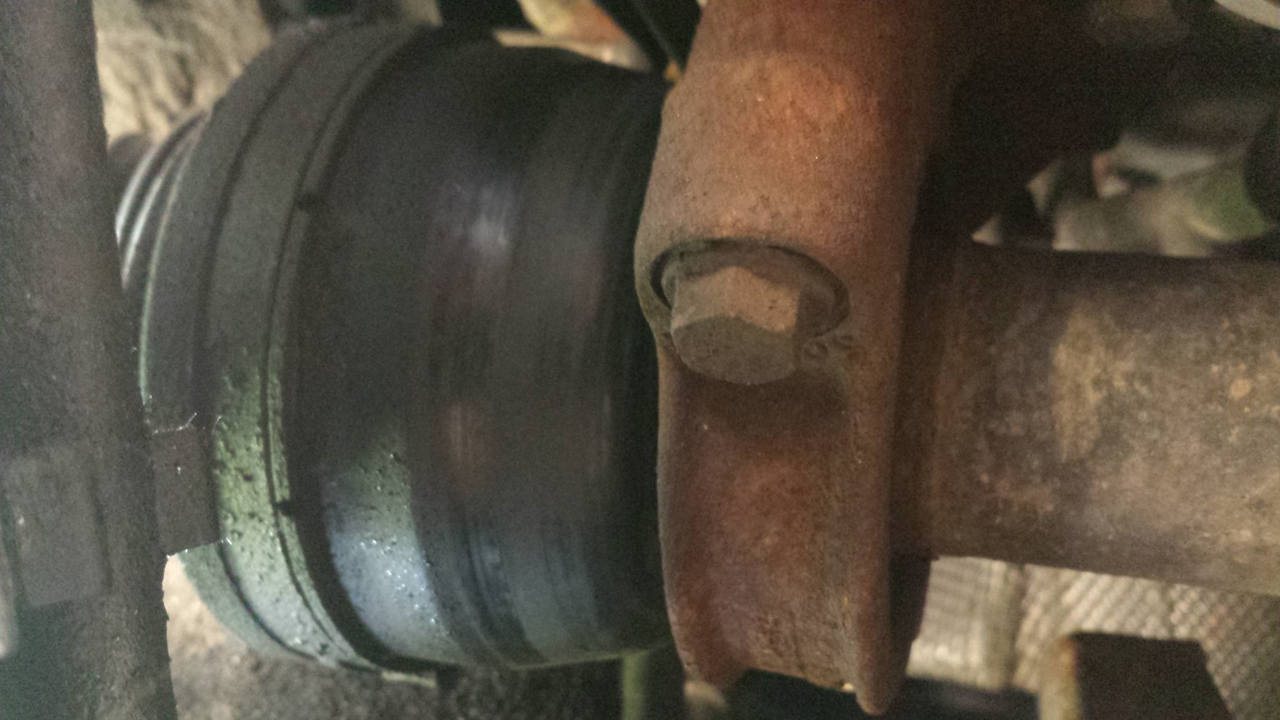
Although probably unneeded, I then put the driveshaft retention screw in and gave it a couple of turns to make sure it couldn't pop back out.
Now, we can put the bearing bracket back on. It should push over fairly easily and hold well enough for you to finger tighten the retaining bolts.
Now get your socket back on and tighten them down. Keep an eye on the side of the bracket so that you can see whether or not the faces are mating - the screws can sometimes go a little tight when there's still a lot of travel left.
Now that the bearing's retained and the knuckle is back together, we can be reasonably sure that we're not going to pop the inner CV by pulling on it.
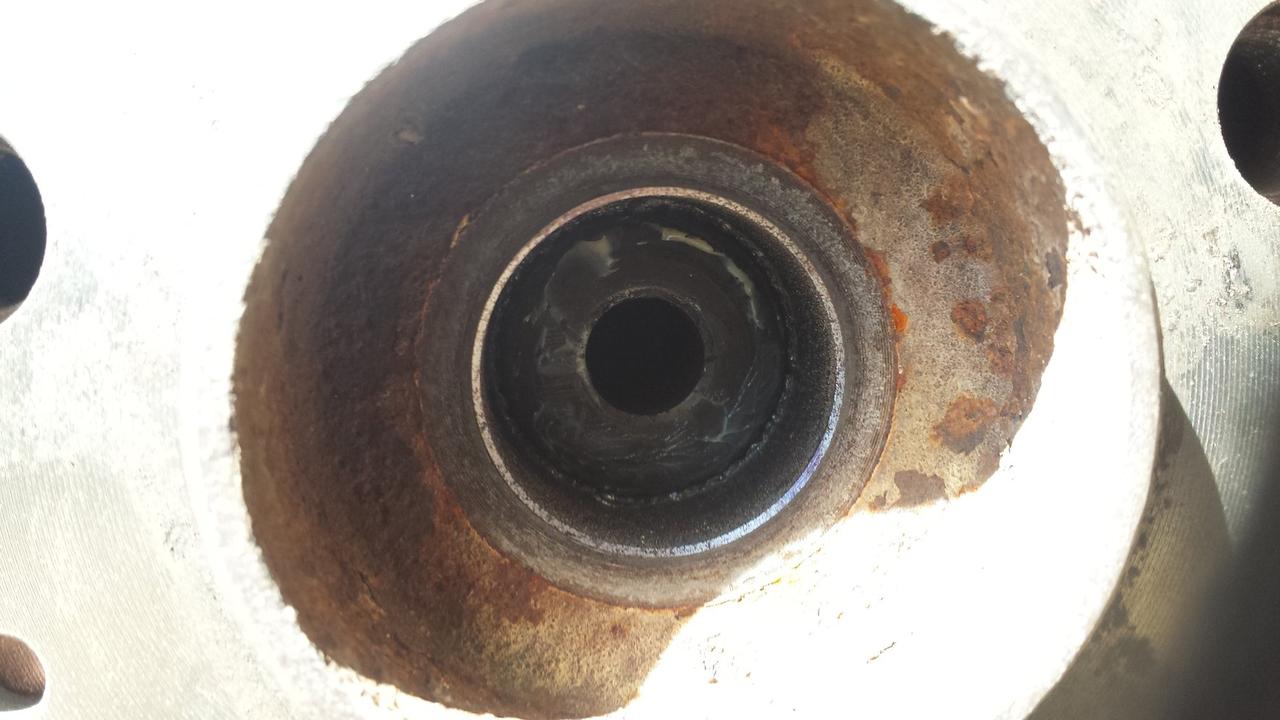
Carefully grab the outer CV boot and pull it forward to pull the driveshaft all the way through the hub. If you look down the hole for the ABS sensor you should be able to see the ABS ring.
Tighten the retaining screw down a bit to remove the play.
Now, we're onto the home stretch:
Re-install the ABS sensor (remember to clip the wire back onto the strut)

Then rewind the brake caliper just a little (otherwise it's a real bugger to get on), slide it over the disk and carefully align the holes with the mounting. Don't forget to put the steering stop back in place before sliding the bolts in. This is easiest if you support the caliper with one hand, and use the other to offer the bolt (already passed through the steering stop) to the top hole. Get it aligned and give it a few turns by hand until it bites. Then align the lower bolt the same way, before tightening both down.
Pass the tie rod end's balljoint shank back into the carrier, and tighten it's bolt down.
Your carrier should now be re-assembled
Now you want to put the wheel back on (still with the centrecap out), wheelnuts in etc.
Lift the car off the stands and remove them, and then gently lower the car down onto the ground until the wheel starts taking some weight.
Now, tighten your wheelnuts to their usual torqueyness
With a socket and extender bar, tighten the driveshaft retaining nut to 35nm. Then turn it another 90 degrees.
Pop the centercap back in and lower the car the rest of the way onto the ground.
Now, if somehow, you have managed to seperate the shaft from the inner CV during installation, you'll find out pretty quickly (and be stranded when it happens). So, reverse up and down the drive, swinging from one lock to the other now so that if the worst happens you're at least not blocking the road.
If all's gone well you won't suddenly hear a massive crunching sound, and you're done