Receiving weather information in EcoWitt protocol and writing into InfluxDB and WOW
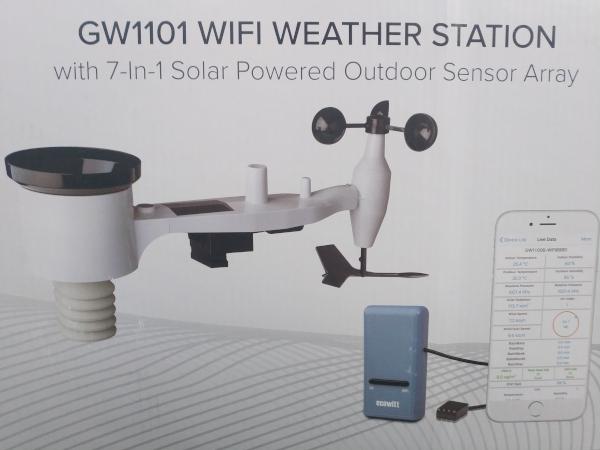
I recently acquired an EcoWitt weather station.
It comes as a kit, consisting of an EcoWitt GW110 Gateway and an EcoWitt WS69AN 7-in-1 Weather station.
It's advertised as being able to write into WeatherUnderground as well as EcoWitt's own service, so I figured I'd probably be able to do something to catch its writes and get them into InfluxDB.
The listing doesn't make it clear, but it actually supports configuring "custom" weather services, so this proved to be extremely straight forward so was largely just a case of building something to receive and parse the writes.
This post details how I did that and, in theory, how you can too (in principle, it should work with any of their weather stations)
Gateway setup
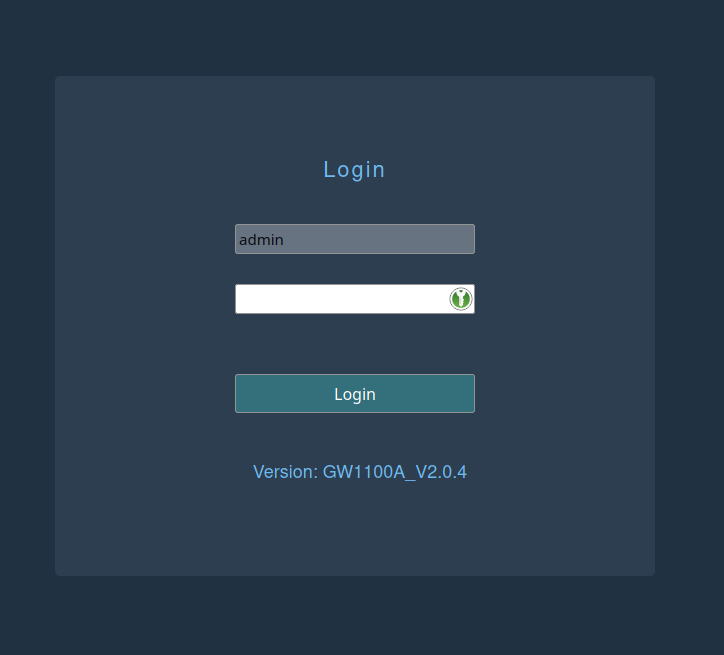
Setting the weather station up on the network was actually pretty straight forward. You plug the gateway in (it's powered via a male USB-A connector, which is a little unusual), which stands up a Wi-Fi network. You connect onto that and then hit the device's web interface to provide it with details for your wifi
Receiving and processing the write
EcoWitt's protocol is just a form-encoded POST, so we can quite trivially use Flask to receive and operate on it (although... see update below)
@app.route('/data/report/', methods=['POST'])
def receiveEcoWitt():
    ''' ... snip ... '''
    # Iterate over each pair in the post body
    data = request.form
    for key in data:
        # Do stuff
The weather station reports in imperial units (the settings in the gateway's web interface do not change this, only how it's displayed on screen), so we need to convert some of the readings to use more modern units.
if TEMP_C and key.startswith("temp") and key.endswith("f"):
    val = convertFtoC(val)
    key = key[:-1] + 'c'

if PRESSURE_HPA and key.startswith("barom") and key.endswith("in"):
    # Convert inches to hPa
    val = float(val) * 33.6585
    key = key[:-2] + 'hpa'

if RAIN_MM and (key.endswith("rainin") or key == "rainratein"):
    # Convert inches to mm
    val = float(val) * 25.4
    key = key[:-2] + 'mm'

if SPEED_KPH and key.endswith('mph'):
    speed = float(value) * 1.60934
    key = key[:-3] + 'kph'
But the code is otherwise very straight forward. Ultimately, it opens a connection to InfluxDB and writes the data in
# Create the datapoint
pt = influxdb_client.Point(MEASUREMENT)

# Add tags
for tag in tagset:
    pt.tag(tag, tagset[tag])

# Add fields
for field in fieldset:
    pt.field(field, fieldset[field])

# Write
with influxdb_client.InfluxDBClient(url=INFLUX_URL, token=INFLUX_TOKEN, org=INFLUX_ORG) as client:
    write_api = client.write_api(write_options=SYNCHRONOUS)
    write_api.write(INFLUX_BUCKET, INFLUX_ORG, pt)
You can see the full (slightly more refined) code at https://github.com/bentasker/ecowitt_to_influxdb/blob/master/app/ecowitt.py
Writing onto the Met Office
We're going to do a quick time jump here - I implemented this bit after everything else, but it doesn't make sense to have readers tear down the server just to enable this.
The Met Office's Weather Observations Website (WOW) accepts input from weather stations, so we can also have the handler write on to them.
If you don't want this enabled, just skip this section as it's off by default
If you go to https://wow.metoffice.gov.uk/sites you'll be prompted to Signup or login (you can skip sign-up and log in with Facebook, Google and Twitter if that's your thing).
Once logged in
- go to https://wow.metoffice.gov.uk/sites/create and you'll be presented with the creation form.
- Drag the pointer on the map to roughly your location (personally, I wouldn't position it too accurately, as people can view it's location).
There are a lot of fields but only those with a * are mandatory. You should set an Authentication key though (just enter a random string and keep a note of it).

Work through the Site Data Preferences section and set the following
- Air Temperature: Farenheit
- Wind Speed: Miles Per Hour
- Wind Direction: Captured (assuming your weather station does direction)
- Wind Gust: Miles Per Hour
- Pressure: Hecto Pascal
The slightly odd mix of units is because those are the units that the api docs said to use (I guess the overrides were added after).
Once you've saved that, you should be shown your site, including it's ID (the UUID looking thing just below the map).
When we start the docker container (in a moment) you're going to want to include the following environment variables
-e MET_OFFICE_WOW_ENABLED="yes" \
-e MET_OFFICE_SITE_ID="<your site id>" \
-e MET_OFFICE_SITE_PIN="<the authentication key you set>" \
The Met Office's API documentation requests that observations are only written once every 5 minutes, so only requests received in a 5th minute will be written onwards (this is controlled by MET_OFFICE_UPDATE_INTERVAL).
Using It
The easiest way to run it is by running my docker image
docker run -d \
--restart=unless-stopped \
--name=ecowitt_listener \
-p 8090:8090 \
-e INFLUX_URL="http://myinfluxinstance:8086" \
-e INFLUX_ORG="myorg" \
-e INLUX_TOKEN="mytoken" \
-e INFLUX_BUCKET="weather" \
bentasker12/ecowitt_listener
Remember to include the WOW variables from above if you want to enable Met Office WOW support.
This stands up a container listening on tcp/8090 which will write data onwards into an InfluxDB instance at http://myinfluxinstance:8086
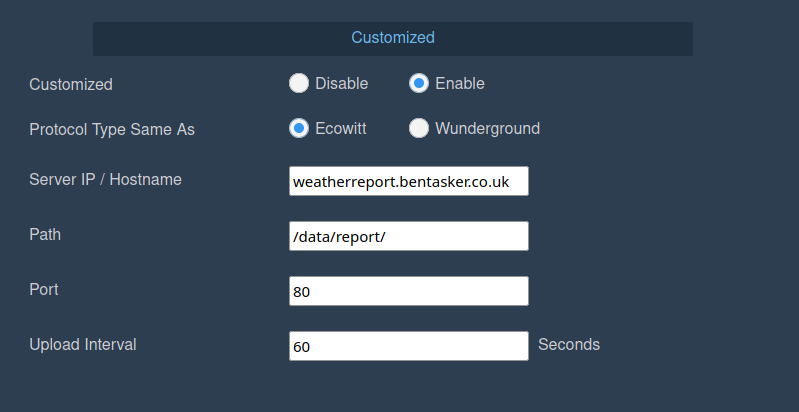
Although it's possible to configure the Ecowitt gateway to communicate directly with this image, I prefer most comms to go via a centralised point - my Nginx server - so I created a reverse proxy on there
server {
        listen   80;

        root /usr/share/nginx/empty;
        index index.php index.html index.htm;

        server_name weatherreport.bentasker.co.uk;

        location / {
              proxy_pass http://127.0.0.1:8090;
              proxy_set_header x-forwarded-for $remote_addr;
              include /etc/nginx/conf.d/lan_auth.inc
        }
}
And then configured the gateway to use it as a weather service
Handling Data
With that, the data started coming in
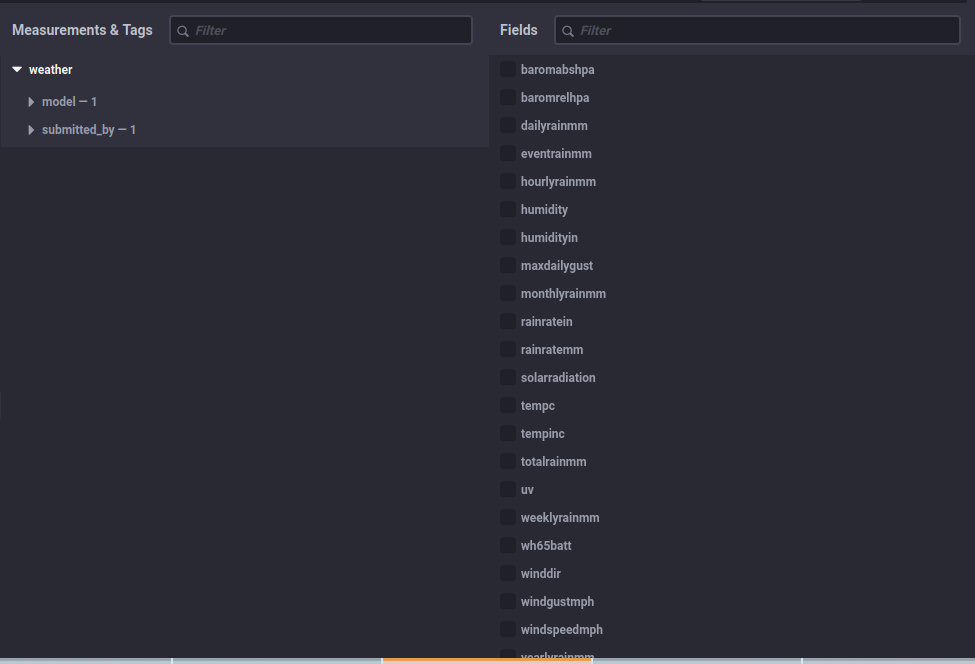
There are quite a number of fields:
-
wh[num]bat(e.g.wh65batt) - battery status (apparently,0= OK,1= low) -
totalrainmm: Total rain recorded in mm -
yearlyrainmm: Total rain recorded in mm this year -
monthlyrainmm: Total rain recorded in mm this month -
weeklyrainmm: Total rain recorded in mm this week -
dailyrainmm: Total rain recorded in mm today -
hourlyrainmm: Total rain recorded in mm in this hour -
eventrainmm: Total rain recorded in mm in the most recent shower -
rainratemm: Current rainfall rate in mm per hour -
uv: UV index -
solarradiation: Solar radiation (w/m2) -
maxdailygust: Maximum wind gust speed today (MPH) -
windgustmph: Gust speed (MPH) -
windspeedmph: Wind speed (MPH) -
winddir: Wind direction (degrees) -
humidity: Outside humidity (%) -
tempf/tempc: Outside temperature (F/C) -
baromrelhpa: Relative pressure (hpa) -
baromabshpa: Absolute pressure (hpa) -
humidityin: Inside humidity (%) -
tempinc: Inside temperature (C)
Which can now be graphed and gauged out
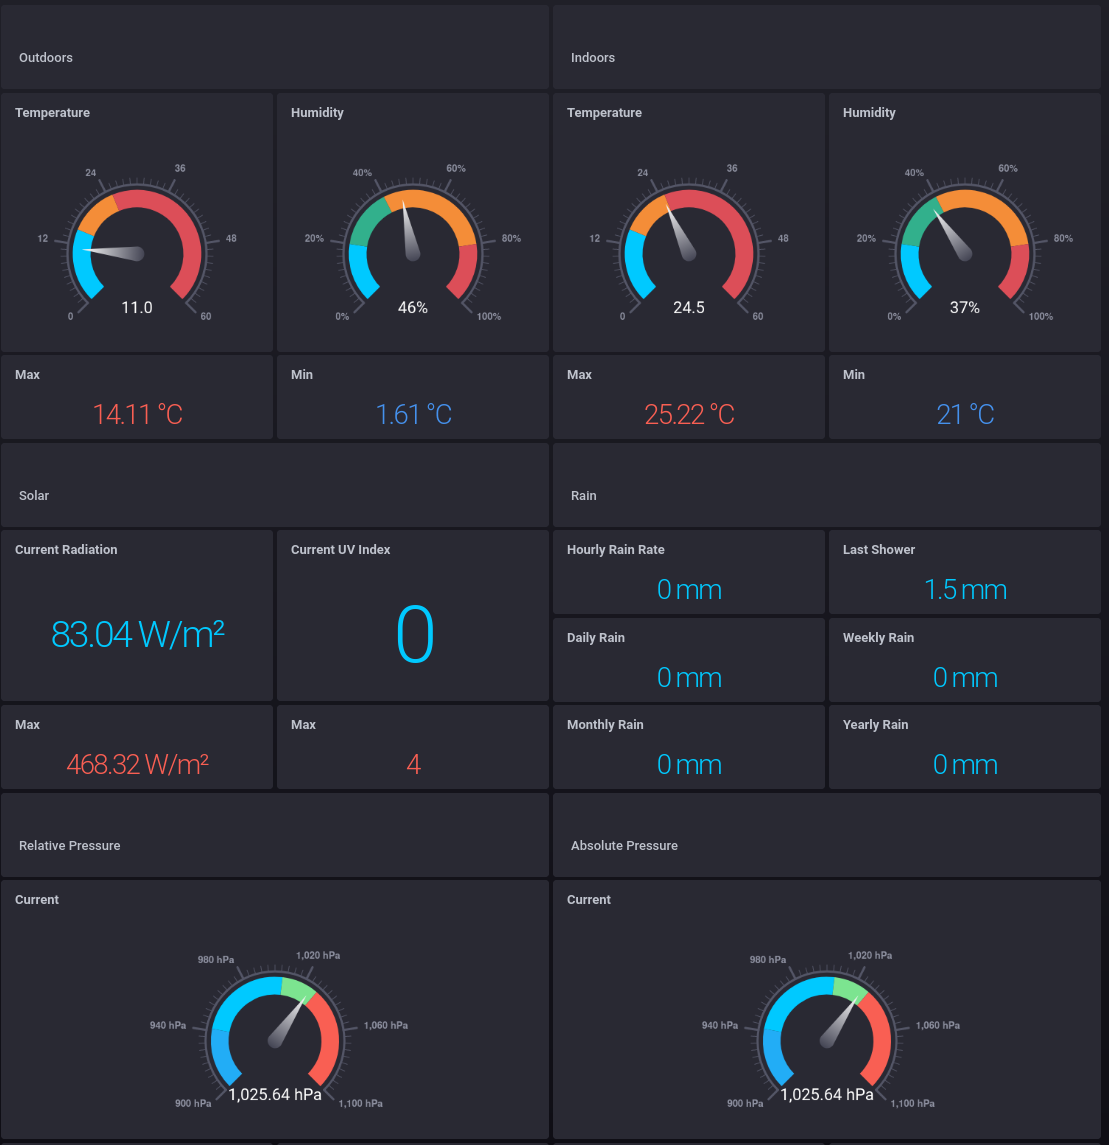
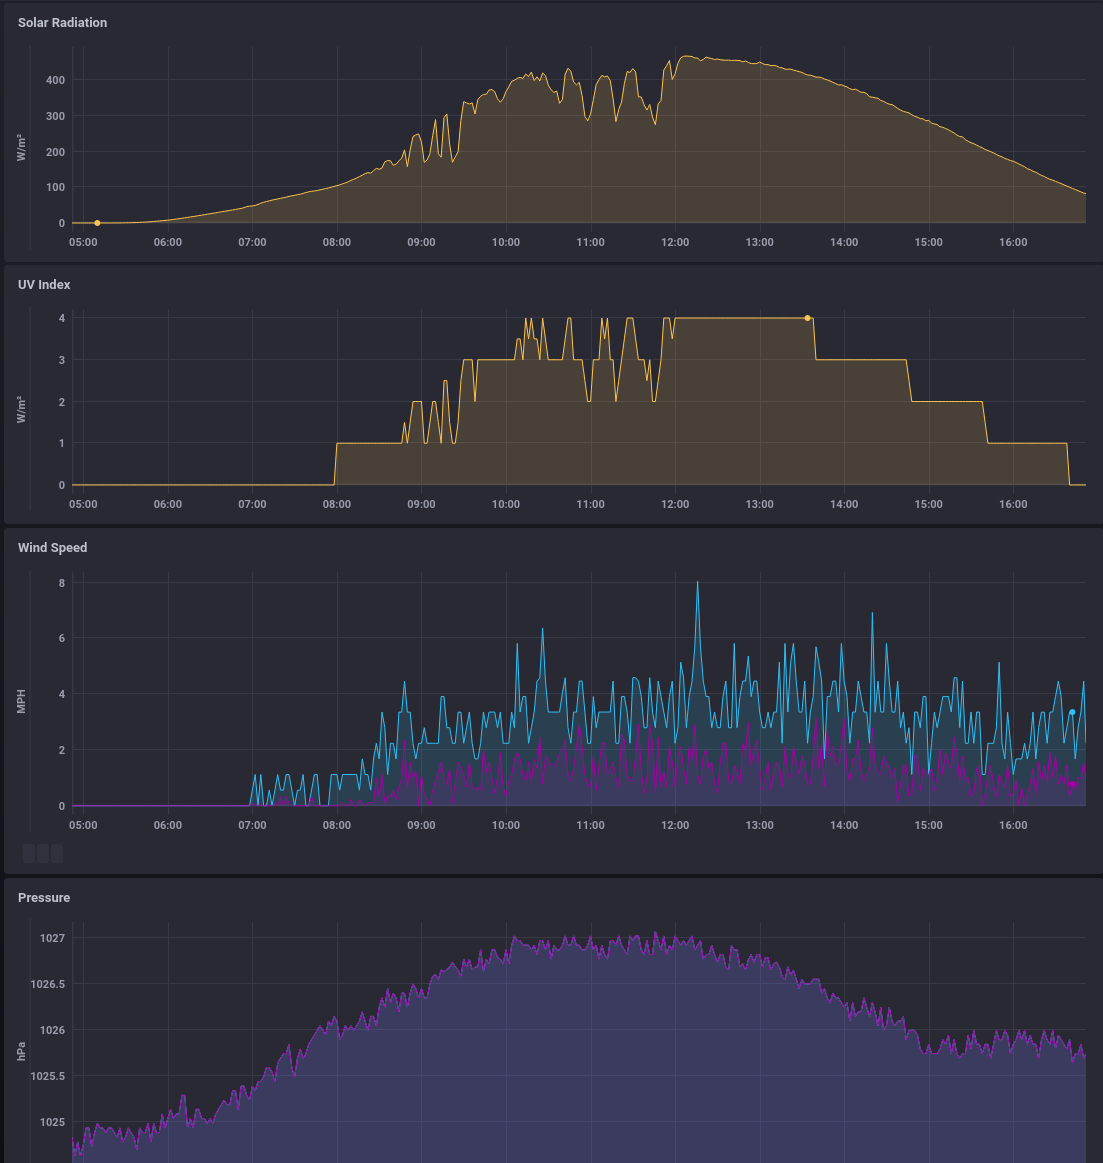
Downsampling
I probably won't care about 1 minute granularities for more than about a week, so the other thing to do is to downsample into another retention policy (or bucket, depending on your Influx version).
I do this with a Flux Task in Kapacitor
import "strings"

option task = {
    name: "downsample_weather_15m",
    every: 15m,
    offset: 1m,
    concurrency: 1,
}

in_bucket = "weather/autogen"
out_bucket = "weather/downsampled"
host="http://192.168.3.84:8086"
token=""

sourcedata = from(bucket: in_bucket, host: host, token: token)
    |> range(start: -task.every)

// Calculate mean
sourcedata
    |> aggregateWindow(every: 15m, fn: mean)
    |> to(bucket: out_bucket, host: host, token: token)

// Calculate min and append "min" to field name
sourcedata
    |> aggregateWindow(every: 15m, fn: min)
    |> map(fn: (r) => ({ r with _field: strings.joinStr(arr: [r._field, "min"], v: "_")}))
    |> to(bucket: out_bucket, host: host, token: token)

// Same for max
sourcedata
    |> aggregateWindow(every: 15m, fn: max)
    |> map(fn: (r) => ({ r with _field: strings.joinStr(arr: [r._field, "max"], v: "_")}))
    |> to(bucket: out_bucket, host: host, token: token)
It's a little more complex than other downsampling tasks - I don't just want to calculate the average of each period, I also want to capture minimum and maximum observed values (because they're useful for things like "max observed temperature").
That's set live with a simple
docker exec -it kapacitor kapacitor flux task create -f /shared/downsample_weather_15m.flux
Conclusion
I was looking forward to the weather station turning up, but if I'm honest, it has been a little anti-climactic. It's pretty well designed and easy to integrate against, so hasn't really been much sport.
Still, the data's flowing which is what really matters - as well as building a locally explorable data-set, I'm able to contribute onwards to the Met Office's observations.
Update: 2023-07-24 - Incompatible Header Values
I was recently contacted by another developer who had run into trouble when trying to do something like the following
@app.route('/data/report/', methods=['POST'])
def receiveEcoWitt():
    ''' ... snip ... '''
    # Iterate over each pair in the post body
    data = request.form
    for key in data:
        # Do stuff
The code worked fine when submitting data directly with curl, but request.form was empty when the Ecowitt did it.
Investigation showed that this was the result of a bug in Flask, driven by unexpected responses from Python's core HTTP client.
The link above provides a fuller explanation, but the underlying issue is that an Ecowitt firmware update led to a subtle change in the value of the Content-Length header in it's requests: a trailing space was added after the value
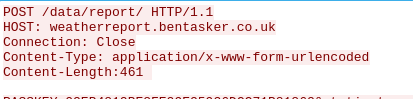
Trailing whitespace is legal (and should be ignored) in HTTP header values. However, Python's HTTP client uses the email header parser which leaves the whitespace in place (because RFC 5322 specifies that it should).
Flask expects the Content-Length header value to comprise of an integer:
_plain_int_re = re.compile(r"-?\d+", re.ASCII)
# .. snip ..

def _plain_int(value: str) -> int:
    """Parse an int only if it is only ASCII digits and ``-``.

    This disallows ``+``, ``_``, and non-ASCII digits, which are accepted by ``int`` but
    are not allowed in HTTP header values.
    """
    if _plain_int_re.fullmatch(value) is None:
        raise ValueError

    return int(value)
As a result, this function considers the value "461" to be invalid and throws a ValueError.
The calling function traps this and proceeds with a content length of 0:
try:
    content_length = _plain_int(event.headers["content-length"])
except (KeyError, ValueError):
    content_length = 0
As a result, it doesn't read the submitted request body, leaving request.form unpopulated.
This behaviour is only apparent if the Ecowitt is connecting directly to Flask: it didn't occur on my setup because the Ecowitt instead talks to an Nginx reverse proxy (which silently normalises the upstream headers, stripping that trailing space).
Upstream issues are: