Fixing a stopcock that leaks near the gland nut
I'm not a plumber, in fact, I generally try to avoid jobs that involve plumbing - I don't like the idea that a single mistake could lead to a slow, steady drip that eventually costs you a ceiling (or expensive damp problems), so I leave most plumbing jobs to the professionals.
But, I found water on the floor around one of my water supply stopcocks.
Dealing with it is a pretty straightforward job (I didn't even need to turn the main off) and takes about 10 minutes - it's hard to justify calling a plumber out for that, and you obviously don't want to leave it to get worse and/or ruin everything in it's path.
This post details the process of repacking a stopcock (water shut off valve to the Americans) gland nut - if I can do it, then anyone with a couple of spanners can.
Although this is on a main supply stopcock, the same process can be applied to stopcocks elsewhere in the house - whether it's a shower isolation tap or something else.
You first need to identify where the water is coming from.
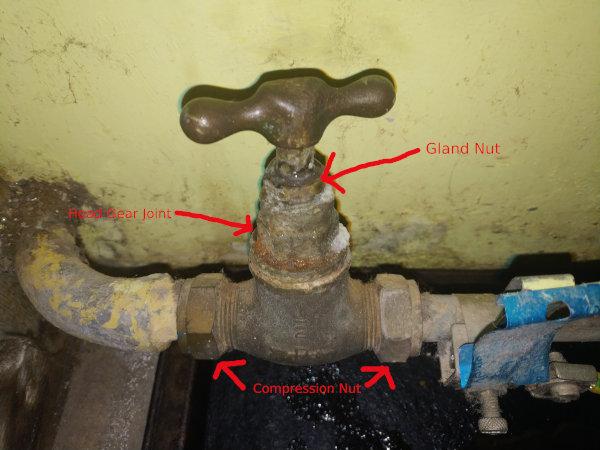
If your leak is via the gland nut, then there'll be water coming out of the top of the tap, where the handle/spindle enters the gland nut

If your water is emerging from somewhere else, then sorry, this isn't the guide for you (as a broad guide though, if it's coming from the compression nuts, try tightening them, if it's coming from the head gear joint you'll need a new washer and a different set of instructions).
However, if your water is coming out of the gland nut then repair is fairly straight forward - there's no need to turn the water off for this, although you will want to put a tray down as there'll be a small flow of water whilst you work.
To stop the leak, you need to repack the gland.
Tools
- Spanners (one that fits the gland nut, and one that fits the head gear joint)
- PTFE tape
- Kitchen towel/rags
- Tray to catch water
Procedure
The process is pretty simple
If you can, put a tray under the stopcock to catch any run-off.
Use a spanner to unscrew the gland nut - depending on how tight it is, you might find you need a second spanner on the head gear joint to brace against
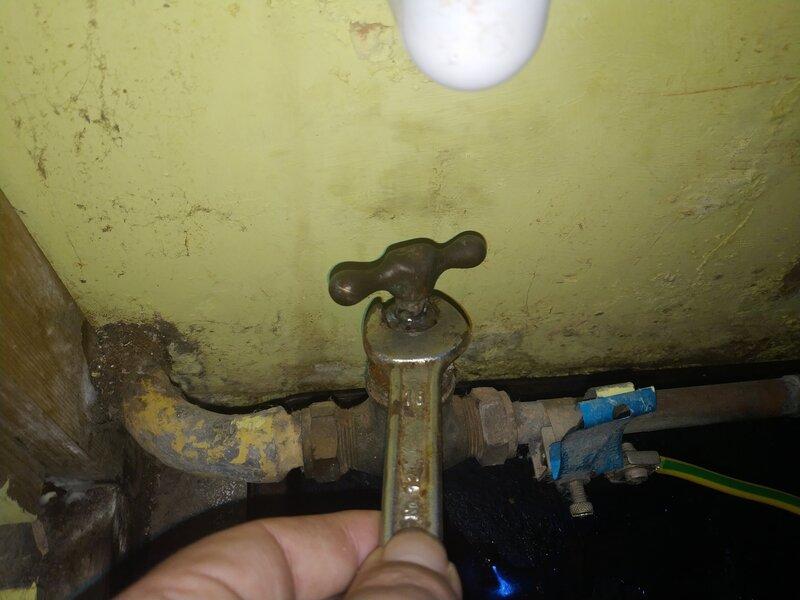
You're aiming to unscrew it and slide it up the spindle. However, you might find there isn't room and the nut won't come clear of the threads - if so, it's because the tap is closed, so turn the tap and the gland nut should start to rise.

You'll likely have a small flow of water at this point.
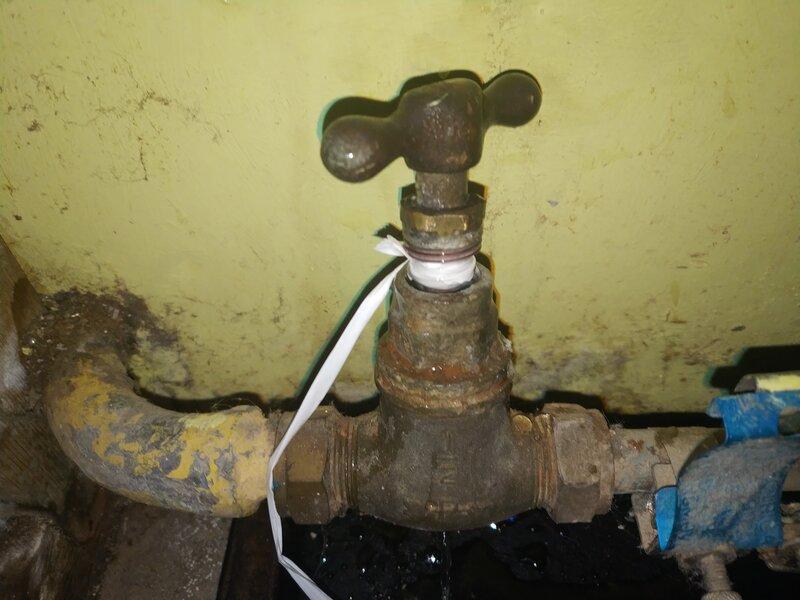
Take your PTFE and wrap the spindle - if you look elsewhere on the web, you'll see warnings not to use too much, without "too much" ever being defined. If you use too much, you'll find the tap won't turn when re-assembled (or worse, won't re-assemble).
I wrapped until the PTFE filled about 2/3 of the diameter of the gland nut (so that the nut could still just about slide over the top of it) - the tap's a little stiff, but definitely operable
It's time to re-assemble.
Push the gland nut down and try to screw it back into the threads - you might find that it won't bite (because the PTFE is pushing it upwards), but you can overcome this by turning the tap all the way closed - this'll help push the PTFE and nut downwards, then you can tighten the nut up.
You should now have a re-assembled stopcock
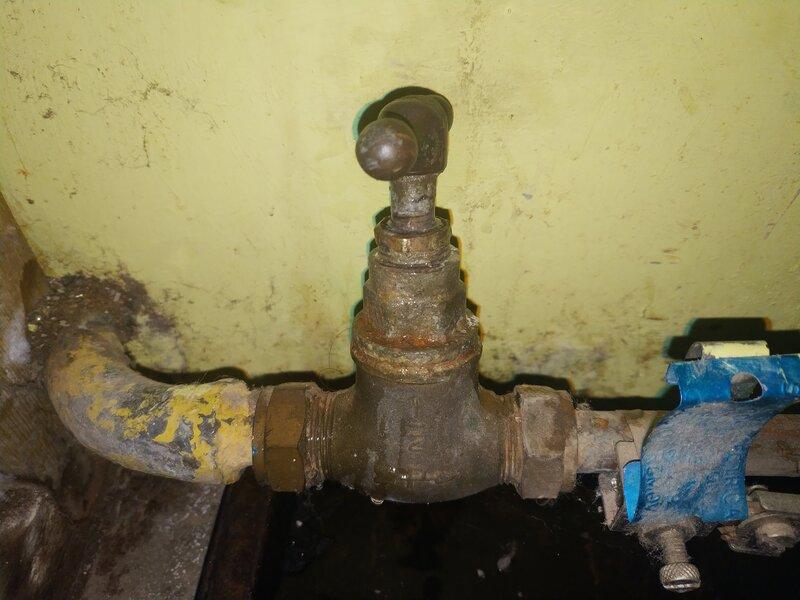
Check that the tap will turn on and off.
Use some kitchen roll (or a rag) to wipe the tap dry, then empty your water tray.
Place the empty tray back under the tap with a piece of dry kitchen roll on it.
Go and have a cup of tea (or something) before coming back to see if there's any sign of leak - you're looking for drips on the kitchen paper, or beads of water near the gland nut.
If all's well, pack up.
Conclusion
It turns out that repairing a leaking stopcock really couldn't be much easier - at least so long as you've a little bit of luck in terms of where it's leaking.