Saab 9-3: Installing a Dashcam Hardwire Kit
I drive a lot of miles, so statistically it's likely that at some point I'll be involved in a collision. In all my earlier cars, I've fitted a dashcam so that I can show whether or not (hopefully the latter) I was at fault when that day arrives.
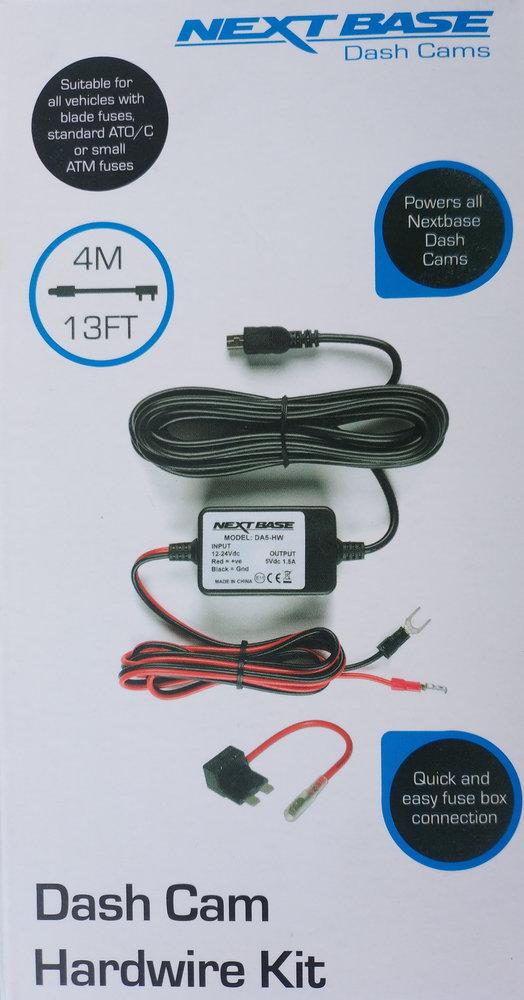
Having recently changed car, I once again need to install the dashcam. The cam itself is a Nextbase 412G and simply clips to it's mount (stuck to the windscreen, with one of these adhesive mounts).
This documentation details how to install the Nextbase Dashcam Hardwire kit into a 2010 Saab 9-3 Saloon. It should also apply to most other years and variants of the 9-3 (and, to some extent, things like the Vauxhall Vectra).
The procedure is fairly simple, though you will need the following items:
- 10mm socket
- flathead screwdriver
- Nextbase Dashcam Hardwire Kit
- Self adhesive cable clips (optional but very helpful)
The kit piggybacks off a fuse in the fusebox, so we're going to run the hardwire kit from the passenger compartment fusebox, up the A pillar, across the windscreen and down behind the rear-view mirror.
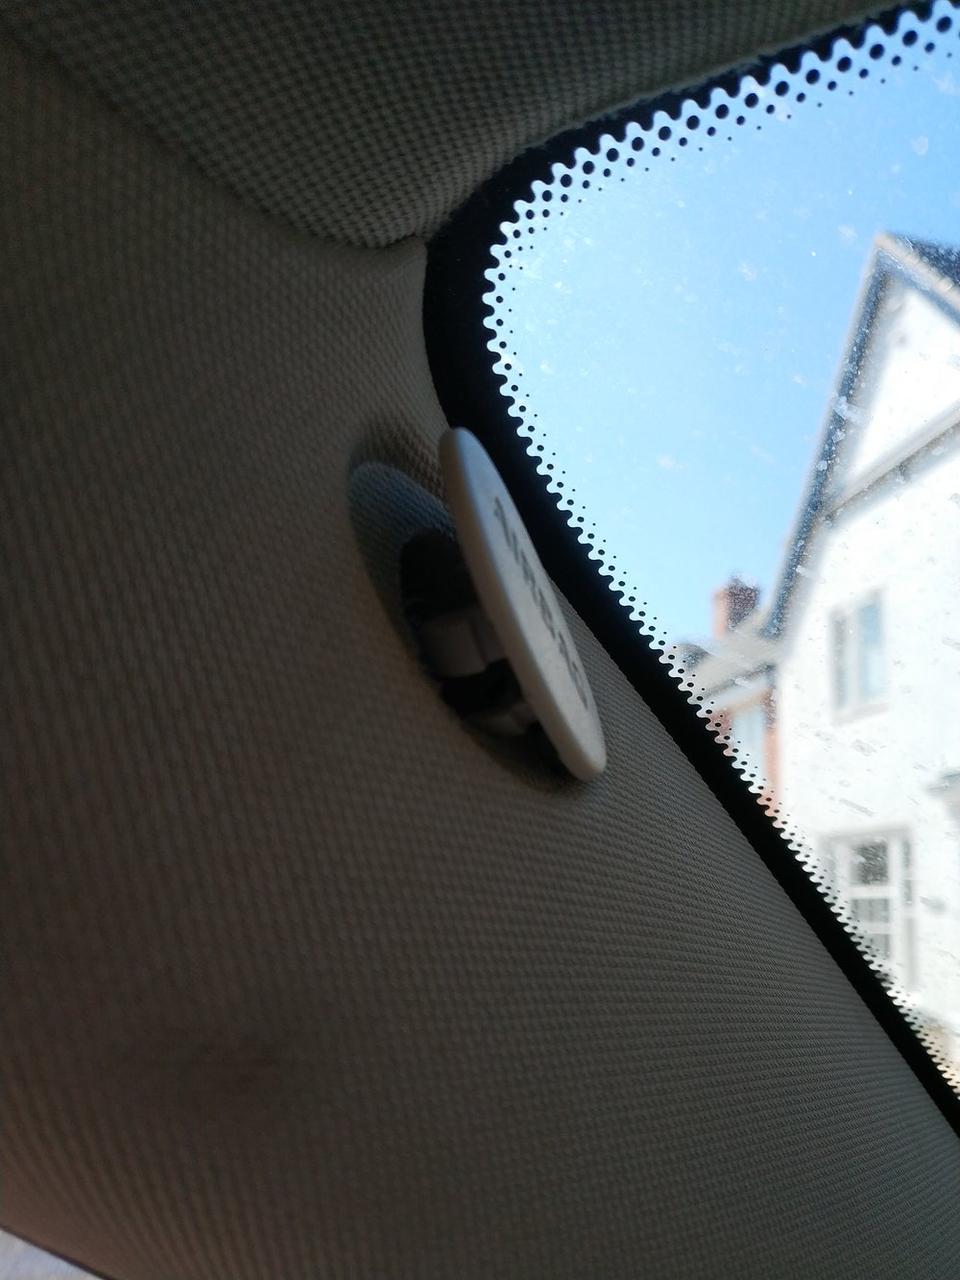
First, we need to remove the relevant bits of trim. Gently pull the end of the dashboard off, and then use a small screwdriver to lever the "Airbag" emblem out of the A pillar
Removing the emblem should expose a bolt with a 10mm head, use a socket to extract it (it's likely only finger tight, but is quite long),
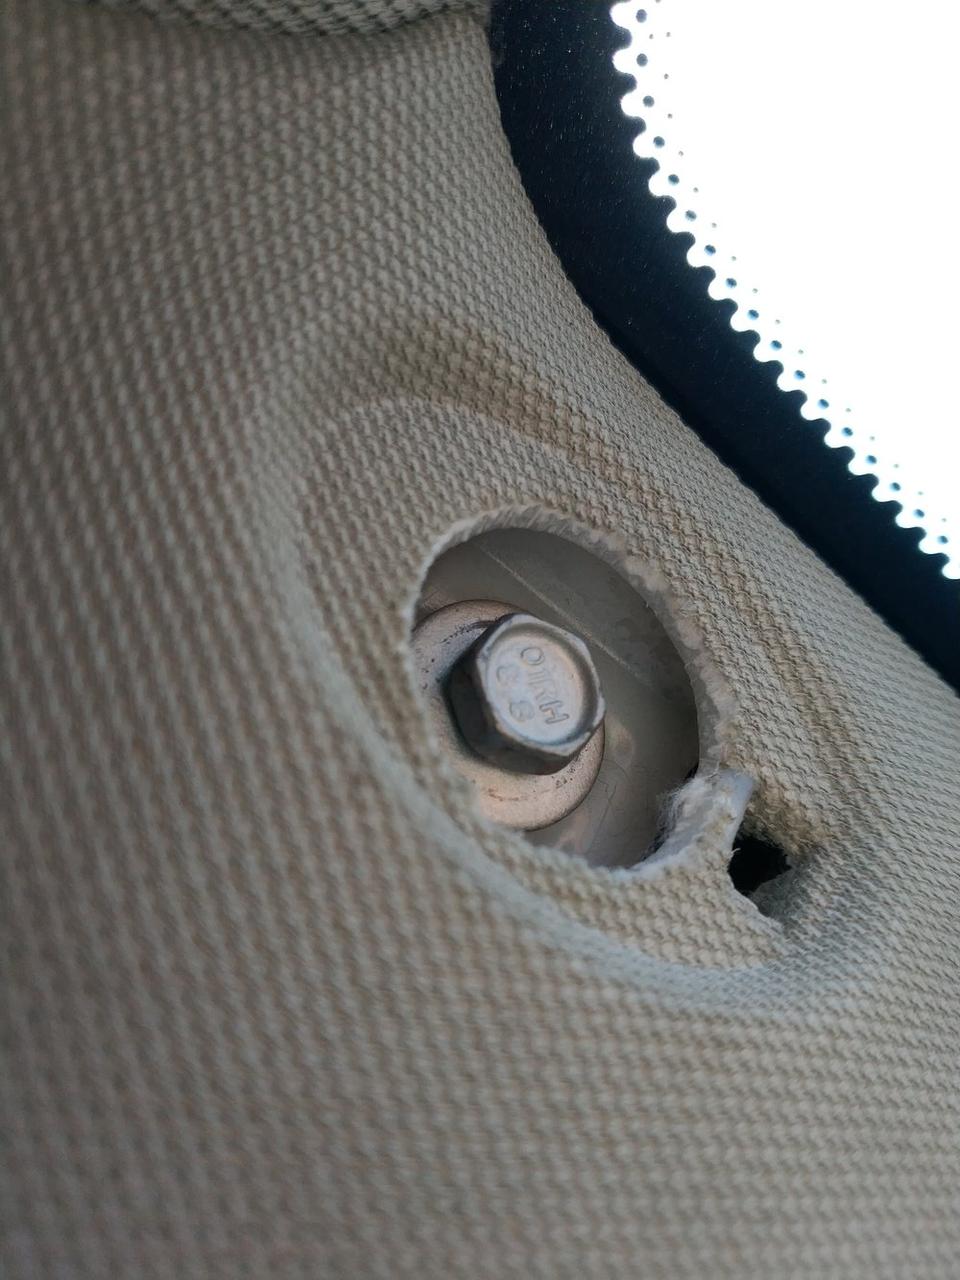
With the bolt removed, start at the top and lever the trim out. Try and make sure it moves outwards in a straight line as there are two clips on the underside. Do not push a screwdriver in under the lip furthest from the windscreen as the airbag is under here (it won't go off - ever - if you pierce it)
This should leave you with the trim off and the airbag exposed

We're now ready to route the cable.
The first thing to do, is to pass the cable up from the fusebox to the bottom of the pillar. The gap is too tight for fingers, so what I did was to drop a wire down through the gap, pull it out and tie it to the USB end of the Nextbase kit, then pulled it back up and through.
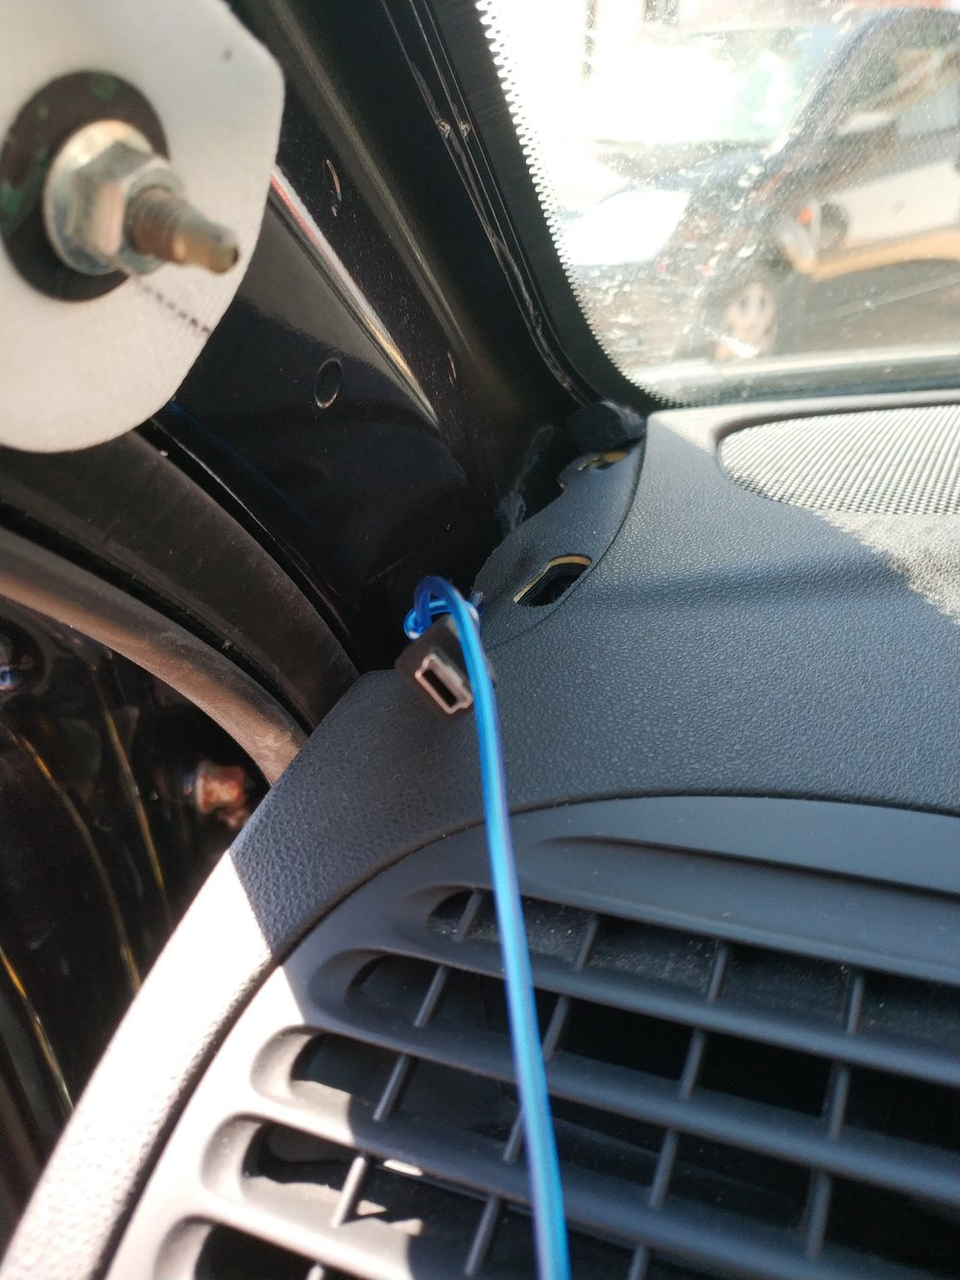
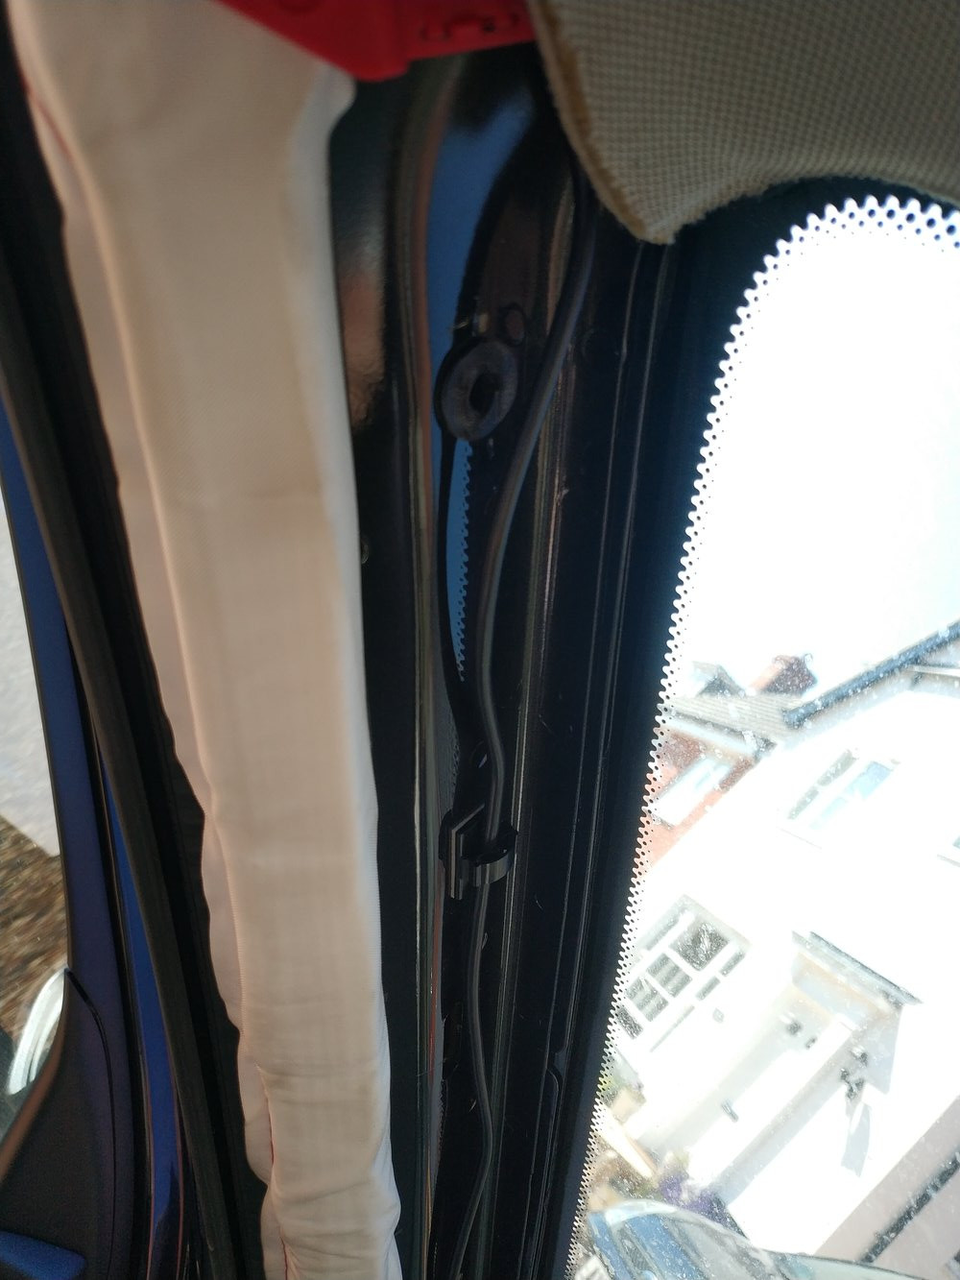
Now pull the cable through to assess the length you're going to need. I used some carefully place adhesive cable clips to help route the cable (and to make sure it didn't end up falling in the way of the airbag.
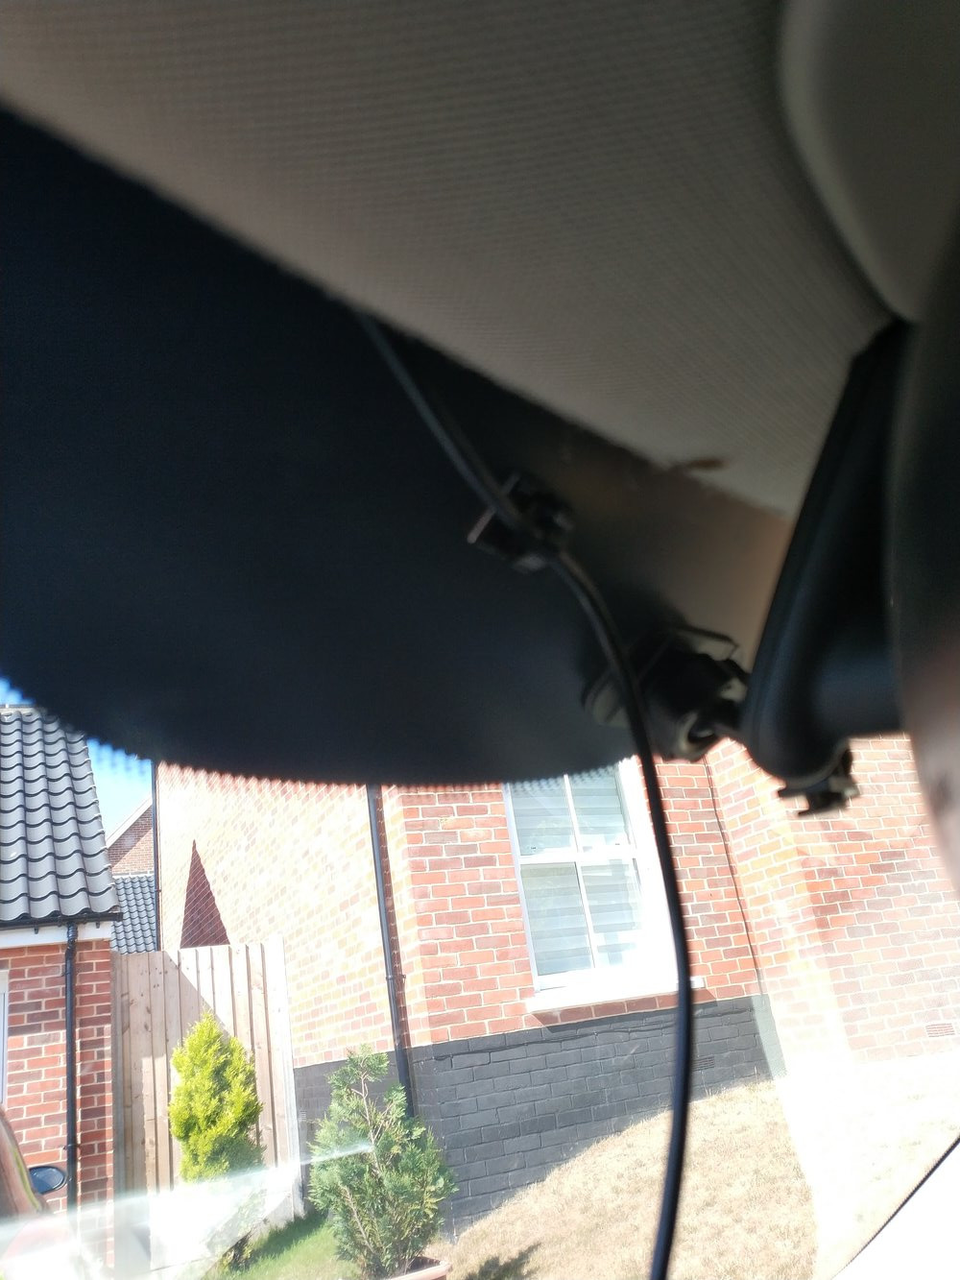
You want the cable to go up the pillar, behind the roof liner and across to come down just behind the rear view mirror
With the cable now routed, we can put the A-Pillar trim back on. It takes a little bit of manouvering to get into place, but goes in fairly easily. Remember to tuck the edge under the rubber lip of the door seal. Screw the bolt back in to secure it
Connecting
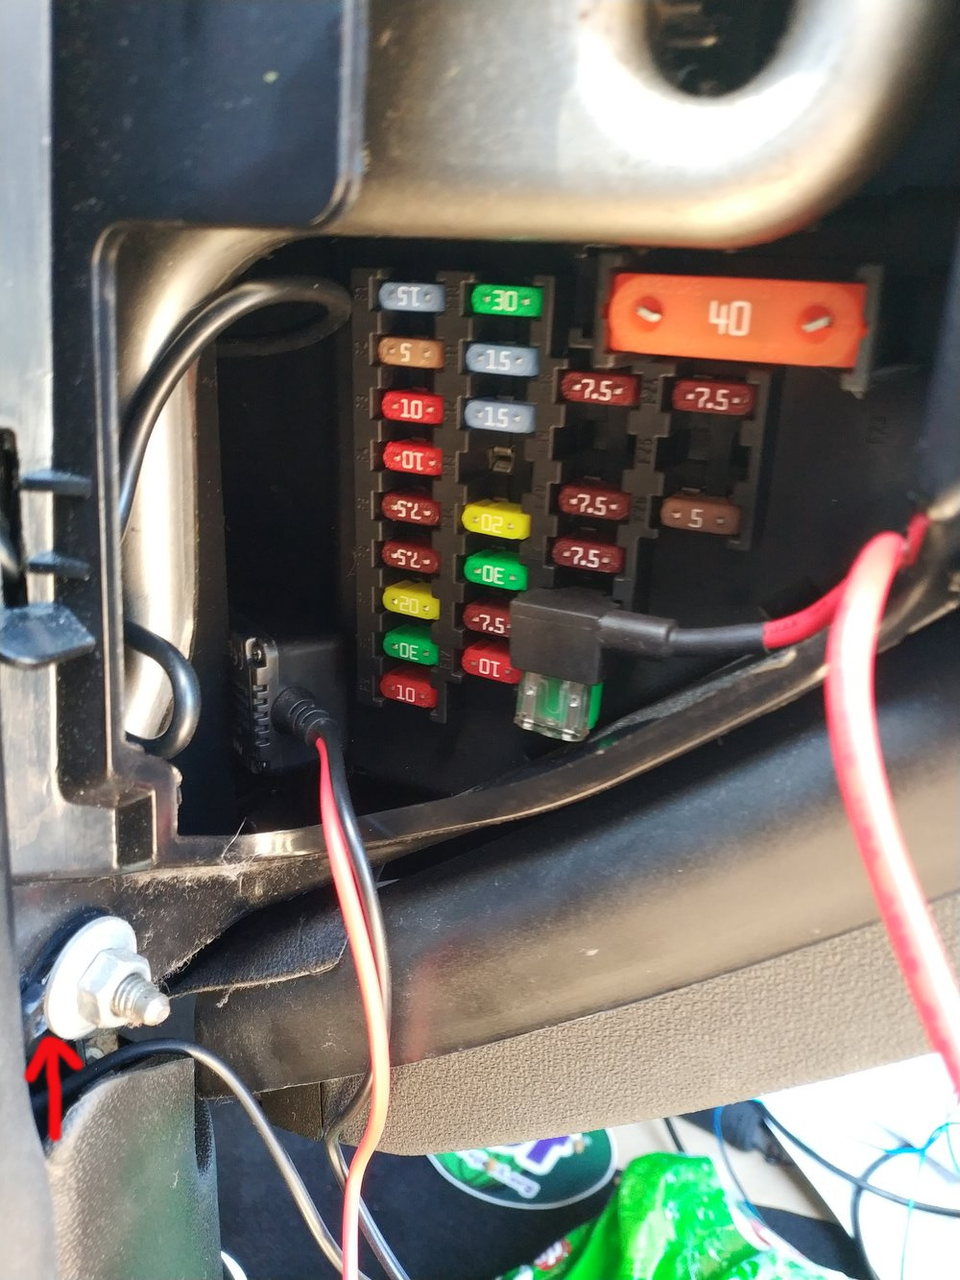
The next thing to do is to piggy back off a fuse in the fusebox.
We want a switched live - i.e. on that's only on when the ignitions on - so that the camera can turn on and off with the car. After a bit of experimentation, I found the best option is the Cigarette lighter socket - F22.
Simply pull the existing fuse (should be a 30A one), slide it into the spare gap on the piggy back and slide the piggyback connector in in it's place.
We also need to attach the ground. There's a conveniently placed screw near the fusebox that we can connect to (arrowed in the image below) so slacken it slightly and then slide the kit's ground connector behind it and tighten back down.
You should now be able to test that the camera powers on. Clip it into it's mount and plug the USB cable in. Wait about 30 seconds just to confirm it doesn't switch on without the ignition (in which case the fuse you've used isn't a switched live, but a constant live).
Then turn the ignition on (no need to start the engine), the cam should power up, and then switch back off after you've turned the ignition off.
All being well, you can now tuck the cabling out of the way behind the fusebox and re-install the dashboard end panel.
Job Done.