Volvo S60: Alternator Replacement
A few days ago, I started bearing noise (like air being released) from the general area of the auxillary belt. As it's freezing outside, I booked it into the garage and hoped it could make it the few days until the garage could see it.
Inevitably, it didn't. After starting the battery warning light came on, and as the belt was still on I checked the battery voltage - 11v and dropping, goodbye alternator bearing...
This documentation details the steps necessary to swap out the alternator on a 2003 Volvo S60 with a Diesel engine. The steps differ slightly for later years (you need to remove the radiator cooling fan to make space to get the alternator out, but can simply move the P/S pump out of the way rather than disconnecting it), but should be applicable for vehicles <= 2003. From what I've seen, it should also apply to V70's of the same age.
Some of the images are a little blurry because the weather was getting ready to snow on me, so there was quite a bit of shivering involved.
The whole process shouldn't take you more than a couple of hours, unless you have to wait for replacement parts to arrive.
Replacement Part
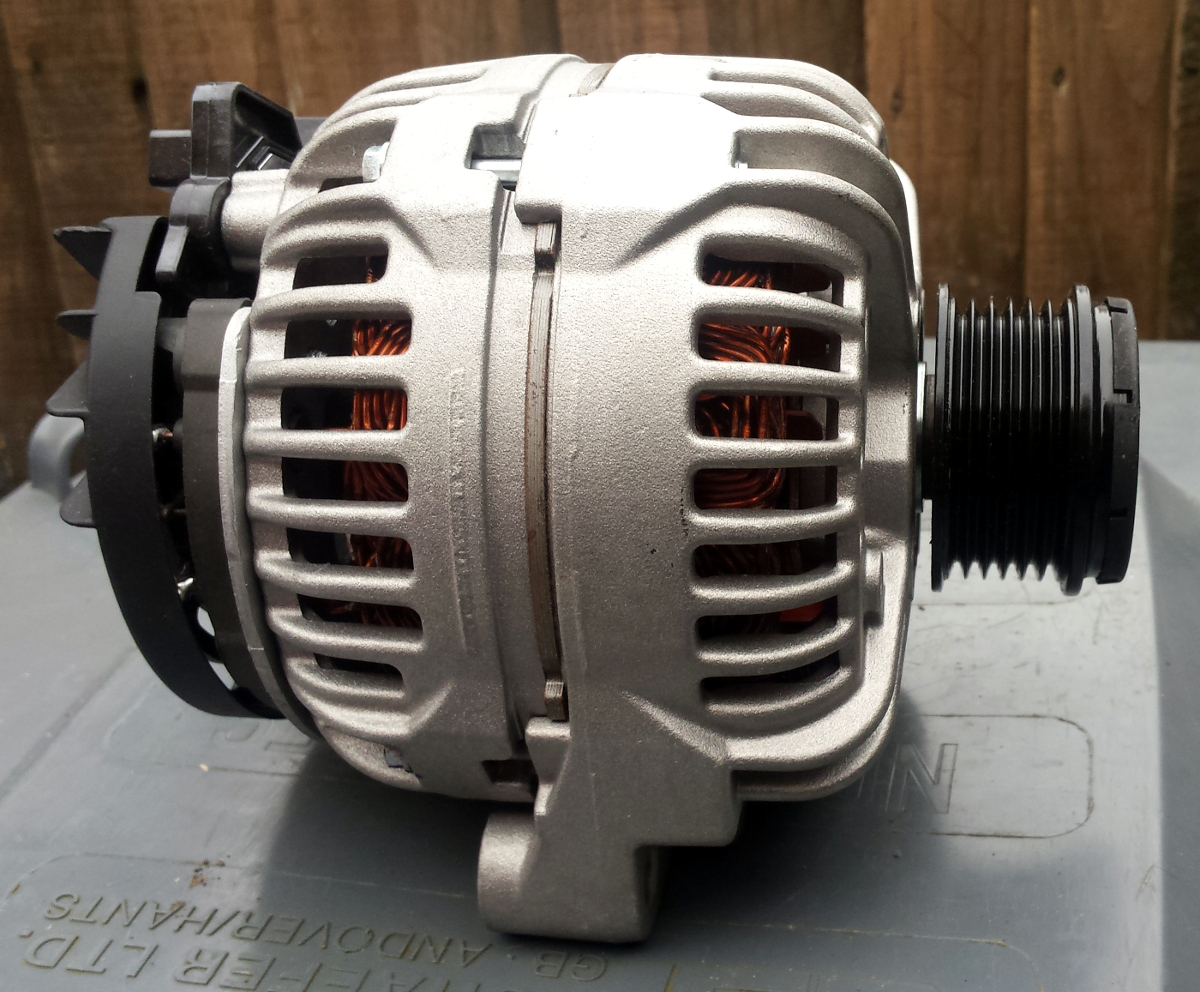
I have the Bosch 120 Amp alternator (P.N. 9459092), so you'll likely want the same:

Although it's tempting to take the opportunity to order the later 160 amp alternator, the mounting holes are 1mm narrower, so make sure you get the right one.
Removing the Alternator
The very first thing to do is to disconnect the negative lead from the battery. You'll need a 10mm spanner to do so. Move the connector clearly out of the way of the terminal to make sure it doesn't move back and make contact.
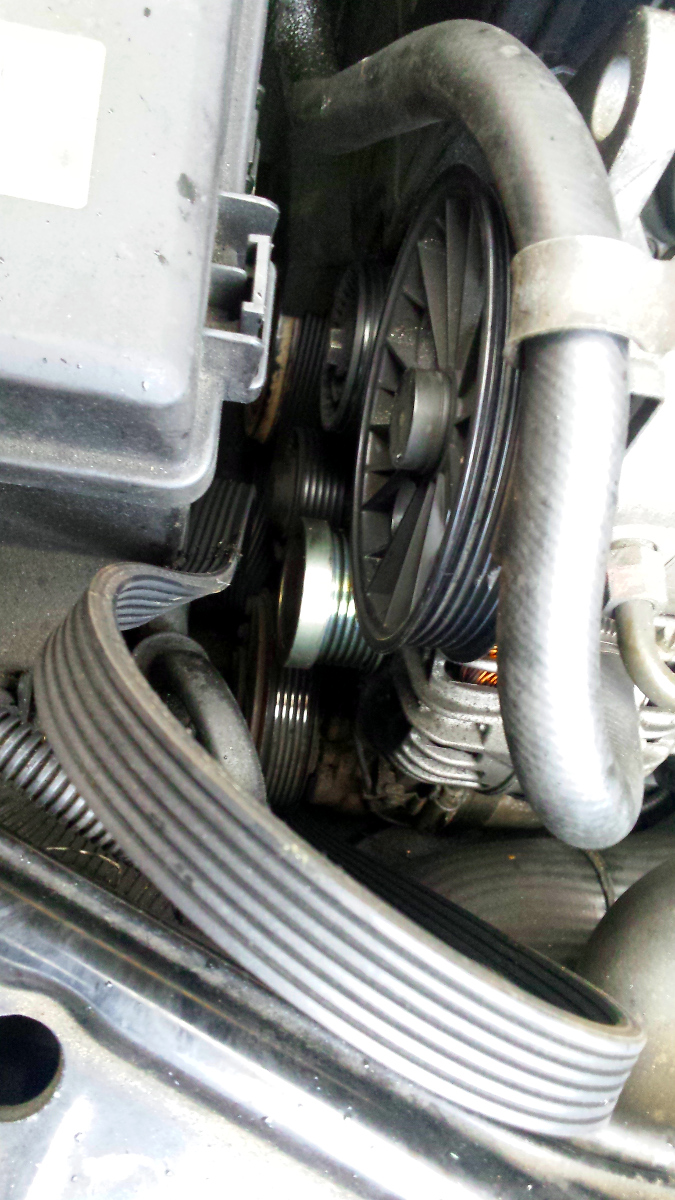
Next, take the aux belt off, you can find the procedure for the best way to do on this page but be sure to make a note of the belt's routing first (mine goes Crankshaft pulley, idler, tensioner, alternator, power steering, a/c compressor, crankshaft pulley)
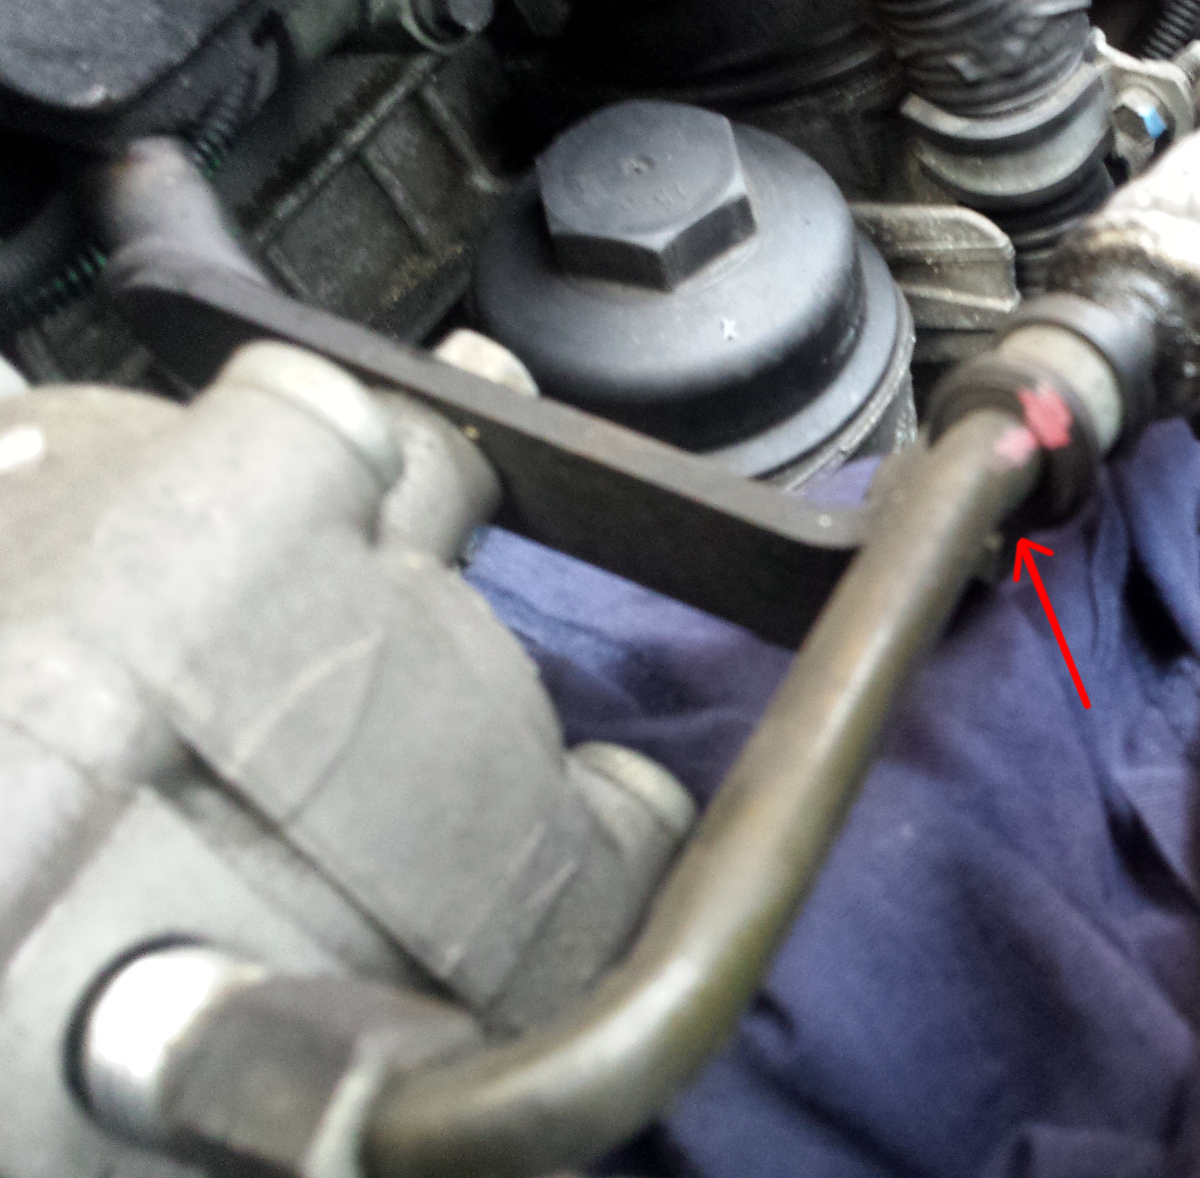
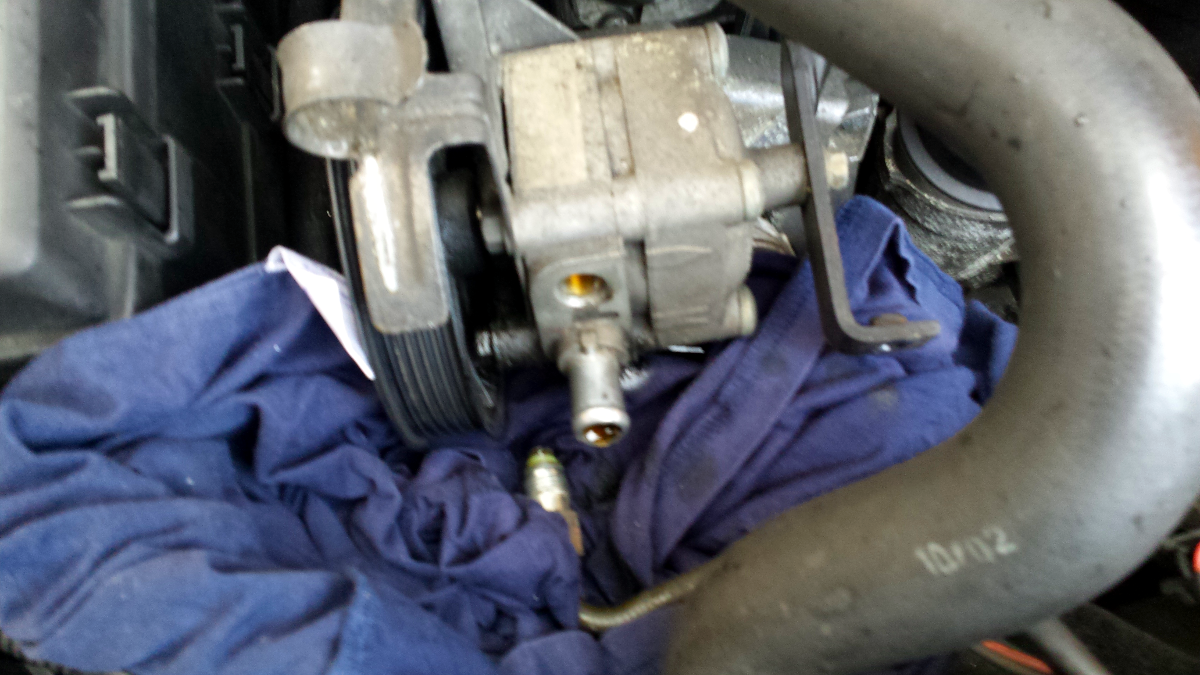
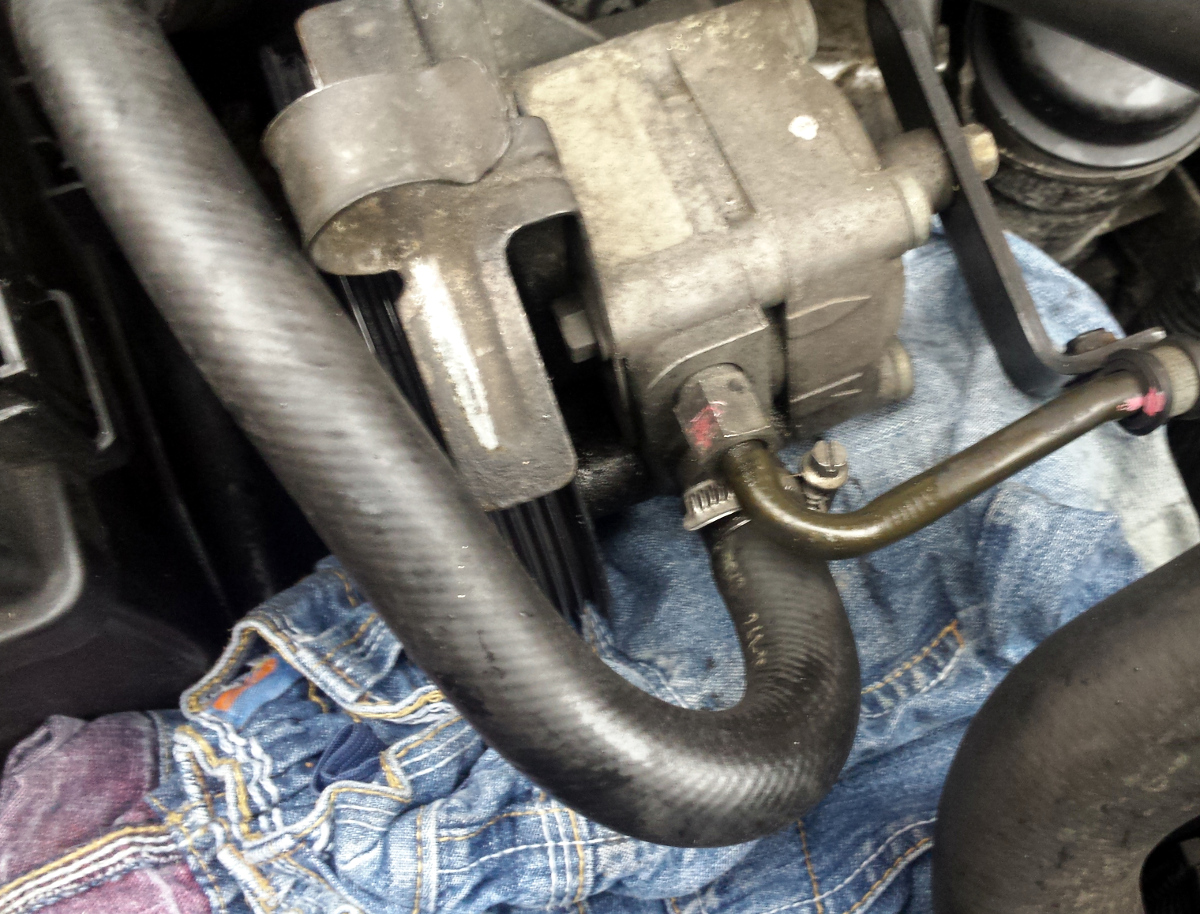
Next we need to make room so that we'll be able to get the alternator out, which unfortunately means disconnecting the feed and pressure pipes from the power steering pump.
The pressure pipe has a little mounting slightly further down, start by taking this out
Place some rags under the power steering pump to protect against spills (there will be some in the next steps)
Next, clamp the power steering feed pipe (the soft one that runs from the reservoir) as best you can (I found it wouldn't clamp particularly well) and then loosen the jubilee clip and gently work it back off the pump. Be careful to avoid spilling PS fluid.
Move the pipe out of the way (I found I could route it the other side of the fuse/relay box and leave the end pointing up) and place a rag over the end to catch any fluid egress (and minimise the amount of dust that gets in).
Next, use a 17mm spanner to loosen the union bolt on the pressure pipe, and then carefully work the pipe free.
Move the pipe out of the way (it should be possible to move to the other end of the block), and again, place a rag over the end to catch fluid egress.
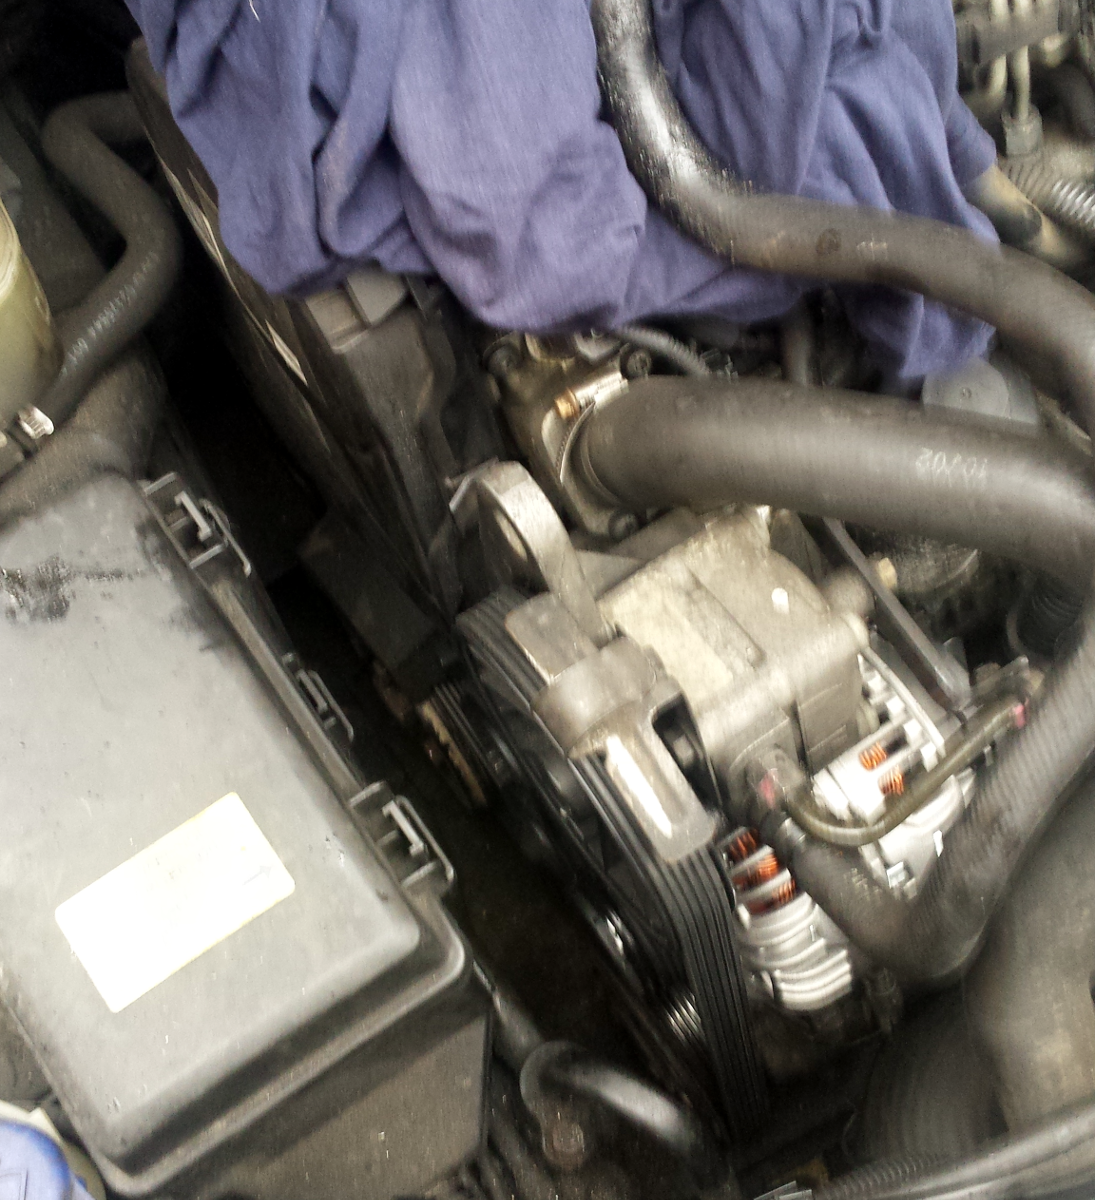
Next, we need to remove the alternator top mount bolt. I couldn't get the camera in to get a decent picture of the location, but if you approach the car from the side (so you're facing the alternator) and put your fingers in just below the power steering pulley, you should feel a bolt along the top left edge of that recess. The bolt on mine has a 12mm head (though as I previously found that fixing missing, yours may differ)
Once the top mount is removed, the lower mounts need releasing.
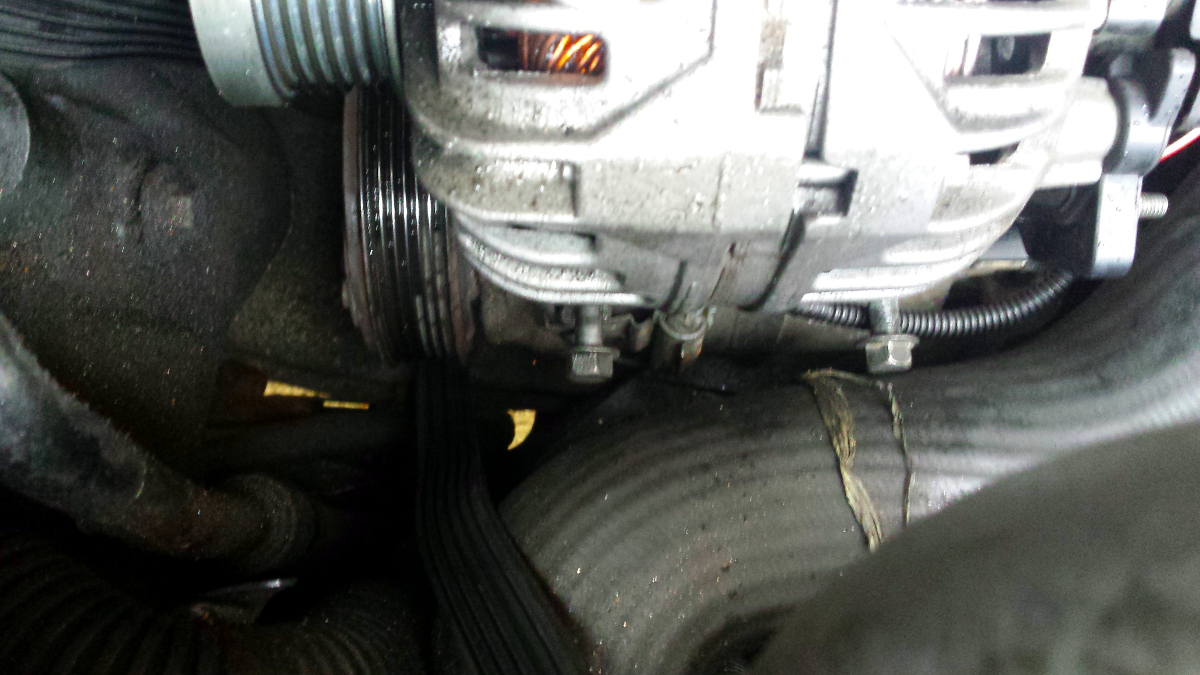
There are four 10mm headed fixing holding the aircon compressor in place. The top two of these pass through the lower mounts of the alternator, so need to be completely removed
The alternator should now feel fairly free, but probably won't come out yet.
They're a pig to get to (as you can't access them from the underside) but you need to slightly slacken (not remove) the aircon compressor's lower fixings. The fixings are identical to the two top ones you've just removed, but you'll need to push your hands past the intercooler feed pipe to feel for them.
Loosen them slightly and then see whether it's possible to work the alternator's feet free from the back of the a/c compressor. I didn't need to slacken them too much, though the left foot did stick slightly.
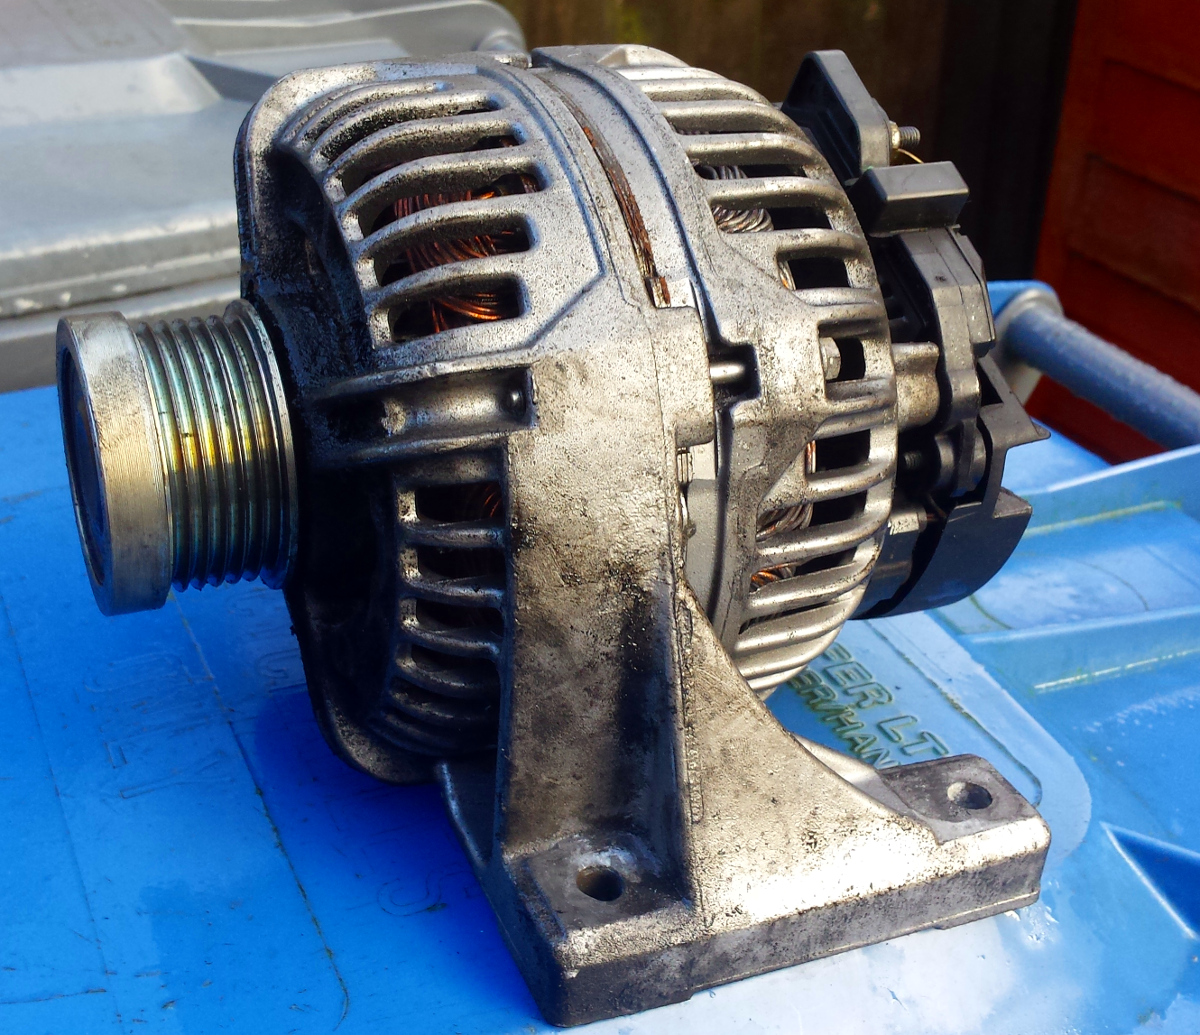
Next, we need to physically remove the alternator. Although we've made some space, it's still fairly tight, I found the best way was to tip the alternator backwards and twist slightly so that I could bring it out pulley first.
Once out, it should now leave you with a gaping hole.
Confirming the issue
As I was removing the alternator in advance of the replacement turning up, I took a little bit of time just to confirm it was the bearing. Running the pulley did not sound good:
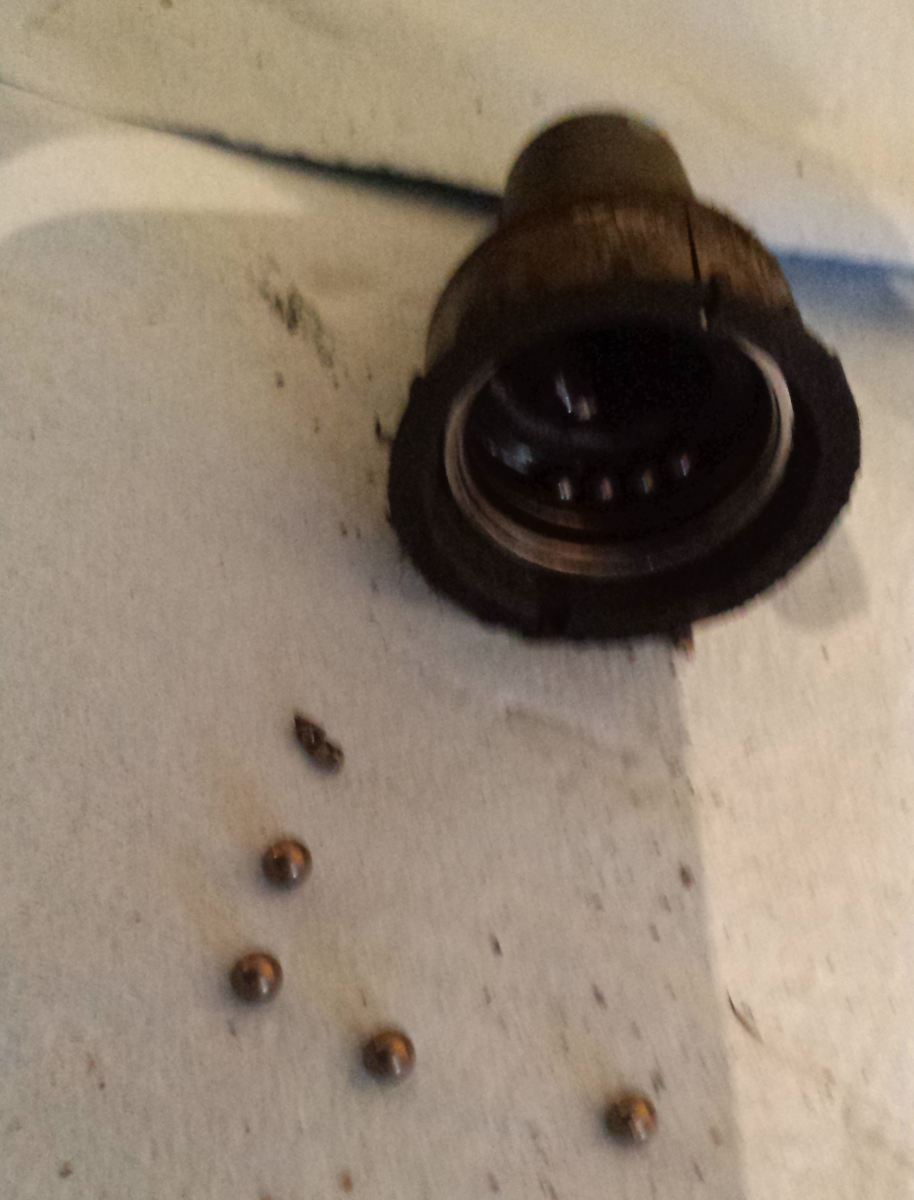
Splitting the alternator revealed that the bearing had completely disintegrated, to the extent that some of the balls had melted into the plastic housing. The shaft jumping had also murdered the brushes (which is probably the point that my light came on)
Although it should be more than possible to refurb, I'd already ordered a replacement as I haven't the time to wait
Installing the new Alternator
So the next step is to install the shiny new alternator
The next step is probably a lot easier if you have an assistant to help, I didn't so I used a mirror on a stick. Trying to install without one or the other (preferably both) is possible but will be incredibly frustrating.
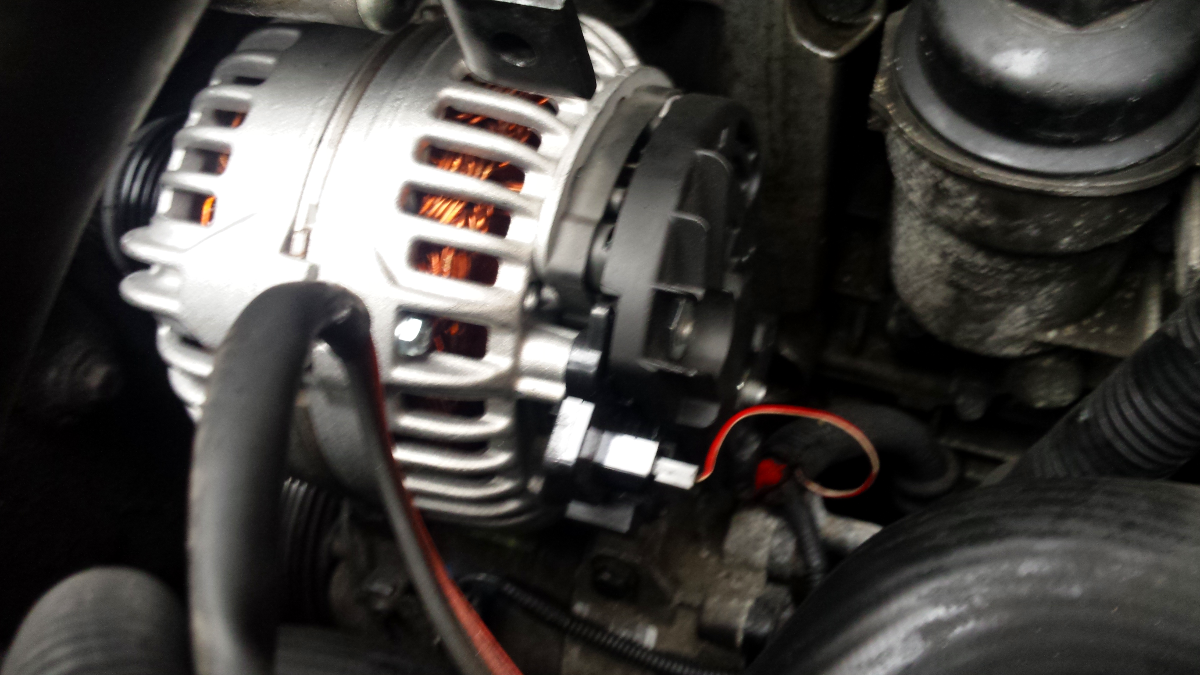
Insert the alternator, the right way up and pulley first into the gap that you pulled the old one out of. I found it goes in much easier than it comes out.
Now for the fiddly bit, getting the mounting holes to line up.
The easiest way to try and get things lined up is to start with the top mount, as you can at least see down the back of that. Get your assistant and/or your mirror looking down the back of it while you shift the alternator to try and line up the mounting holes. As soon as it's aligned, get the top mounting bolt in and tighten it most of the way down (leave a little play, but tighten it enough the alternator starts pulling flush to the mounting)
Getting the lower mountings in is a little harder as you can't look down either end very easily (getting the angle on the mirror proved damn-near impossible), so insert the fixings as far they can go.
Then, whilst gently trying to push the right-hand fixing (furthest from the pulleys) in, wiggle the alternator up and down until you feel the fixing slide forward. Maintaing position on the alternator, start to tighten the fixing with your fingers. Once it's finger tight, move onto the other fixing and repeat.
Once you've got the threads biting on both tighten them down.
Now re-tighten the lower A/C compressor fixings. Once those are tightened up, tighten up the alternator's top mount.
You'll probably then need to tighten the A/C compressor tops down further.
The alternator's in, so the next step is to reconnect the connectors at the back
Next, we need to reconnect the power steering hoses, so get a clean dry rag spread out under the Power Steering pump to catch any fluid spillage.
Start by reconnecting the Power Steering feed pipe, work it gently over the P/S pump inlet and then tighten down the jubilee clip.
I put a rag in front of the outlet and then gave the pipe a good squeeze here to help drive some of the air out
Next, re-install the pressure pipe, tighten the union bolt back down and refix the mounting
Next, refit the belt
Refitting the belt
Now we just need to refit the belt and the casings - if your routing differs to mine then you're on your own!
Pass the new belt around the crankshaft pulley, along the bottom and under the air conditioning pulley, up to the power steering pulley (so you're effectively creating a "L").
Back at the crankshaft pulley, pass the belt under the idler, and around the tensioner.
You should now have a loop near the alternator, but because the tensioner is fully at rest won't have quite enough to pass it over.
Using a lever if possible (makes things a lot easier), use a 14mm socket/spanner to pull the tensioner forward and hold it securely. Carefully pass the belt around the alternator pulley - I found it fell off the tensioner, so needed to push it back on once it was around the alternator pulley.
If that proves too fiddly, gently release the tensioner and instead, unloop the belt from the power-steering pulley, route it around the alternator pulley. Then pull the tensioner forward again and work the belt over the power steering pulley. Because there's a lip it's very tight, but there's more room to get your spare hand (or an assistant) at the belt to help work it over.
Once the belt is around all pulleys, check it's straight and then gently release the tensioner. It should take up the slack and stop (roughly) half-way along it's travel.
Final Steps
Next, move all rags out of the way, as we're going to prepare to start the engine.
Reconnect the battery negative lead.
Make one last visual check that the belt is on straight, and then start the engine. Check that the belt's not visibly moving from side to side (keep fingers away!) and that all pulleys are turning.
Now, we want to check the voltage across the battery. My diagnostic computer was closer to hand than my multimeter so I used that
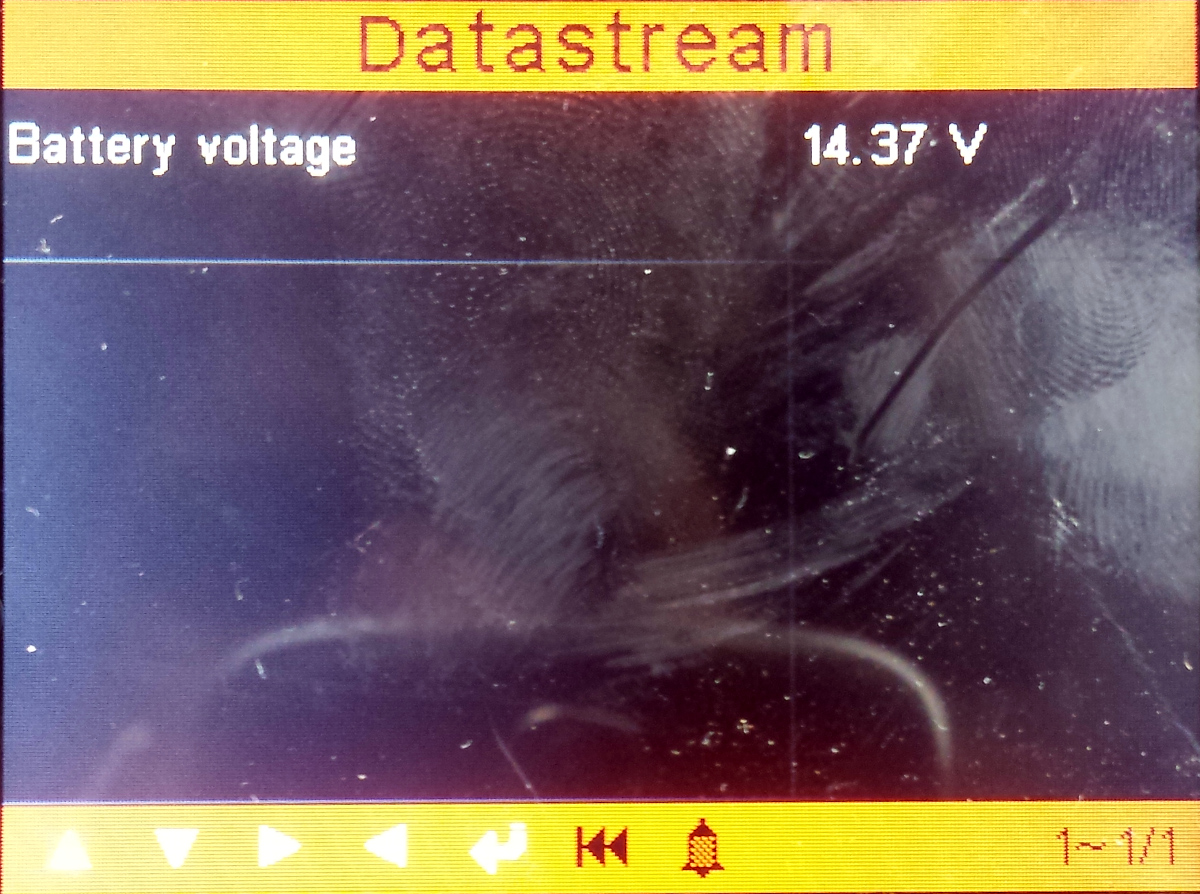
If you're using a multimeter, set it to read Volts (DC) and then put the probes across the battery (observing polarity). You should see in the region of 14 volts
Put any covers back onto the car, and you're done.

The final thing you need to do, as we disturbed it, is to bleed and flush the power steering fluid, the procedure for which is pretty simple and easy to find
Conclusion
Replacing the alternator on an S60 is reasonably straightforward, the most trying bit really is trying to line the fixing holes up when installing the new alternator. It should be possible to do the complete job within a couple of hours, even in the freezing cold.
I had an issue with my alternator pulley about 9 months ago, which probably contributed to the early death of the bearing (though it didn't seem to have any play at the time).