Building a Raspberry Pi Based Music Kiosk
I used to use Google's Play Music to host and play our music collection.
However, years ago, I got annoyed with Google's lacklustre approach to shared collections, and odd approach to VMs. So, our collection migrated into a self-hosted copy of Subsonic.
Other than a few minor frustrations, I've never looked back.
I buy my music through whatever music service I want, download it onto the NFS share and Subsonic picks up on it following the next library scan - we can then stream it to our phones (using DSub), to the TV (via a Kodi plugin) or to a desktop (generally, using Jamstash). In the kitchen, I tend to use a bluetooth speaker with the tablet that I use to look up recipes.
However, we're planning on repurposing a room into a puzzle and playroom, so I wanted to put some dedicated music playback in there.
Sonos devices have Subsonic support, but (IMO) that's a lot of money for something that's not great quality, and potentially has an arbitrarily shortened lifetime.
So, I decided to build something myself using a Raspberry Pi, a touchscreen and Chromium in kiosk mode. To keep things simple, I've used the audio out jack on the Pi, but if over time I find the quality isn't what I hope, it should just be a case of connecting a USB soundcard in to resolve it.
There's no reason you shouldn't be able to follow almost exactly the same steps if you're using Ampache or even Google Play Music as your music source.
The Parts
I don't want to focus too much on the hardware build itself, as it really is quite straightforward.
I chose the Raspberry Pi 3B over the Raspberry Pi 4 because I've got a stock of Pi 3 power supplies and don't really need the extra oomph for this anyway.
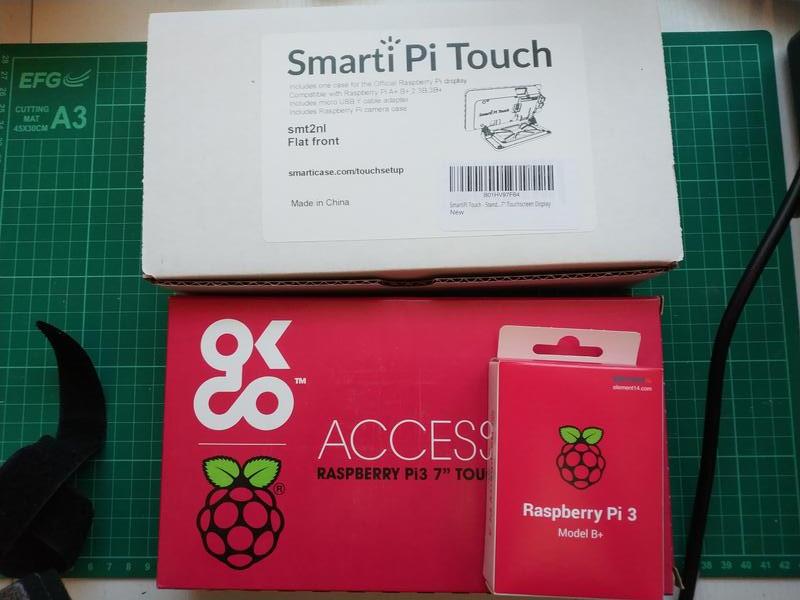
- Raspberry Pi 3B
- SmartPi Touch Stand for Pi and Touchscreen
- Raspberry Pi 7" Touchscreen
- MicroSD card (I already had some)
- Low profile USB drive (optional)
- Raspberry Pi power supply (I already had one)
If you do choose to go with the Pi 4, remember to make sure you also find a Pi 4 compatible case
The stand I chose isn't the prettiest, but it's fairly flexible in how you can position/mount it. It's not just going to be adults operating this, so flexibility is good.
For the output, I decided to go with a pair of Edifier R1280T's (I'm reasonably impressed with them, although I can see why some reviews complain they're too bassy out of the box, there is definitely a bit of a kick to them).
I did toy around with the idea of using bluetooth speakers to remove the need for the physical link, but that'd mean screwing around with pulseaudio, and to be honest there about a billion things I'd rather do. So, I also grabbed a mini-jack to RCA lead.
Software
The setup itself is actually fairly straightforward.
The first thing to do is to write a lite copy of Raspbian to an SD card, I decided I'd use a low profile USB thumbdrive for the root partition though - primarily to avoid some of the SD associated woes down the line.
So, on a desktop:
curl -L https://downloads.raspberrypi.org/raspbian_lite_latest -o raspbian.img.gz
gunzip raspbian.img.gz
Connect your SD card in, and check what it's been identified as using dmesg. Assuming it's sdc run the following to write the image onto it
dd if=raspbian.img of=/dev/sdc bs=1m
USB Stick
If you're planning on using a USB stick as the root partition, you'll also need to write the image onto that, and then amend a file on the SD card.
Connect the USB stick and check where it's ended up with dmesg. Assuming sdd below.
dd if=raspbian.img of=/dev/sdd bs=1m
Now you need to mount the SD card's boot partition, assuming it was sdc before, that's
mkdir tmpmount
sudo mount /dev/sdc1 tmpmount
sudo nano tmpmount/cmdline.txt
Now in that first line change the root= definition to say /dev/sda2 then save and exit
sudo umount tmpmount
rm -r tmpmount
Wifi Config
We can also preconfigure the wifi so that the Pi automatically connects the first time we boot it. We need to mount the root partition, so if you're using a USB stick change the command to point at that
mkdir tmpmount
sudo mount /dev/sdc2 tmpmount
sudo nano tmpmount/etc/wpa_supplicant/wpa_supplicant.conf
At the bottom of the file, add a block like the following (obviously replacing your network name and psk)
network={
    ssid="NETWORK-NAME"
    psk="NETWORK-PASSWORD"
}
Save and exit
In principle, we're now ready to assemble the Pi, and hardware
Hardware assembly
Assembly is "simply" a case of fitting Pi and touchscreen into the case. My notes file from the build, though, notes that
The case is a little bit of an arse if you don't know how. There's a video at https://www.youtube.com/watch?v=XKVd5638T_8 which shows how to assemble it.
The most important thing to realise really is that the screen's ribbon connector points in the opposite direction to the slot in the back of the case, the case comes with a longer ribbon cable because of this.
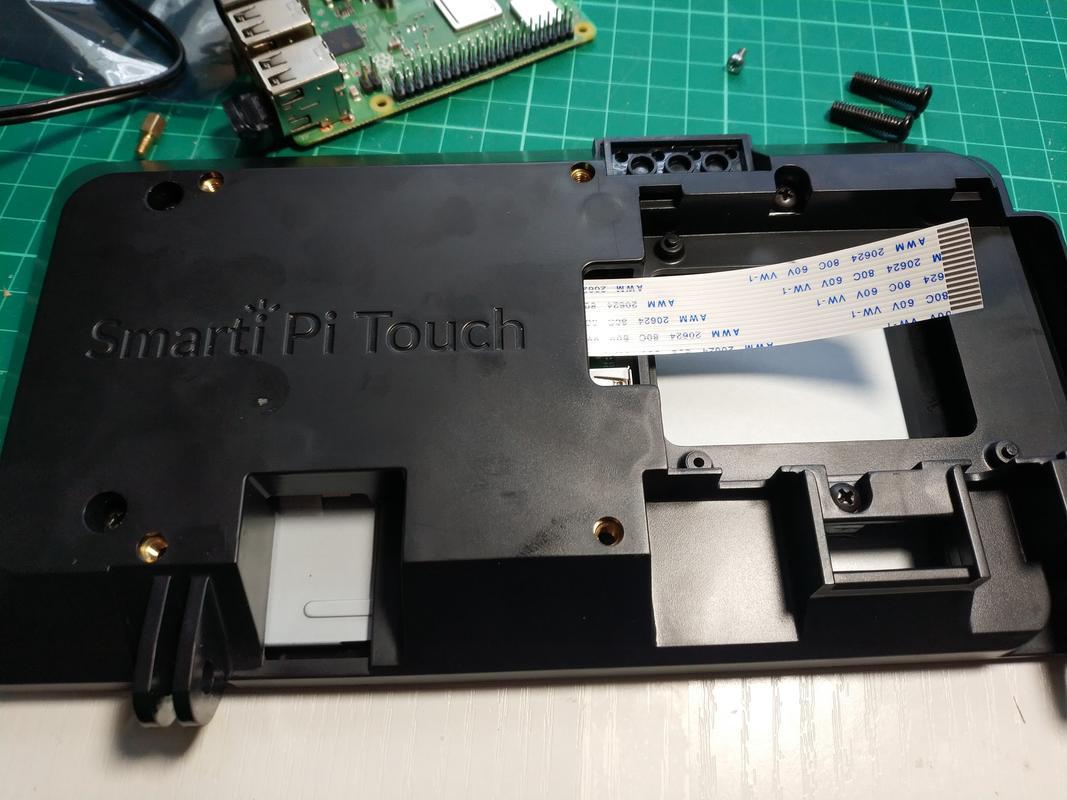
The main thing with it really, is patience.
Once you've got the screen screwed in place, insert the SD into the Pi. If you're using a USB stick, connect that up too.
Connect up the ribbon cable, and then fit the Pi into the back of the case (again, the video linked to above may be helpful here), then install the back cover and connect up the Y cable that comes with the case.
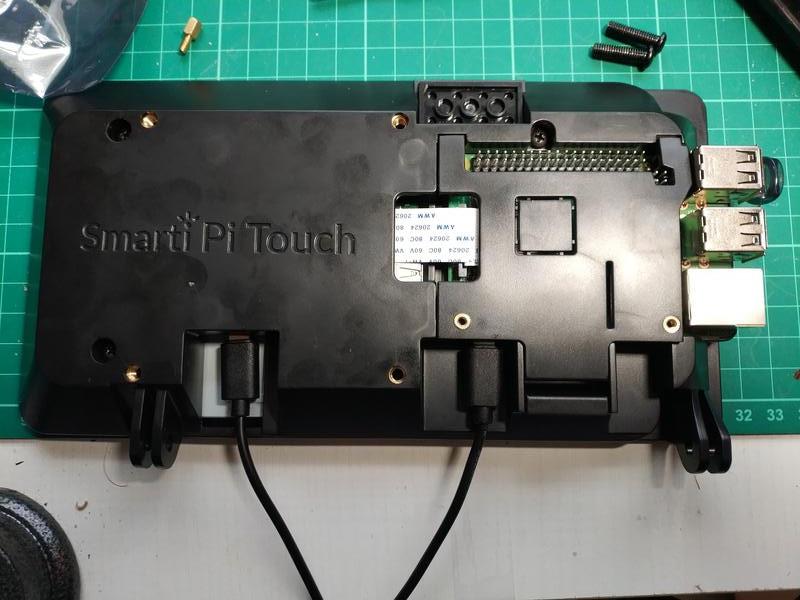
You can now connect the feet onto the stand and should be ready for the first boot.
First Boot
You'll want to connect up a USB keyboard for the initial steps.
The first thing we want to do is adjust config (to enable SSH amongst other things)
sudo raspi-config
Navigate through the menus as follows
-
Boot Options->Desktop CLI->Console Autologin -
Advanced Options->Overscan->No -
Interfacing Options->SSH->Yes - Finally tab onto
Finishand save and exit.
Non USB Stick Users Only
If you're simply using a SD card for the root partition you can tell the Pi to automatically resize it to fill the SD
sudo raspi-config
Select the option to resize the root partition
USB stick users only
If you're using a USB stick as the root partition you'll need to manually resize it, the Pi won't do it for you automatically.
This involves deleting the existing partition and then recreating with a new end boundary
sudo fdisk /dev/sda
Then
-
p- this will print out the current partition layout, Make a note of the number in theStartcolumn for the second partition -
d- enter the deletion menu -
2- delete partition 2 -
n- Create a new partition -
p- type Primary -
2- Create as partition number 2 - Now enter the number you noted earlier
- Accept the default for the last sector
- If prompted, do not remove the signature
-
w- write changes to disk and exit
We've now resized the partition, the next thing to do is to tell the filesystem to resize
sudo resize2fs /dev/sda2
Whether you're using stick or SD card, your root partition should now have been resized to fill the available storage. Our first boot config is now done, so it's time to reboot, and the Pi should come up ready for software install
sudo reboot
Kiosk Install
The Pi should have booted straight into the commandline without prompting for a password.
You should, now, also be able to SSH to the Pi. If you don't know what IP address it's acquired, then simply run sudo ifconfig on it using your USB keyboard
ssh pi@192.168.5.100
The password is the raspbian default raspberry
Now we're going to install a lightweight X server (in this case openbox) and have that start Chromium Browser on boot, pointing to an URL of our choice
sudo apt-get update
sudo apt-get install --no-install-recommends xserver-xorg x11-xserver-utils xinit openbox
sudo apt-get install --no-install-recommends chromium-browser
We need to amend the Openbox configuration so that it loads Chromium and doesn't throw up errors if Chrome crashes (it's a kiosk, turn-it-off-and-on-again should fix all)
cat << EOM | sudo tee -a /etc/xdg/openbox/autostart
xset -dpms			# turn off display power management system
xset s noblank		# turn off screen blanking
xset s off			# turn off screen saver

# Remove exit errors from the config files that could trigger a warning
sed -i 's/"exited_cleanly":false/"exited_cleanly":true/' ~/.config/chromium/'Local State'
sed -i 's/"exited_cleanly":false/"exited_cleanly":true/; s/"exit_type":"[^"]\+"/"exit_type":"Normal"/' ~/.config/chromium/Default/Preferences

# Run Chromium in kiosk mode
chromium-browser  --noerrdialogs --disable-infobars --kiosk \$K_URL

EOM
Now we need to configure the Openbox environment to define K_URL - this is the URL that Chromium will load. For a quick test, I configured it to load my site
echo "export K_URL=https://www.bentasker.co.uk" | sudo tee -a /etc/xdg/openbox/environment
Finally, we need the user pi to automatically start X when it logs in
echo '[[ -z $DISPLAY && $XDG_VTNR -eq 1 ]] && startx -- -nocursor' | tee -a ~/.bash_profile
In principle, we've now configured our Kiosk, so it's time to reboot and see whether it comes up as it should
sudo reboot
Which resulted in
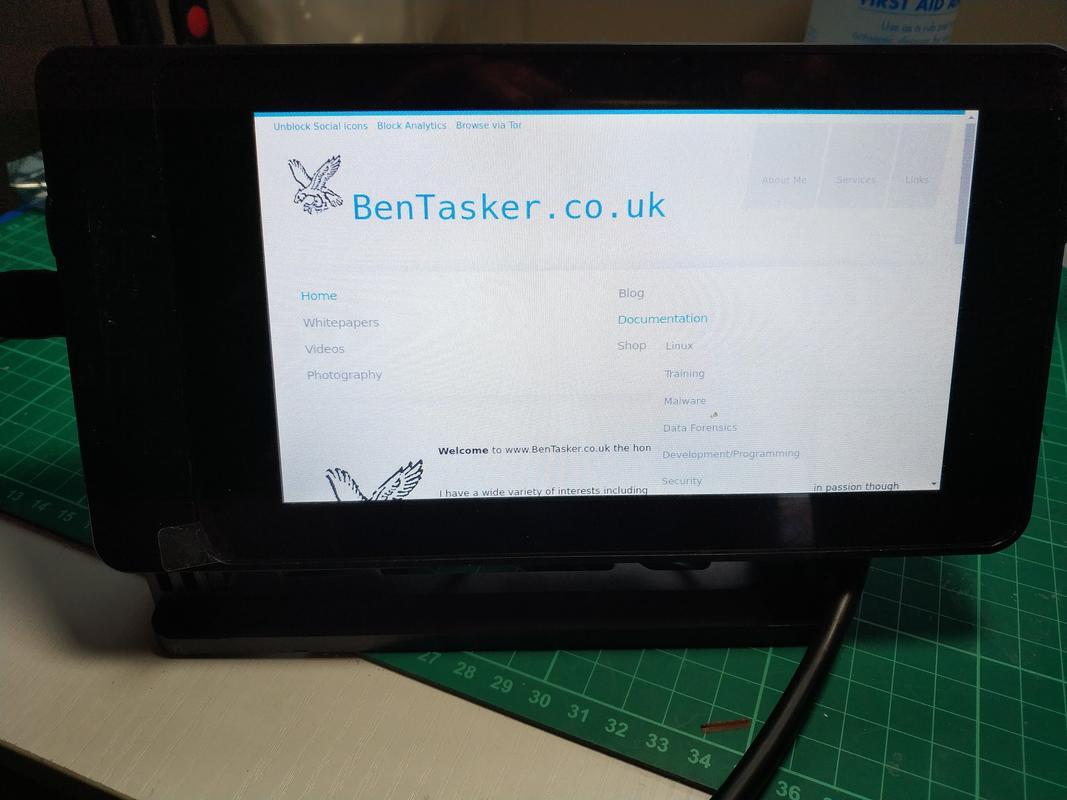
Success!
Music Streaming Service
The Pi's up and running in Kiosk mode, but that's not much use when it's not pointed at a streaming source.
My intention, originally, was to use Jamstash for this purpose. Unfortunately, that didn't really work out. It turns out that Jamstash doesn't use responsive template techniques, and so all gets squashed in
The play controls at the bottom have a hard-coded width and height of 24px. The result is that even a childs finger will generally trigger the wrong one. There's also a lot of information hidden off-screen even when panels are closed.
There's also no volume control visible - that's not great.
I did have a quick play around to see if I could fix Jamstash's template, but decided it probably wasn't worth the effort.
The interface on Subfire looks much better suited to a touchscreen of this size, but doesn't currently offer a way to self-host (part of the reason we're hosting music locally is internet interruptions - so having the player interface even lightly internet dependant is a non-starter). I did send a cheeky message on LinkedIN to ask whether I could perhaps get a copy of the source, but got no reply.
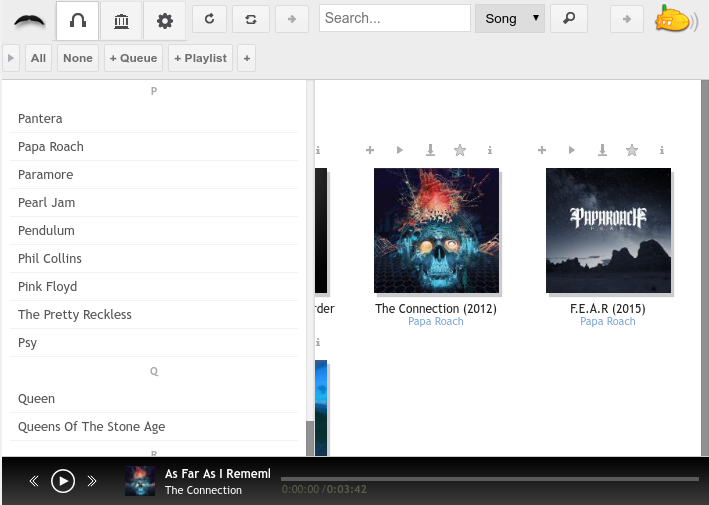
Subsonic itself, however, has recently seen some fairly significant interface improvements - and most importantly it's responsive.
So, on the Pi, I adjusted the Openbox environment so that it'd point at my subsonic server
sudo nano /etc/xdg/openbox/environment
# change the url to https://mysubsonic.mydomain.com/
Mixed Content
There is one extra step here for me though. It's.... not nice, and I should really know better, but there'll be an issue with the interface if I don't. Let me explain myself first
Subsonic's approach to SSL is.... well, crap.
The interface uses iframes, and specifies absolute URLs for the source of those. If it believes it's been accessed via plain HTTP it'll insert a http:// source leading to mixed-content warnings. So, when it's sat behind a HTTPS reverse proxy, it'll sit there and reference HTTP stuff - ultimately breaking navigation within the interface.
Neither Chrome or Firefox take Strict-Transport-Security into account here and block as mixed-content rather than upgrading the connection.
The proper "fix" for this is to configure Subsonic itself for SSL.
This isn't quite as simple as it sounds, because Java people are nuts. You need to
- generate a cert (obv)
- then import it into a java keystore using
keytool - then you need to zip that keystore into subsonic's booter file
- Edit
subsonic.shto tell it to use HTTPS
Because you're changing a core files, it'll be overwritten when you next update Subsonic. It's enough of an arse to do that I figured it'd probably lead to me putting off updates, which is an extremely negative outcome.
Because I use Jamstash on desktop etc, the mixed-content issues don't affect me (Jamstash uses Subsonic's API, and the issues only exist in the interface itself)
It will affect the Pi though, so needs addressing. As they'll only be communicating over a LAN, I decided I'd argue with Subsonic some other day, and instead edited the chromium call to tell it to allow mixed/insecure content
sudo nano /etc/xdg/openbox/autostart
# add --allow-running-insecure-content to the chromium call
Final Steps
To finish up, I then logged into Subsonic from my desktop and created a dedicated user for the Kiosk to use.
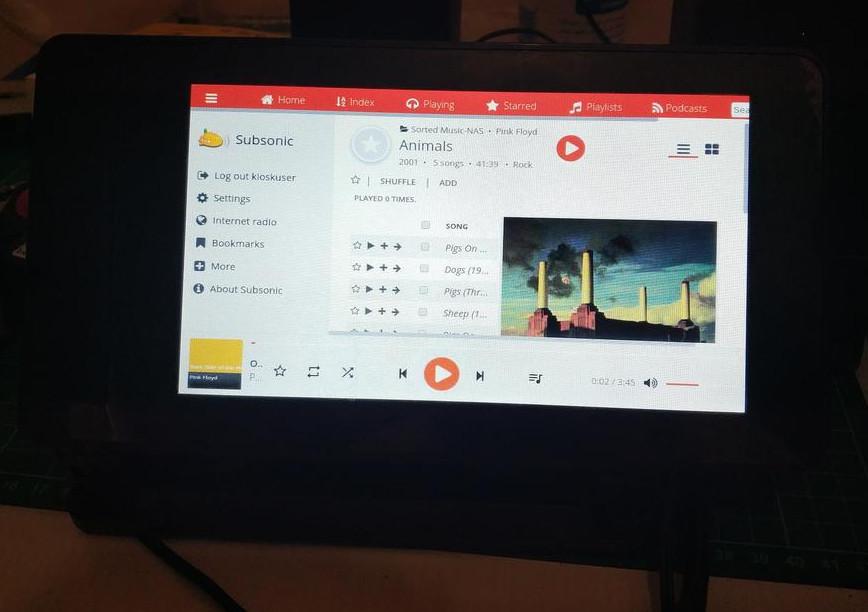
One reboot later and the Pi was sat waiting for me to log it into Subsonic - clicking "Remember Me" is the final use of the keyboard, and it can now be removed.
By default, the interface will be a little cramped, but it's possible to turn off a bunch of unneeded stuff. Click Settings and then untick
-
Track #(Both Columns) -
Album(Browse) -
Year(Playlist) -
Bit Rate(Playlist) -
Duration(Browse) -
Format(Playlist) -
File Size(Playlist) Show what others are playingShow chat messagesShow artist bio and album notesNotify me about new versions
Click Save and the interface should resize quite nicely (you could turn the album imagery off if you wanted, but I quite like having it there)
Playback doesn't work and instead play.m3u downloads
This only happened to me because I'd tried with Jamstash first, but it seems worth documenting for easy reference later.
If the Subsonic interface downloads play.m3u when you press play, it's because Subsonic has mis-identified your player type (or in my case, because Jamstash had explicitly specified one).
Within the Subsonic interface go Settings -> Players and set the type to Web Audio
Conclusion
Although I've perhaps made a bit of a meal of writing it up, setting a Pi up in Kiosk mode and linking it up to Subsonic really was quite trivial, and the audio quality really is more than acceptable, even using the mini-jack.
Admittedly, I did cut a bit of a corner with Subsonic's approach to HTTPS, though I'll probably rectify that next time I install a Subsonic update. In some ways I'm actually relatively pleased that Jamstash was so unsuitable- although I vastly prefer it on desktop, now that I've played around with it, I think the Subsonic interface is quite a good fit for this use-case. Pretty much any (responsive) web interface should be suitable though - as long as you can play back in Chrome without needing a keyboard it should be possible to get it up and running.
Once we're done re-purposing the room, I'll probably run a cable up to the Pi so that it's not doing everything over wifi (freeing up a little bit of bandwidth for things like phones), but I'm otherwise pretty happy with it.