Building a HLS Muxing Raspberry Pi Cluster
It was quite a long time ago now that I started HLS-Stream-Creator, and I've previously released an example of automating HLS-Stream-Creator so that it receives and processes workloads.
I never really expected that I'd actually have much practical use for HLS Stream Creator when I created it (I created it as a means to learning about HLS in advance of a 2nd interview), particularly as I wasn't generating/publishing any video at the time.
Over time, though, that's changed and my needs have grown from occasionally invoking the script to wanting the convenience of having a dedicated muxing pool so that I can simply submit a video and have it come out in HTTP Live Streaming (HLS) format (particularly useful now that I have videos.bentasker.co.uk).
Although I'm not going to focus on the Command and Control aspect (at it's heart it's a simple REST API) in any depth, this documentation will detail the process I followed in order to have 3 Raspberry Pi's PXE boot and run HLS-Stream-Creator as a service in order to receive arbitrary videos, calculate the output bitrates and then generate HLS output.
It's as much an opportunity to document the process I used to PXE boot Raspberry Pi's with a NFS root filesystem.
The Raspberry Pis
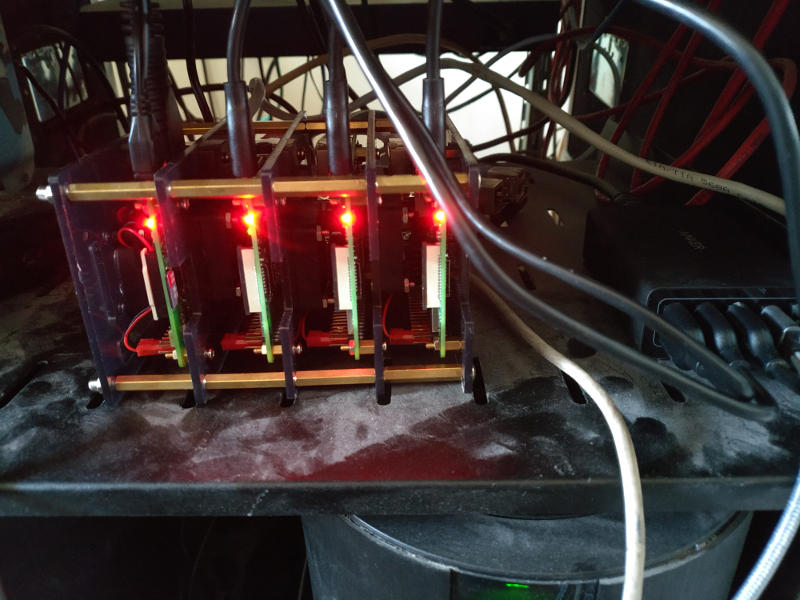
For this project I've used 3 Raspberry Pi 3 Model B (Rev 1.2) boards. Although the Pi 4 has been released, I deliberately opted not to use it for the following reasons:
- PXE booting isn't currently supported - the workload is fairly intensive for an SD card, and the last thing I want is for corrupt video to get published.
- MPEG2 hardware acceleration isn't available - although the Pi 4's CPU is much more capable than the 3, my expectation is that the hardware acceleration will probably be faster for this particular workload
- There are reports of overheating issues with Pi 4 - the workload is potentially constant and pretty demanding. Current reports suggest that the Pi 4 is much more likely to start CPU/GPU throttling than the 3
As noted above, I've specifically gone for PXE booting rather than using micro-SD cards because of concerns about corruption. However, it also means that I can (fairly) trivially add new Pi's into the pool by copying a directory on my NFS server and adding a config in the TFTP directory.
In an ideal world, the Pis would be sharing an underlying root filesystem (mounted read-only), but I decided it was simpler to just give each their own to begin with.
PXE Boot Setup
Template Creation
The first thing to do is to create a root filesystem template. The easiest way to do this is to install raspbian on an SD card and boot one of the Pis into it, in order to complete the setup steps.
Note: I ultimately had to use a Raspbian release from April 2019 rather than the latest. PXE booted Pi's currently fail to boot using the later releases with kernel version > 4.19.50
So, having booted a pi, we need to do a few bits to prepare the system
Enable SSH
sudo raspi-config
# Interfacing options
# Enable SSH
Normally, we'd make sure all our packages were up to date (I skipped this once I'd fallen back to the older release, as I didn't want to risk the kernel getting upgraded)
sudo apt-get update
sudo apt-get upgrade
sudo apt-get dist-upgrade
Then, we need to disable the swapfile (swapping over NFS would be 'orrible)
sudo -s
dphys-swapfile swapoff
dphys-swapfile uninstall
update-rc.d dphys-swapfile remove
I also took the opportunity to copy my SSH key over so it'd be pre-enabled on any Pi based on this image, also change the default password from raspberry
ssh-copy-id pi@192.168.1.10
passwd
Now we want to prepare to make a clone of the system files
mkdir -p /clone
apt-get install -y rsync
rsync -x --progress --exclude /clone / /clone
rsync -x --progress /boot/* /clone/boot
Once that's complete, we want to make sure the old swap file wasn't copied in, and then create a tarball containing our clone
rm -f /clone/var/swap 2>/dev/null
tar -cpf /clone.tar /clone
We then need to get the tarball off the Pi and over to our NFS server. You could remove the SD card to do that, but I just scp'd it off
scp /clone.tar ben@milleniumfalcon:./
Enabling Netboot
Pi's don't have Netboot functionality enabled by default, so you'll need to follow this step for each new Pi you get.
Boot the Pi into Raspbian using a micro-sd card (it can be the one you were using for template creation.
Update config.txt to enable USB boot mode (which will also enable PXE boot) and then reboot
echo program_boot_mode=1 | sudo tee -a /boot/config.txt
sudo reboot
If you want to verify, then when the system comes back up, run the following
vcgencmd otp_dump | grep 17: | grep 3020000a
If you get a result, then it was successful
Simply booting any Pi 3 off that SD card once will now enable PXE boot, so keep it somewhere safe to avoid having to complete the above steps each time you want to provision a new one
NFS Setup
The Pi will use NFS in order to mount a root filesystem, so we need to extract our template tarball and then serve via NFS
mkdir /mnt/PiRoots
sudo apt-get install nfs-kernel-server # I didn't need this. NAS already serves NFS
iptables -N NFS
iptables -I INPUT -p tcp -m tcp --dport 2049 -j NFS
iptables -I INPUT -p udp -m udp --dport 2049 -j NFS
iptables -I INPUT -p tcp -m tcp --dport 33049:33054 -j NFS
iptables -I INPUT -p udp -m udp --dport 33049:33054 -j NFS
iptables -I INPUT -p tcp -m tcp --dport 111 -j NFS
iptables -I INPUT -p udp -m udp --dport 111 -j NFS
iptables -A NFS -j REJECT

# Now authorise 192.168.1.10 to access NFS
iptables -I NFS -s 192.168.1.10 -j ACCEPT
Now we want to extract our template tarball
cd /mnt/PiRoots
mv ~/clone.tar ./
tar --same-owner -xf clone.tar

# Just so it's obvious what it is
mv clone template
We need to change fstab within the template so that it's not trying to mount local partitions, then copy it over to be used by our Pi
nano template/etc/fstab
# Remove all lines except the proc line

cp -rp clone HLSPi1
Now, we should just need to add the export and reload NFS (you could restrict it to the specific Pi's IP if you prefer)
echo "/mnt/PiRoots/HLSPi1/ 192.168.1.0/255.255.255.0(rw,sync,no_subtree_check,no_root_squash)" | tee -a /etc/exports
service nfs-kernel-server reload
TFTP Setup
When a Pi PXE boots, it will use trivial FTP (TFTP) in order to fetch the various files it requires for boot. So, we need to setup a TFTP server somewhere on the LAN.
The official Raspberry Pi documentation talks about using Pi-server or another raspberry Pi for this, however as my NAS runs Debian I'll be doing it on that
sudo apt-get install tftpd
grep tft /etc/inetd.conf # Ensure it's not commented, edit and uncomment if needed
Make a directory to house the files we'll be serving
mkdir /srv/tftp
Allow the TFTP port (TCP 69) through the firewall
iptables -I INPUT -p udp --dport 69 -j ACCEPT -m comment --comment TFTP
iptables-save > /etc/iptables/rules.v4
We can now try and connect in from another machine just to check that TFTP works. On a Ubuntu/Debian desktop:
sudo apt-get install tftp
tftp [nas ip]

tftp> get test
Error code 1: File not found
On the NAS we should be able to see the test attempt in the logs too
grep tftp /var/log/syslog
Jul 21 10:59:32 in.tftpd[7449]: connect from 192.168.1.70 (192.168.1.70)
Jul 21 10:59:32 tftpd[7450]: tftpd: trying to get file: test
Jul 21 10:59:32 tftpd[7450]: tftpd: serving file from /srv/tftp
Now, we need to copy the boot files into our tftp directory
cd /srv/tftp
cp -rp /mnt/PiRoots/template/boot/* ./
Now, we need to edit cmdline.txt in order to tell the Pi where to find the NFS mount. We'll change this to be per-Pi later, so for now (remember to change 192.168.1.50 to the IP of your NAS)
nano cmdline.txt
selinux=0 dwc_otg.lpm_enable=0 console=serial0,115200 console=tty1 nfsroot=192.168.1.50:/mnt/PiRoots/HLSPi1,v3 rw ip=dhcp root=/dev/nfs elevator=deadline rootwait
We're almost ready to go, we just need to adjust our DHCP server to serve the options that the Pi looks for.
I already have isc-dhcp-server running as the DHCP server on my LAN (setup detailed here), but as brief guide
sudo apt-get install isc-dhcp-server
sudo nano /etc/dhcp/dhcp.conf

# Comment out the following
option domain-name "example.org";
option domain-name-servers ns1.example.org, ns2.example.org;

# Leave authoritative commented, we're not ready to replace the HomeHub just yet!

At the bottom of the file, add the following

subnet 192.168.1.0 netmask 255.255.255.0 {
range 192.168.1.150 192.168.1.200;
option broadcast-address 192.1.0.255;
option routers 192.168.1.254;
default-lease-time 600;

max-lease-time 7200;
option domain-name "home";
option domain-name-servers 8.8.8.8, 8.8.4.4;
}
So, to add the options for the Pi, we need it's MAC address so that we can configure options for it (and later other Pis). Again, remember to replace 192.168.1.50 with the IP of your NAS.
host hlspi {
  hardware ethernet b8:27:eb:33:34:7a;
  fixed-address 192.168.1.10;
  next-server 192.168.1.50;
  option tftp-server-name "192.168.1.50";
  option vendor-encapsulated-options "Raspberry Pi Boot";
  option vendor-class-identifier "PXEClient";
  option host-name "HLSPi1";
}
(My Pi seems to ignore host-name, but never mind. Update: turns out it matters quite a lot.)
Then reload the DHCP server
service isc-dhcp-server reload
First Boot
Everything should now be in place for us to PXE boot the Pi.
So, ensure the Pi is powered off, remove the SD card, and then power it on (making sure it's plugged into the network...). It takes about a minute to come up, but you can tail syslog on the NAS to watch tftp transactions happening.
Jul 21 10:30:22 holly in.tftpd[18992]: connect from 192.168.1.10 (192.168.1.10)
Jul 21 10:30:22 holly tftpd[18994]: tftpd: trying to get file: bootcode.bin
Jul 21 10:30:22 holly tftpd[18994]: tftpd: serving file from /srv/tftp
Ultimately, the Pi should come up and hit a login screen.
Now that the Pi's been booted, the NAS logs should contain the information we require to set up the per-Pi TFTP config.
When PXE booting, the Pi will look for a directory named after it's serial number, and use that for all files/config if it exists, if not it'll use the basedir
So, to find out the name of the directory we need to create, simply grep syslog for start.elf
grep start.elf /var/log/syslog
Jul 21 11:18:17 holly tftpd[9179]: tftpd: trying to get file: 3333347a/start.elf
Then we can create the directory (remember to replace with your serial)
cd /srv/tftp
mkdir 3333347a
cd 3333347a
ln -s ../* ./

# Remove the circular link
rm 3333347a

# Remove the links to files we want to override
rm cmdline.txt config.txt
cp ../cmdline.txt ./
cp ../config.txt ./
If you reboot the Pi, it should now start using files and config from within it's dedicated directory. When you add a second Pi, you can create a directory for that Pi and edit cmdline.txt to reference a NFS mount dedicated to that Pi.
Adding New Pis
So, the process for adding a new Pi is:
cd /mnt/PiRoots
cp -rp template [piname]
cd /srv/tftp
cp -rp [first pi serial] [serial]
nano [serial]/cmdline.txt
# Change the path in nfsroot
Then
- update your DHCP config to define a block for the new Pi
- Boot the Pi off your SD card to enable PXE boot (or repeat the process if you've lost the card)
And your pi should be ready to go.
HLS Muxer setup
Now we get onto the bit I originally intended to write about, configuring the Pi to run HLS-Stream-Creator as a service.
Software Install
The first thing to do is to get the base software installed
sudo apt-get update
sudo apt-get install ffmpeg git
cd /home/pi
git clone https://github.com/bentasker/HLS-Stream-Creator.git
Lots of experimentation happened after this point. Will come to the results of those later
File Access
My muxer uses NFS in order to retrieve the input files, as well as to output the HLS stream, so I simply needed to create a mountpoint and edit fstab. Also created a directory to act as the temporary directory
mkdir tmpdir
mkdir remote
echo "10.16.0.1:/home/videos/files /home/pi/remote nfs     rw,user,noauto" >> /etc/fstab
mount remote/
HLS as a Service
As the intention is to have these things boot and just start muxing, needed to turn my wrapper script into a service, as well as making it so that muxer specific bits of config could be specified at boot time.
The wrapper script itself was a python script I've used (and adapted) elsewhere, so the changes were fairly trivial. Rather than post it here, I've uploaded into a Git repo on Github. So, to deploy, it's now
cd /home/pi
git clone https://github.com/bentasker/HLS-Muxing-Cluster-Example-Code.git
sudo cp HLS-Muxing-Cluster-Example-Code/hls-muxer.service /etc/systemd/system
sudo cp HLS-Muxing-Cluster-Example-Code/muxlogs /etc/logrotate.d
ln -s /home/pi/HLS-Muxing-Cluster-Example-Code/get_jobs.py /home/pi/
sudo systemctl daemon-reload
sudo systemctl enable hls-muxer
As an overview, the wrapper script does the following:
- Check boottime options to ascertain muxer ID (or otherwise use 1 as the default)
- Check whether HW assisted MPEG-2 decoding should be enabled
- Check whether
/home/pi/hlsmux.lockexists, if it does refuse to check jobs (this is so that a Pi can be gracefully taken out of service withtouch /home/pi/hlsmux.lock) - Poll C&C to see if there are any jobs queued for that muxer ID
- When a job is received
- Verify that the NFS share is still mounted, attempt to mount it if not
- Run
ffprobeagainst the file to extract bitrate information - Calculate output bitrates based upon some hardcoded multipliers and thresholds (I do have a newer version which does resolutions too)
- Do a first pass through
ffmpegto strip any unneeded data tracks. Output x264 (using hardware assisted encoding) into the tempdir. HW decoding is not used at this stage (input may not be x264) - Set ffmpeg flags so that hardware encode is enabled, and hw decode (if enabled at boottime), passing in the bitrates calculated earlier. Write output directly into the NFS share
- Once complete (or failed) update C&C with the status of the job
- Check if any old input files need tidying out of the way
Although not Pi based, a variation of this script has been running in a production environment for over 18 months - files are published and go live, and are replaced with HLS once the job is processed (which is why the tidy is a separate step - it's to let downstream caches that might still reference the original expire).
The muxing service should now start on boot. However, there are a couple of options we may want to set on our tftp server.
Boot Time Options
My C&C distributes jobs based on muxer ID (so that a queue is evenly split across different hardware to keep the backlog down).
We might also want to (if we've bought the license) enable hardware MPEG-2 decoding (we'll use hw assist for encoding either way). If you've received a license, you'll need to edit config.txt on the tftp server to enable it.
We can then tell our wrapper script what options to use by specifying
-
muxid=[num]- Set muxer ID to[num] -
muxhwdec=1- Enable hardware assisted decoding
So, for example, my first Pi now has the following in cmdline.txt
cat /srv/tftp/3333347a/cmdline.txt
selinux=0 dwc_otg.lpm_enable=0 console=tty1 nfsroot=192.168.1.87:/mnt/PiRoots/Pi1,v3 ip=dhcp root=/dev/nfs rw elevator=deadline rootwait muxid=1 muxhwdec=1
Whilst my other Pi's don't currently have a MPEG-2 license (see below), so do not include muxhwdec
We also need to make sure that the GPU is allocated some memory either way (otherwise HW encode won't work)
echo "gpu_mem=192" | sudo tee -a /srv/tftp/3333347a/config.txt
To License or not to License?
When building the first Pi, I ran some experiments to see what the performance benefits of using a MPEG-2 license actually were.
Using a 720p 30FPS video as the input file, I found that
- Without hardware accelerated decode,
ffmpegwould process about 81fps on average - With accelerated decode,
ffmpegwould process about 90.6fps on average
So, there is an improvement, but it's very slight. On the other hand, the license is only £2.40 so really it comes down to personal preference - it is going to save a little time on each job. In my case, the primary bottleneck is always going to be that the NFS server we're writing into is remote (and at the other end of a VPN), so it doesn't seem worth spending on licenses for the other Pis.
HLS Template Creation
To simplify adding new Pis into the pool, I shut down the first Pi and took a copy of its NFS root
cp /mnt/PiRoots/HLSPi1/ /mnt/PiRoots/HLS-Muxer-Template/
When I booted the pi, it came up and started accepting jobs.
Adding a new Pi
The process for adding a new Pi to the pool is now fairly straight forward:
- Boot the Pi off the SD card to enable PXE boot
- If monitor is plugged in: grab the MAC address and serial number (from /proc/cpuinfo)
- If monitor not plugged in: grab the MAC address from DHCP lines
- Add necessary config to DHCP server
- If monitor not plugged in: remove SD card and reboot, whilst tailing syslog on NAS to find serial
On NAS run the following
# Create a copy of the root
cp -rp /mnt/PiRoots/HLS-Muxer-Template /mnt/PiRoots/HLSPi2

cd /srv/tftp
cp -rp [original pi serial] [new pi serial num]
cd  [new pi serial num]
nano cmdline.txt
# Edit the NFS root path to point to the new one
# Also set muxid

# Add an export for the Pi's root
echo "/mnt/PiRoots/HLSPi2 192.168.1.0/255.255.255.0(rw,sync,no_subtree_check,no_root_squash)" >> /etc/exports

# Whitelist whatever IP you assigned to the Pi, reload NFS
iptables -I NFS -s 192.168.1.11 -j ACCEPT
service nfs-kernel-server reload
Finally, power cycle the Pi, ensuring the SD card has been removed and it should come up, contact C&C and start processing jobs
Conclusion
I now have a surprisingly capable muxing pool. I had assumed with the limited RAM, and fairly limited CPU capabilities that Pis would struggle with the workload (and early tests did lead to things getting OOM'd), but because of the availability of hardware accelerated encoding, neither RAM or CPU are used too heavily.
I now have 3 Pi's sat in a rack, quietly processing jobs. None of the fan noise experienced when I used a HP Z400 for the task, with only a fraction of the power consumption (and jobs don't take too much longer either).
Perhaps more importantly, though, I now have the infra in place to PXE boot a Pi into pretty much whatever role I want.
The following video was processed through the Pis for a 1080p source: