Updating iptables to allow Chromecast discovery and casting

I occassionally find that I want to cast a browser tab from my laptop - usually to put a chart onto a display so that I can periodically glance at it.

However, my laptop runs a fairly strict set of firewall rules - after all, it's a portable device and, on occasion, will connect to networks that aren't mine.

Strict firewall rules can prevent Chromecast discovery from working, mean that no devices will appear available to be casted to.

This post details adding rules to iptables to allow casting.

Read more…

Moving Files And History Between Git Repos

Although primarily used for revision control of source code, git repos are also often used to store a wide array of other things. For example, I use it for notes, a wiki, my website and even an audit-able means to share my public keys.

When troubleshooting, having a revision log showing when I changed something and (if I've written a decent commit message) why is invaluable.

However, just occasionally, you may find that you want to move a file out of one repo into another - whether to absorb it into a broader project, or simply as a result of a tidy up leading to some form of repository consolidation.

Copying files between repos with cp takes seconds, but, may be something that you later come to regret: git log on the copied files will no longer reveal why you chose to write $obviously_bizzare_code in the way that you did, destroying a lot of the value that using a git repo is supposed to provide.

It's therefore desirable to preserve histories where possible - in this documentation I'll detail how to copy a file from one repo to another without losing history.

Read more…

Reconfiguring Mastodon to use Object Storage

If you ask anybody that runs a small Mastodon server, you're quite likely to hear that media storage can be a bit of a pain.

Although there are various tootctl incantations that are used to help free up space (I've included mine further down), as the fediverse grows so do a server's storage demands.

When I originally set up my Mastodon server, I used a locally attached volume for media storage.

Over time, though, the instance's needs have started to out-grow the storage that I've made available, and the volume has hit 100% a couple of times (although I have alerts, it's not something I'm going to rush back home to fix if I happen to be out).

Recently, I decided to move to using object storage instead: that way, the server could (within reason) consume whatever space it needed without costing a fortune.

The Mastodon documentation does a fantastic job of describing how to enable object storage, but information on how to move an existing server is much more limited.

There is, however, an excellent post by Thomas Leister on moving to Amazon S3.

I ran into some issues along the way though, so thought it was still worth putting some information up on my experience. I also use DigitalOcean Spaces rather than AWS S3, which slightly changes the config that's required.

Read more…

Converting a Markdown Article into an Ebook

It's not something I've ever been particularly motivated to do before, but I recently found cause to turn one of my blog posts into an ebook.

A couple of years ago, I moved my site over to using Nikola and, since then, all my posts have been written using Markdown (often being drafted in Obsidian).

As well as being an extremely convenient medium to write posts in, Markdown also benefits from being extremely well supported by various tools, include Pandoc.

In this post, I'll detail the process that I used in order to convert a Markdown document into an EPUB e-book, ready for publishing into online book stores. I did this on Linux, but Pandoc supports Windows, MacOS, ChromeOS and BSD as well.

Read more…

Injecting Audio Sidetone using Pipewire or PulseAudio

My Razer headset has a built in microphone which started to fail recently: people started to note that they couldn't really hear me (a particular highlight being "We're having a hard time understanding you because your voice is so feeble").

Whilst it's possible to replace the headset's mic, they do get knocked a lot and I didn't really want to replace it with something that was just going to fail again, so I decided to get a boom mic instead.

It's not a particularly expensive one, but is a nice bit of kit. The only issue is that I'm never quite sure how I'm coming across on it. Am I too loud, am I too quiet? Am I disturbing the rest of the house?

So, I decided I wanted to enable Mic Monitoring (also known as sidetone or audible feedback): having the microphone's input play in my headphones, so that I can hear and moderate my own voice when I speak.

This post talks about enabling sidetone on a Linux box running Pipewire or PulseAudio (the commands are backwards compatible).

Read more…

Deploying Grafana into a Kubernetes Cluster

I recently needed to set up a new Grafana instance. Previously I've run Grafana using Docker, but this time, I decided to run it in my K8S cluster instead.

There was no particular reason for choosing to run it in Kubernetes other than that I had the cluster sat there, with spare resources and it avoided needing to make other arrangements.

Grafana have some documentation on deploying into Kubernetes, but it skips over things like provisioning storage and customising configuration (to do things such as enabling SMTP so that alert emails can be sent).

This documentation details how to deploy and configure Grafana in a Kubernetes cluster, with some guidance on how to provision some persistent storage so that changes made in Grafana survive pod restart and replacement.

Read more…

Flashing and Rooting a Samsung Galaxy S4 from Linux

I recently found need to update the OS on an old Samsung Galaxy S4 (GT-I5905) from the stock Android 7 to Android 11 (if you're interested, it was for this).

I decided to use LineageOS as the phone's new Android distro and also installed Magisk to root the phone so that I could install a custom CA certificate into the system root store.

This short post details the process of using a Linux laptop to flash Lineage OS onto a Samsung Galaxy S4 before loading the Google Apps, rooting with Magisk and installing a custom CA certificate (you don't need to do that bit).

If you're running Windows or a Mac, the process should be much the same, but you'll need Windows/Mac versions of the tools instead.

Note that this process will wipe any existing data, so be sure to take a backup first.

You'll need your phone, a Linux laptop and a USB cable.

Read more…

Deploying Kubernetes Onto A Single Debian 12.1 Host

There are a few things that I've been wanting to play around with, some of which could do with being deployed into a Kubernetes cluster.

They're only small projects, so I didn't want to devote multiple bits of hardware to this experimentation, nor did I particularly want to mess around with setting up VMs.

Instead, I wanted to run Kubernetes on a single machine, allowing orchestration via kubectl and other tools without any unnecessary faffing about.

By sheer luck, I started doing this a few days after the release of Debian 12.1 (Bookworm), otherwise this'd probably be a post about running on Debian 11 (the steps for that, though, are basically identical).

In this post, I'll detail the process that I followed to install Kubernetes on Debian 12.1 as well as the subsequent steps to allow it to function as a single node "cluster". If you're looking to install Kubernetes on multiple Debian 12.1 boxes these instructions will also work for you - just skip the section "Single-Node Specific Changes" and use kubectl join as you normally would.

Aside from a few steps, it's assumed that you're running through the doc as root so run sudo -i first if necessary.

Read more…

Removing A Broken Headset Plug from Nintendo Switch Jack Socket

The Nintendo Switch has a 3.5mm audio socket on its top edge, allowing a gaming headset to be plugged in so that players can talk to (or scream at) each other. Although Nintendo did eventually add Bluetooth Audio support to the switch, for quite a while, only wired headsets were originally supported.

The problem is the player is attached to the console, leading to accidents if they become overly animated.

If the Switch falls off a high enough surface, the headphone plug sometimes breaks off within the socket:

Picture of a Nintendo switch with a broken off headset plug in the jack

This post details how to remove the broken plug without needing to dissassemble the switch

Read more…

Replacing a Faulty Horn on a Vauxhall Corsa E

There isn't really a good time to find out that your car's horn isn't working, but there are plenty of very bad ones.

Like many cars, the Vauxhall Corsa uses an electromagnetic snail horn, positioned inside the front bumper. Although not directly in the path of road grime, they do tend to get a bit wet and eventually end up knackered.

Although located behind it, it is possible to replace the horn without needing to remove the bumper.

This post details how to replace the horn on a Vauxhall Corsa Mk5 (2015 onwards) - I'm fitting a generic horn, but the process is the same if you've bought one from Vauxhall.

Read more…

Restricting Internet Access to Specific Times with OpenWRT

As littluns start to (d)evolve into grumpy teenagers, the level of access that they have to internet-connected devices tends to grow.

I've written in the past about controlling access to Youtube from Android devices and we continue to find that the Microsoft Family Safety is an important tool for setting and enforcing limits on the devices that it supports (unfortunately that support is lacking on things like Nintendo's Switch, Linux Laptops etc).

One of the core things that I wanted to enforce was time bounds: not allowing devices to be used outside of specific hours of the day in order to reduce the likelihood of secret device usage impacting sleep. Whilst it's an easy rule to put in place, we found that the presence of an automatic and technically enforced cut-off greatly reduced the number of "5 more minutes.... pleeease?" type discussions.

Our router runs OpenWRT which, it turns out, makes it absolutely trivial to add time based rules to cut connectivity.

This post discusses the process for enabling those as well as a caveat or two that I've found along the way - those caveats aren't OpenWRT specific and will apply to most time-control regimens.

Read more…

Password Manager Can't Autofill on Xiaomi Android Devices

Like many others, I store my credentials in a password manager.

I previously used KeepassXC but have since migrated most credentials over to 1Password because of the ability to share vaults (this forms part of my approach to avoiding lockout, as well as helping ensure continued access if something nasty were to happen to me).

There isn't/wasn't an Android build of KeepassXC, so I was using the Keepass2Android app on my phone.

Although very good password managers, both Keepass2Android and 1Password encountered issues on my Android phone.

Both apps worked flawlessly, initially, but at some point their respective integrations stopped working and it was no longer possible to have them insert credentials into login forms for me. Instead, I had to switch into their app, copy the credentials to the clipboard, switch back to the browser and attempt to paste (hoping that the site I was on hadn't stupidly disabled paste on it's login form).

The broken behaviour was quite odd, a prompt would still be shown detailing available and relevant credentials

Screenshot of 1Password listing available credentials for a login form

Selecting an option did nothing, credentials weren't filled and choosing Open 1Password didn't result in the app being opened.

I tried variations, but it didn't work even if I logged into the password manager app first. Inter-app communication clearly worked, because the prompt always showed options relevant to the current page, it just seemed unable to push passwords into the form.

This post details the cause and the annoyingly simple fix for this issue.

Read more…

Monitoring a Mastodon Instance with Telegraf

I recently published a post detailing how to stand up a Mastodon server using docker-compose.

For those with an operations bent though, that post misses a key component (even if it is alluded to): monitoring. If you're standing up public facing services, you almost certainly want automated monitoring (and alerting) to help ensure that someone's told if services aren't running properly.

Mastodon's administration interface exposes a wide range of useful statistics, but the presentation is very much reliant on the server operator manually checking in. As a result, the interface is great for troubleshooting, but not so helpful for service assurance purposes.

In this post, I'll describe how to use Telegraf to collect stats from the service's underlying components, and write them into InfluxDB allowing graphing and alerting. Telegraf supports writing to other output databases, so the Telegraf setup section of the process may still be relevant even if you use a different TSDB (or you can register for a free InfluxDB Cloud account).

Although the steps are based on the deployment generated by using docker-compose, it should be relatively easy to translate configs to connect to natively installed services instead, and I've tried to provide hints on how to do that.

Read more…

Adding a Share On Mastodon button to a website

A high number of users are currently migrating onto Mastodon as a result of Musk's takeover of Twitter.

Many websites carry social media icons to allow easy sharing of content into social media networks (including Twitter), however very few have a button for sharing into Mastodon - in part because the mechanics of sharing into a decentralised network can be a little more complex than into a centralised one (because you need to know where to send the user).

In this post, I'll describe the process of creating a simple Mastodon toot button with a little bit of javascript and HTML, as well as how to add it to a Nikola theme.

Read more…

Implementing Geo-Blocking with OpenResty and LUA

Whilst going through WAF exceptions recently, I found a period where my services were getting hammered with exploit attempts by an overseas IP (the graphs in that section only show part of the activity).

Probes like that are just a fact of life on the internet, but some of the targets being hit didn't actually need to be accessible for this IP to probe in the first place, because some of the services are only accessed in certain regions and don't actually need to be globally accessible.

In this post, I'll detail how to build an OpenResty docker image with Geo-IP support so that it can be used for geo-fencing and geo-blocking, whilst still allowing some subnets to bypass the checks (allowlisting).

Read more…

Set up and monitor a Tor Snowflake Proxy

The Tor Project's Snowflake is a system which helps users in censorious countries gain access to the wider internet (via Tor) despite blocking attempts by local ISPs or Governments. Given current geopolitics, it's unsurprising currently seeing heavy usage from users in both Russia and Iran as citizens seek out non-state-originated information on events affecting those countries.

Snowflake is one of Tor's Pluggable Transports and aims to hide the fact that the user is using Tor by first connecting to an arbitrary endpoint (the Snowflake proxy) as if the user were just browsing the net.

Snowflake's design relies on proxies being run by volunteers: the more there are, the harder it is for governments to block them in order to restrict their citizen's access to information.

This documentation details the process of setting up a standalone Snowflake proxy and using Telegraf to collect basic statistics for monitoring purposes.

Read more…

Set up a Signal Proxy on Ubuntu

Signal Messenger are currently calling for volunteers to run Signal TLS Proxies in order to help people in Iran re-establish private communications despite the government's current censorship attempts.

Signal's blog post gives simple instructions on how to get a proxy up and running on a system, but assumes that you're already running Docker.

The aim of this post is to go a step further and provide instructions on getting Docker and Signal Proxy onto a freshly installed Ubuntu system. If you're on Debian, the steps are almost identical, you just need to swap ubuntu for debian in the Docker install related commands.

If you're interested in providing support, it really is a matter of minutes to get it up and running.

Read more…

Unable to SSH onto some systems after client upgrade: no matching key found and/or permission denied

After installing system updates, you may find that you're suddenly unable to SSH into systems that you could once reach without issue.

After updating to Ubuntu Jammy Jellyfish (22.04), I found I was no longer able to SSH onto my router

ssh 192.168.4.254
Unable to negotiate with 192.168.4.254 port 22: no matching host key type found. Their offer: ssh-rsa

I also found that I was no longer able to authenticate with a different box

ssh root@mikasa
root@mikasa: Permission denied (publickey).

Both of these issues occured because OpenSSH had been updated to a version >= 8.2:

ii  openssh-client                                1:8.9p1-3                                   amd64        secure shell (SSH) client, for secure access to remote machines

SHA-1 signatures were deprecated in OpenSSH 8.2.

This post discusses how to verify and resolve this.

Read more…

Installing Firefox as a package instead of a Snap on Ubuntu 22.04 LTS

The snap packaging system is a convenient way to install containerised applications.

However, containerisation of applications has drawbacks, including an inability to communicate directly with other applications on the system (after all, that's kind of the point of process isolation).

In Ubuntu 22.04 (Jammy Jellyfish), the Firefox browser has been moved over to using a snap package rather than a .deb, and the package in the repos is now just a wrapper triggering install of the snap.

Whilst process isolation does bring some security benefit, it also means that password managers such as KeepassXC are rendered useless because the Firefox extension can no longer communicate with the database.

Broken comms

Frustratingly, this isn't a surprise: a lot of things broke when Canonical moved Chromium to snap a couple of years back. That browsers are being moved over without the underlying problems being fixed is troubling.

However, it is possible to remove the Firefox snap and install as a native package instead.

This documentation details the process of uninstalling the Firefox snap, adding a repository and giving it's Firefox package priority over the one in the default repos.

Read more…

Adding Social Media Sharing Buttons to a Nikola Site

In November 2011 I migrated my site from Joomla to Nikola.

Unlike Joomla (and, for that matter, Wordpress/Drupal), Nikola is a static site generator (SSG): when adding content to the site I invoke Nikola and it generates a static files for each of the pages in the site (one of which you're reading now).

This provides significant security and performance benefit. There's no PHP in the background calculating what to serve to you, the file is simply loaded from disk and served on request, reducing both response time and attack surface.

However, because responses are not dynamically calculated, there are things that become harder as a page cannot dynamically include something based upon the user's request.

Social Media sharing icons are an example of this.

In a dynamic site, we might update a template to include

<div class="social-icon">
  <?php
   // Broken up for readability on smaller screens
   $t = urlencode($page->title);
   $p = urlencode($_SERVER['REQUEST_URI']);
   $d = "https://www.bentasker.co.uk";
  ?>
   <a href="https://twitter.com/share?text=<?php echo $t; ?>&url=<?php echo $d . $p; ?>&via=bentasker">
     Tweet This
   </a>
</div>

This injects the title of the current page, as well as the path of the page being requested (in practice you'd use one of the CMS's methods rather than the $_SERVER superglobal, but it allows the example to fit into a small screen more easily).

In a SSG we need to use a slightly different approach. Although the underlying principle is similar, rather than acquiring details from the request, we instead need to ask Nikola's templating engine to include specific details from the post so that we can display preconfigured buttons like these:

This post details the process of adding social media sharing icons to Nikola post pages - it's more or less exactly the process I used to add icons to my own site.

Read more…

Enabling and monitoring the zswap compressed page cache on Linux

I use a Lenovo X1 Carbon for work, and generally speaking it's a lovely bit of kit.

Unfortunately, the laptop was only specced with 16GB of RAM at purchase time, and it turns out that Lenovo decided it was a good idea to solder RAM in, so it's not actually possible to add more.

As a result, I frequently find that I'm using swap.

This isn't as bad as it sounds, the laptop's NVME storage is blazing fast, so it's often not immediately obvious that it's swapping (so much so, in fact, that I set up an ordered set of swap partitions so that it's more obvious when the system is approaching swap exhaustion).

Inevitably though, I reach the point where the system just doesn't have the resources that it needs, especially if I'm busy and multitasking.

The full fix for that, really, is a new laptop but there are things which can be done to mitigate the issue and improve performance a bit.

One of those is enabling a compressed in-memory page cache using the Linux kernel's zswap support (introduced in kernel version 3.11). zswap is more computationally expensive than RAM, but less expensive than swapping to disk.

This post details the process of enabling zswap in order to improve the performance of a Linux system. We'll also explore how to monitor it's usage with Telegraf.

Read more…

Manually applying a snap package update

Snap is a convenient way to install containerised applications. Like all package management systems it has it's flaws, but sees widespread use (in particular on Ubuntu derived distros).

There's a little known feature of Snap that's started catching people out though. Snap has the ability to force updates, and will push notifications about a forthcoming attempt to do so.

Pending update of "signal-desktop snap"

Although this feature was actually introduced back in 2019, it's still not particularly well received at times.


Misleading Notification

One concern is that the notification is quite misleading and doesn't really give a clear indication of what the user is supposed to do

Pending update of "signal-desktop" snap

Close the app to avoid disruption (7 days left)

The call to action seems to suggest (particularly to those familiar with things like AWS degraded instance notifications) that you can avoid the disruption of a forced update by closing the app and re-opening it.

But, this isn't the case. On relaunch, the app will be running the same version and notifications will continue unabated.

It is, however, possible (desirable, even) to update (or, in snap parlance: refresh) the package/application manually rather than waiting for the scheduled update.

This documentation details the (simple) process to refresh a snap package on linux.

Read more…

Tracking and Alerting on LetsEncrypt Certificate Renewals With InfluxDB and Kapacitor

LetsEncrypt has been providing free SSL certificates since 2014, and has seen widespread usage.

With a 90 day lifetime, the certificates only have relatively short lifespans and need renewing regularly, with the recommended way being to automate renewal using certbot.

The relatively short lifetime of these certificates means there's also a fairly short window to notice and intervene if renewal fails (whether because you've hit LetsEncrypt's rate limits, because certbot has started failing to fire, or some other reason).

Service monitoring often includes a check that connects in and checks certificate expiration dates, but there's usually a window between where a certificate should have renewed and when it gets close enough to expiry to breach your alert threshold.

If we apply a defense-in-depth mindset, there should also be monitoring of the renewal process itself: not only does this provide an earlier opportunity to trigger an intervention, it also addresses the risk of reliance on a single health check (which might itself malfunction).

This post covers the process of configuring a post-deploy hook in certbot to write renewal information into InfluxDB so that alerts can be generated when an expected renewal is missed.

Read more…

Rotating Docker Container Logs To Comply With Retention Policies

Docker's default configuration doesn't perform log rotation.

For busy and long running containers, this can lead to the filesystem being filled with old, uncompressed logging data (as well as making accidental docker logs $container invocations quite painful).

It is possible to configure docker to rotate logs by editing daemon.json, but the rotation threshold options are fairly limited:

  • max-size: size at which to rotate
  • max-file: max number of rotated files

Whilst these options do help to reduce filesystem usage, being purely size based they fail to support a number of extremely common log rotation use-cases

  • Log rotation at a specific time based interval (e.g. daily log rotation)
  • Maximum retention periods (to comply with GDPR retention policies etc)

Unfortunately, json-file isn't the only logging driver to suffer from this limitation, the local driver has the same restrictions. It looks like there's an implicit decision that anyone who wants to follow common rotation practices should just forward logs onto syslog, journald or some other logging infrastructure (such as logstash). In practice, there are a variety of use-cases where this may be undesirable.

However, as json-file simply writes loglines into a logfile on disk, it's trivial to build a script to implement the rotation that we need.

This documentation details how to set up interval based log rotation for docker containers

Read more…

Regularly refreshing Pi-Hole Regex Block List from external sources

Pi-Hole provides simple tooling for managing lists of ad domains to block, but sometimes simple blocklists don't provide enough coverage on their own.

Blocking Xiaomi's Tracking

The mobile phone manufacturer Xiaomi is a good example of why a more flexible blocking approach is sometimes called for.

Various views within the MIUI system UI contain tracking/ads with a broad range of regionalised addresses used to support these data harvesting activites.

For example, Xiaomi phones sometimes contact the domain tracking.intl.miui.com, but there are also regionalised variations such as tracking.rus.miui.com and tracking.india.miui.com.

Once known, these domains are easy to block, but a purely reactive approach means that there will always be periods where data is collected unimpeded.

It's far preferable, then, to be able to predict what their other tracking domains might be. Unfortunately the regionalisation of Xiaomi's services isn't particularly consistent:

  • There are services at fr.app.chat.global.xiaomi.net
  • But there are none at tracking.fr.miui.com
  • There are also no services at tracking.gb.miui.com but DNS lookups for it behave differently to those for tracking.fr.miui.com

This inconsistency makes effective blocking of Xiaomi's tracking domains via blocklists quite difficult: not only do we need to be able to enumerate all current domains, we're also reliant on Xiaomi not launching stalkerware services in a new region.


Enter Regex

Regular expressions (regex) provide a tool by which we can improve the effectiveness of our blocks.

Rather than needing to enumerate every variation of tracking.$foo.miui.com we can instead provide a pattern to match against

^tracking\..+\.miui.com$

For those not familiar with Regex, this breaks down as follows

  • ^tracking. : queried name must begin with tracking (the ^ signifies start of the input)
  • .+ : allow an unlimited number of any characters
  • \.miui.com$ : the queried name must end with .miui.com (the $ signifies end of the input)

As if this wasn't powerful enough, PiHole also supports approximate matching allowing things like stemming to be used.

For example, this allows us to trivially create a regular expression that'll accept TLD substitutions:

^tracking\..+\.miui.(com){#3}$

This expression will match any of the following

  • tracking.foo.miui.com
  • tracking.foo.miui.org
  • tracking.foo.miui.net

Managing Regex in Pi-Hole

So, why do we need an entire post for this?

Adding regex blocks to Pi-Hole individually is trivial as they can be added through the web interface

Adding a Regex Filter to Pi-Hole

However, adding a bulk list or linking a remotely maintained list provides a bit more of a challenge.

Older versions of Pi-Hole referenced a file called regex.list on disk, allowing easy automation of updates.

But support for that file was dropped when Pi-Hole Version 5 was released last year and regexes now need to be written into the gravity database.

This post details the process of automatically fetching and refreshing lists of regular expressions for Pi-Hole versions later than version 5.

Read more…

Monitoring the Tor daemon with Telegraf

My services have been available via Tor .onion for around 7 years now, but my monitoring of their availability has always been relatively limited. I did previously have smokeping running reachability tests, but other than that there's been a reliance on me noticing that things weren't right (or perhaps receiving reports that an .onion was misbehaving).

Part of the reason for this is that there's never (to my knowledge) been a good centralised way to monitor the health of a Tor install. Nyx is a fantastic command line tool, but relies on the operator logging into their box: it's akin to relying on top to monitor CPU usage.

I've always figured that it should be possible to monitor the tor daemon more effectively, but never really quite got around to do anything about it.

This week, I decided to take a pop at it, and a quick scan over Tor's control port spec revealed how easy it should be to collect stats.

This documentation details how to use my new Tor Daemon Plugin for Telegraf to collect metrics from a Tor daemon.

The full list of statistics collected can be seen in the plugin's README, but they include

  • bytes_rx: total bytes received by Tor
  • bytes_tx: total bytes transmitted by Tor
  • uptime: Tor daemon uptime
  • version_status: Tor's assessment of whether the installed version is OK to use
  • Accounting information: is a quota set? If so, how much is left?
  • Reachability test statuses
  • Guard node states

Although my main focus is on monitoring the availability of my onion services, the plugin can be used to monitor tor relays, bridges and exit nodes too.

Read more…

Monitoring eepsite availability with Telegraf

I've been doing some work making bentasker.co.uk available via I2P. A core part of that is setting up monitoring so that I can see when things are going wrong (or starting to).

I previously documented the process of monitoring the I2PD daemon with Telegraf. Whilst daemon monitoring is important, it only tells us about the state of the daemon, it tells us little about an eepsite's reachability and performance.

This documentation details how to use Telegraf to perform reachability checks against an I2P eepsite.

Read more…

Generating an eepsite vanity address

I2P base32 addresses aren't particularly memorable, http://gdncgijky3xvocpkq6xqk5uda4vsnvzuk7ke7jrvxnvyjwkq35iq.b32.i2p/ doesn't exactly roll off the tongue.

Although you can register a shortname, the availability of your site via that name will depend on whether the shortname appears in the user's addressbook.

Some I2P operators, therefore prefer to generate a vanity address.

This documentation details how to generate a vanity I2P address for use with an eepsite.

Read more…

Monitoring I2PD with Telegraf

I recently made my site available via I2P as an eepsite, using i2pd as my I2P client.

However, establishing connectivity was only really the first part of that - I needed to be able to monitor i2pd so that I could see when it goes down (or has other issues) rather than waiting for people to complain the the eepsite isn't reachable.

I do the vast majority of my system monitoring using Telegraf. A quick search didn't yield any Telegraf plugins for i2pd - so, I created my own Telegraf Plugin for i2pd.

The plugin's currently very rough around the edges, but does what I currently need. Because i2pd only exposes it's stats as HTML it relies on scraping the webconsole.

This documentation details how to set Telegraf up to report stats from i2pd into InfluxDB so that I could generate graphs in Chronograf.

Read more…

Lenovo Thinkpad X220 Fan Replacement

Replacing the cooling fan on a Thinkpad X220 (or X230) is, by no means, a small job - it's packed away inside and the steps you need to follow would also be enough to change the motherboard.

However, the part - the fan - is incredibly cheap: you can buy a replacement for around £10, so it is a cheap repair to do yourself. It's also relatively straightforward, you just need space and time to do it.

This documentation details how to disassemble a Lenovo Thinkpad X220 in order to remove and replace the cooling fan - the process is exactly the same on an X230.

Read more…

Automatically Opening Firefox Bookmarks in Specific Multi-Account Containers

For quite some time now, Firefox has had a function called Multi Account Containers built into it. This allows you to launch tabs inside a container (whether dedicated to that tab, or shared with some others) so that cookies, locally stored objects etc are only available within the container.

Essentially, it allows you to isolate sites/domains into their own little playground, away from anything else you might want to visit.

The functionality allows you to (quite trivially) set a domain to always open within a specific container - so you could (for example) set Facebook to always switch to a container, making it harder for them to track you when you visit other sites (because you'll not be logged into FB in the referring container).

Setting Facebook to use a specific container

Which is, to say the least, very useful.

It's not just privacy benefits you gain though, particularly if you're in IT.

Individual containers can also be configured to use different proxy settings. If you're supporting widely distributed kit that you reach through different proxies (SSH tunnels for example), rather than messing around switching Firefox's settings around (though I used to use FoxyProxy), you can simply configure the relevant domain to open in a preconfigured container.

However, there's a pretty key (IMO) bit of functionality missing: there's no native way to set a bookmark to always open in a specific container. There's been a feature request open against Firefox for quite some time to enable this, but there's been no real movement to date.

This documentation details how to set Firefox up so that a bookmark can specify the container it should open in, using a small third party addon to provide a custom protocol handler.

Read more…

Accessing Nextcloud files (and external storages) Without Syncing

The Nextcloud Desktop Sync Client does a fantastic job of syncing files between your desktop/laptop and Nextcloud's storage, but you don't always want everything synced down.

For example, we have some fairly sizeable volumes mounted as "External Storage" in Nextcloud. We wanted to be able to browse through those from desktops without having to sync >200GB of data down to each and every client.

This post details how to mount your Nextcloud instance as a remote drive, using WebDAV, so that files are only pulled over the network as and when they're opened.

Read more…

Filling Parking Sensor Holes in a Bumper

I recently needed to replace the bumper on a Vauxhall Corsa but, the replacement bumper had holes for parking sensors in it. The car doesn't have ultrasonic sensors, so currently the nice new bumper has some sizeable holes in it.

Unfortunately, retro-fitting the sensors isn't an option as the loom wiring isn't present.

The most natural looking way to fill them be to fit parking sensors, but at £20 each, it's quite a lot of money for something that you can't use.

Because the holes are quite sizeable (18mm in diameter), using filler isn't really an option: it'll tend to crack and fall out of a hole with that big a diameter. You could use a little bit of mesh to reduce/mitigate but that quickly increases the complexity (and difficulty).

Rather than messing around with filler, I decided to go another way. This post details the approach I took - whilst it's focused on parking sensors, it can potentially be used for any unwanted round hole in a bumper.

Read more…

Vauxhall Corsa E Front Wheel Arch Liner Replacement

There are a number of reasons you might need to remove the wheel arch liner/splashback. On the Corsa, you need to remove part of it in order to gain access to the screenwash bottle and the horn.

They do sometimes get damaged too - if the rear portion develops a split or a hole, you'll want to replace it to reduce the risk of road water getting sprayed all over your sills.

This documentation details how to remove and refit the Front Wheel Arch Liner on a Vauxhall Corsa E - it's demonstrated on a 2015 model, but the procedure should be the same across all model years.

Read more…

Vauxhall Corsa E Screenwash Bottle Replacement

It's not often that you need to remove or replace a screenwash bottle, however they do sometimes get damaged or develop leaks.

The first stages of this process can also be used in order to gain access to the screen wash motor/pump (Vauxhall part number 13349273) and the horn (Vauxhall part number 13489938) if either of those is in need of replacement.

This documentation provides details on how to access, remove and replace the screenwash reservoir (Vauxhall part number 13432705) on a Vauxhall/Opel Corsa (Mk 4) E, and should apply to model years 2014-2019.

Read more…

Vauxhall Corsa E Bumper Replacement

There a variety of reasons you may need to remove the bumper on a Vauxhall Corsa, including bumper replacement, gaining access to the screenwash reservoir or foglight unit replacement.

The procedure is fairly straightforward and isn't that dissimilar to that followed when replacing headlights bulbs on a Corsa D.

This documentation details how to remove and re-install the front bumper on a Vauxhall (or Opel) Corsa E (also known as a Corsa Mk4). The images show a 2015 Corsa E, but the same process should apply for model years 2014 to 2019.

Read more…

Using multiple swap partitions in a specific order on Linux

It's possible, on Linux, to have multiple swap partitions and/or swapfiles so that your swapspace is spread across multiple physical devices.

It's also sometimes desirable to set an order of priority for these, so that paging uses the fastest underlying storage first.

This documentation details how to set up a mix of swap files and partitions and tell the kernel how to prioritise it's swapsources Linux.

Read more…

Running and monitoring a Minecraft server using Docker and Linux

Running a Minecraft server has always been fairly painless, with the biggest headache usually being getting the right version of Java up and running.

I wanted to find an even simpler route, though, and wanted something that gave me the ability to monitor the server (if only so I could fix stuff before getting complained at).

Although I came into this ready to build my own images, it turns out a bloke called Geoff has done a sterling job not only of dockerising Minecraft-server, but also creating a monitoring tool.

This documentation details how to tie that all together in order to use Docker to stand up a Minecraft Java edition server and monitor it using Telegraf to push monitoring data into InfluxDB or InfluxCloud. Technically, this should all work with running a Bedrock server too, but I've not tried that.

This document assumes you're running Ubuntu, but if you're not then it's only really the Docker installs steps which are Ubuntu specific.

Read more…

Running multiple Tor daemons with Docker

Running a Tor relay helps give bandwidth back to the network, however it's not uncommon for new relay operators to be surprised at Tor's performance profile.

Tor is not multi-threaded, so operators arrive with multi-core machines and find that only a single core is actually being worked. However, it is possible to maximise use of multiple CPU cores by running multiple instances of the tor daemon - this documentation details how to do it using docker (although it's perfectly possible without containerisation too).

Read more…

Collecting Nextcloud User Quota Information With Telegraf

Collecting system level stats from Nextcloud with Telegraf is well documented, and very well supported.

However, I wanted to extract some additional information - current storage quota allocations and usage. Nextcloud allows you to apply a storage quota to each individual user, so I though it'd be useful to be able to monitor for accounts that are getting close to their quota.

The information is a bit more buried within Nextcloud's APIs than the system level stats, and so can not be (as easily) consumed using inputs.http.

This post gives details of an exec plugin which can fetch quota usage, per user, and pass it into Telegraf in InfluxDB line protocol

Read more…

Automounting a remote server over SSH with sshfs and autofs

Sometimes it can be pretty useful to access a remote system's filesystem from your own, and sometimes NFS isn't a great fit for the connectivity at hand.

It is, however, possible to use sshfs to mount a remote filesystem on pretty much any box that you can SSH to - giving quite a bit of convenience without the need to make changes at the remote end.

This documentation details how to create an auto-mounting SSHFS mount

Read more…

Allowing your internal search engine to index Gitlab Issues, Commits and Wiki pages

I've basically lived my life inside issue tracking systems - it used to be JIRA, and I had built tooling allowing effective indexing/mirroring of JIRA issues, but then Atlassian decided to all but do away with on-prem users. So, like many others, I moved over to Gitlab instead.

As a product, Gitlab's great: it's got project lifecycle management, issue tracking, wiki support and even a container registry baked straight into it.

However, it's indexability is basically non existent - even if you have projects marked as public, significant parts of pages are fetched by javascript, so a crawler can't index things like issue references (no, I'm not kidding) unless they execute javascript. It's like they reverse search engine optimised...

It's not just on-prem Gitlab either, it also affects their cloud offering.

Search within Gitlab is excellent, but this is of little use if you have things spread across systems and want to search from a single central point (to be fair to Gitlab, their idea is that everything you do should be within their solution, but life rarely actually works that way).

This documentation details how to use my new tooling (rudimentary as it currently is) to expose an indexable version of your Gitlab life. Although this is focused on an on-prem install, this tool should work with their cloud offering too, as the APIs are the same (but I haven't tested against it).


Read more…

Kernel Modules missing on Rasberry Pi

This, almost certainly, was a mess of my own making, but as I didn't find any answers with web searches I thought it was worth documenting for anyone else who sets a similar time bomb for themselves.

I've got some Raspberry Pi's which use NFS for their root partition. They used to be PXE booted, but at some point starting failing to boot so some time back I put a SD card back in for the /boot partition.

This, I suspect, was probably my undoing.

The Pi's have been working fine since, but I wanted to install Docker onto one of them. Although it installed, Docker failed to start, logging the following

Oct 09 22:45:43 redim-4-search-pi dockerd[3534]: failed to start daemon: Error initializing network controller: error obtaining controller instance: failed to
Oct 09 22:45:43 redim-4-search-pi dockerd[3534]: modprobe: FATAL: Module ip_tables not found in directory /lib/modules/4.19.75-v8+
Oct 09 22:45:43 redim-4-search-pi dockerd[3534]: iptables v1.6.0: can't initialize iptables table `nat': Table does not exist (do you need to insmod?)
Oct 09 22:45:43 redim-4-search-pi dockerd[3534]: Perhaps iptables or your kernel needs to be upgraded.
Oct 09 22:45:43 redim-4-search-pi dockerd[3534]:  (exit status 3)
Oct 09 22:45:43 redim-4-search-pi systemd[1]: docker.service: Main process exited, code=exited, status=1/FAILURE

On examination, there is no modules directory for the kernel version I'm currently running

root@redim-4-search-pi:~# uname -r
4.19.75-v8+
root@redim-4-search-pi:~# ls /lib/modules/
4.19.66+  4.19.66-v7+

This post details the steps I took to resolve this issue


Read more…

OpenWRT opens multiple OpenVPN client connections

This is a slightly obscure one, but when I was initially hit by it, didn't find much searching on the net.

After setting up a new OpenVPN client config (i.e. the OpenWRT box is VPN'ing into somewhere, rather than acting as a VPN server itself) on an OpenWRT box, you might find that OpenWRT eventually crashes.

This documentation details the cause, at least in so far as it affected me

Read more…

Vauxhall Corsa D balljoint and Lower Control Arm Replacement

Lower suspension ball-joints periodically reach the end of their useful life and need replacing.

They're rarely fun to do, but are (normally) quite simple. On the Corsa, replacing the Lower Control Arm as well is usually just two additional bolts, and may or may not be necessary (depending on your car)

This documentation details the  process of removing and replacing your lower control arm and balljoint on a Vauxhall Corsa D

I screwed up the dismantling pictures, so the pictures below were mostly taken during re-assembly (which is why things look nice and shiny).

Read more…

Saab 9-3 Front Wheel Bearing Replacement

Wheel bearings don't last forever, and inevitably need replacing.

Saab 93's have a combined bearing and hub assembly, so replacement is - in principle - fairly straight forward, no bearing press required. The ABS sensor is also built into the assembly, so the procedure described here can also be used for replacing ABS sensors.

Although the procedure is quite straight-forward, if you're unlucky it can also be a bit of a pig. Although a hub puller shouldn't be required, it's advisable to have on one hand - unfortunately the driveshaft splines have a habit of rusting into the bearing, making it extremely difficult to remove the axle when required.

This documentation details signs of a failing front wheel bearing, as well as the process for replacing it on a >2003 Saab 93.

Read more…

CentOS 8: Requiring a Yubikey OTP Press for SSH logins

Some 7 years back, I wrote a guide to requiring a Yubikey OTP for SSH logins on CentOS. In the time that's passed, the process has changed (a little), so this documentation provides an updated reference.

Although this is written (and tested) for CentOS 8, it should work equally well on CentOS 7 (and presumably also Rocky Linux) too.

The (increased compared to my previous post) flexibility of Yubikeys, along with their relative ubiquity makes them a fantastic candidate for two-factor authentication tokens. Modern Yubikeys can do U2F as well as using their proprietary mechanism, allowing them to be used with a wide range of software.

By the end of this documentation, we'll have configured a CentOS 8 server to require that a user provides a Yubikey press along with

  • Username AND
  • Account password, OR
  • Authorised SSH key

For brevities sake, the majority of this documentation assumes you want root to manage user's yubikeys - something Yubico call Administrative level managment - switching between the two is relatively straight forward, so details on how to switch "User Level" will be given at the end of the document.


Read more…

Citroen C5 Dragging/Rubbing Caliper

I found some old notes on this on my wiki, and figured someone might find them helpful

There is a known issue with the Citroen C5, where the rear calipers may end up rubbing against the inside of the wheel (rear caliper corrosion syndrom).

Basically the issue is one of water ingress. Corrosion develops between the mating faces where the caliper is mounted to the suspension leg, and the caliper is slowly pushed out at an angle, ultimately causing it to rub against the wheel.

It's identifiable by metal being worn away from the caliper and/or the inside of the wheel.


Read more…

Vauxhall Corsa D: Oil Pressure Switch Replacement

Also known as "My Vauxhall Corsa D is leaking oil from top left hand side of the engine", the Vauxhall (or in some markets, Opel) Corsa D has a known issue with it's Oil Pressure Switch failing.

After some use, they eventually fail and start to leak oil inside your engine compartment - worse, some of this oil can get pushed back into the wiring, and then drawn up into the loom via capillary action - left long enough, a failure of this switch will be followed by failed lambda sensors, airflow sensors and then ultimately, the ECU.

The part is cheap and simple to replace, it really is 10 minutes work.

Make sure you give your car time to cool down first though, you're going to be working in close proximity to the manifold - when that's at temperature it'll happily sear the flesh off your hands.

For those who prefer it, there's a video version at the bottom of the page.


Read more…

Generating a vanity .onion address

Note: This documentation only applies to the older V2 Onions, for newer, please see Generating a vanity .onion address for Version 3 .onions.

Tor Hidden Services are accessed through a web address ending in .onion. Generally speaking these appear to be random strings of letters and numbers, though they're actually a representation of the public key generated when the operator created their hidden service.

It is possible, however, to attempt to generate a keypair which will allow you to generate a desired vanity URL, though the process is essentially a brute-force of key combinations, so may take some time.


Read more…

Generating a Vanity Address for Version 3 Onions

Tor Hidden Services are accessed through a web address ending in .onion. Generally speaking these appear to be random strings of letters and numbers, though they're actually a representation of the public key generated when the operator created their hidden service.

Whilst it's possible to generate a V2 vanity .onion address with eschallot, V3 Onions use ed25519 requiring use of a different tool.

This documentation details how to generate a vanity .onion address for Version 3 Onions


Read more…

Saab 9-3: Rear Pads and Disc Replacement

Replacing the front discs on a Saab 93 is simple, however, the rears are a little more work (in fact, they're a pain in the arse), and you're going to some specific tools in order to achieve the job.

This was performed on a 2010 Saab 93 TTID, but the process should be the same for most model years (and may actually be more or less the same on the Vauxhall Vectra).

Be aware: some of the fixings are extremely tight and have limited access, there will almost certainly be periods where you'll wish you let the garage do the job.

Amongst the usual selection of tools and sockets etc, please ensure you have

  • A selection of longbars/torque wrenches etc (you're going to need to find something that can fit)
  • A E18 Torx socket to fit each of these. You cannot proceed without.
  • A E20 Torx socket  (just in case)
  • A deep 21mm socket
  • An electric or air impact driver (you may be able to proceed without, but there's a strong chance of getting stuck)
  • A small/pocket blowtorch
  • A jack that can lift your car as high as possible (makes more room to work in on the hard bit)
  • Brake rewind tool sized to fit a Saab (the "universal" 2 size ones don't) - I have this kit, the Saab needs disc "M" on there.

You will also need to ensure that you've ordered the correct size replacement discs for your car. You can quite easily ascertain what size you will need.


Read more…

Automatically Mounting Secondary Encrypted Disk/Partition at Boot

There are a wide variety of use-cases for disk encryption, and the idea of automatically mounting an encrypted disk/partition without user intervention is an anathema to many of those - anyone who can take physical possession of your system will have the disk auto-mount for them.

However, there is a very simple use-case which benefits from being able to automount a second encrypted disk.

If you're storing data unencrypted on a drive and it fails, you're now potentially left with something of an issue, particularly if you intend to RMA it (return it under warranty) - could the drive be fixed, allowing someone else to pull that data off the drive (bearing in mind the manufacturer may fix the drive and sell as refurbished)?

Similarly, when you need to expand your storage, you hit a similar conundrum - do you trust disk wipes sufficiently to be willing to sell/pass the disk on (a particular concern with SSDs where data may previously have been written to a now bad block, so won't be overwritten by your wipe), or do you feel you have to physically destroy the disk, un-necessarily generating e-waste.

Using Full Disk Encryption (FDE) addresses both of these situations - the manufacturer might fix the disk, but without the key the data's just random bytes, similarly, for whoever buys your disk off ebay.

But, FDE can quickly become a major inconvenience at boot - your system will stop booting and ask you to provide the decryption passphrase. That's particularly problematic if you're talking about a headless system like a NAS, where you want things to come up working following a power cycle.

It's possible (trivial even) to configure so that the system uses a key stored on another disk (like your root filesystem, or if you prefer, a USB flash drive) so that the partition is automagically mounted.

This documentation details how to set up ecryptfs on a disk (or partition) and add it to /etc/fstab so that it automatically mounts at boot

All commands are run as root, so use sudo -i/su


Read more…

Configuring Unbound for Downstream DoT

Quite some time ago, I wrote some documentation on how to stand up a DNS-over-TLS server using a Nginx reverse streams proxy to terminate the SSL.

However, since then (in fact, back in 1.6.7) Unbound released support for directly terminating TLS connections.

This documentation details the (simple) config changes necessary to configure Unbound to service DNS over TLS (RFC 7858) queries.


You will need to have a copy of Unbound >= 1.6.7 installed (and, of course, you should really be running the latest release)

Within the config file (normally /etc/unbound/unbound.conf) you'll need to add the following within the server block

    interface: 0.0.0.0@853
    interface: ::0@853
    tls-port: 853

    tls-service-key: [path to your SSL Key]
    tls-service-pem: [path to your SSL cert]
 
    access-control: 0.0.0.0/0 allow

You then simply need to restart unbound and can then confirm it's listening

systemctl restart unbound
netstat -lnp | grep 853

As we only want to accept TCP connections (to reduce opportunity for us to be used in a reflection attack, we firewall UDP 853

iptables -I INPUT -p udp --dport 853 -j DROP


Read more…

Xiaomi MIUI "Can't Connect To Internet" on Wireless Network

Google's Android OS used to have an annoying feature - smart network switch - which would inevitably lead to it sitting there, not using your wireless network, displaying the message "No network access".

This usually happened as you got home, because it had picked up your wifi at the very extreme edge of it's reach, and the test probes had failed as a result.

The functionality works by placing some test HTTP requests when connected to a wifi network - if those requests fail, it's considered that the wifi doesn't have network access. This (fairly flawed) methodology doesn't properly account for a range of possible failures in the test itself.


Read more…

Saab Keycase Battery Replacement

If you're sometimes finding that the remote buttons on your Saab key don't work, it's probably that the battery is coming up for replacement.

The key on both the Saab 93 and Saab 95 is essentially a large plastic sheath around a hidden key, with some rubberised buttons on the front.

Replacement of the battery is quick and easy, and follows much the same process as replacing the keycase itself.


Read more…

Finding Vauxhall Paint Codes

Cars come in a weird and wonderful array of colours, which is great until you need to find out which exact shade of touch-up/repair paint you need to order after an issue.

Most manufacturers give shades both a name and a code - "Black Sapphire" (20R) , "Flame Red" (79L) - but, there may be multiple codes/shades within a name.

This documentation details how to find the paint code for a Vauxhall car. In this case, it's a Corsa but the information is available on all models, it's only the location which may change.


Read more…

Nginx logs two upstream statuses for one upstream

I'm a big fan (and user) of Nginx

Just occasionally, though, you'll find something that looks a little odd - despite having quite a simple underlying explanation.

This one falls firmly into that category.

When running NGinx using ngx_http_proxy_module (i.e. using proxy_pass), you may sometimes see two upstream status codes recorded (specifically in the variable upstream_status) despite only having a single upstream configured.

So assuming a logformat of

'$remote_addr\t-\t$remote_user\t[$time_local]\t"$request"\t'
'$status\t$body_bytes_sent\t"$http_referer"\t'
'"$http_user_agent"\t"$http_x_forwarded_for"\t"$http_host"\t$up_host\t$upstream_status';

You may, for example, see a logline line this

1.2.3.4	-	-	[11/Jun/2020:17:26:01 +0000]	"GET /foo/bar/test/ HTTP/2.0"	200	60345109	"-"	"curl/7.68.0"	"-"	"testserver.invalid"	storage.googleapis.com	502, 200

Note the two comma-seperated status codes at the end of the line, we observed two different upstream statuses (though we only passed the 200 downstream).

This documentation helps explain why this happens.


Read more…

Building a Raspberry Pi Based Music Kiosk

I used to use Google's Play Music to host and play our music collection.

However, years ago, I got annoyed with Google's lacklustre approach to shared collections, and odd approach to VMs. So, our collection migrated into a self-hosted copy of Subsonic.

Other than a few minor frustrations, I've never looked back.

I buy my music through whatever music service I want, download it onto the NFS share and Subsonic picks up on it following the next library scan - we can then stream it to our phones (using DSub), to the TV (via a Kodi plugin) or to a desktop (generally, using Jamstash). In the kitchen, I tend to use a bluetooth speaker with the tablet that I use to look up recipes.

However, we're planning on repurposing a room into a puzzle and playroom, so I wanted to put some dedicated music playback in there.

Sonos devices have Subsonic support, but (IMO) that's a lot of money for something that's not great quality, and potentially has an arbitrarily shortened lifetime.

So, I decided to build something myself using a Raspberry Pi, a touchscreen and Chromium in kiosk mode. To keep things simple, I've used the audio out jack on the Pi, but if over time I find the quality isn't what I hope, it should just be a case of connecting a USB soundcard in to resolve it.

There's no reason you shouldn't be able to follow almost exactly the same steps if you're using Ampache or even Google Play Music as your music source.


Read more…

Resolving GFID mismatch problems in Gluster (RHGS) volumes

Gluster is a distributed filesystem. I'm not a massive fan of it, but most of the alternatives (like Ceph) suffer with their own set of issues, so it's no better or worse than the competition of the most part.

One issue that can sometimes occur is Gluster File ID (GFID) mismatch following a split-brain or similar failure.

When this occurs, running ls -l in a directory will generally lead to I/O errors and/or question marks in the output

ls -i
ls: cannot access ban-gai.rss: Input/output error
? 2-nguoi-choi.rss ? game.rss

If you look within the brick's log (normally under /var/log/glusterfs/bricks) you'll see lines reporting Gfid mismatch detected 

[2019-12-12 12:28:28.100417] E [MSGID: 108008] [afr-self-heal-common.c:392:afr_gfid_split_brain_source] 0-shared-replicate-0: Gfid mismatch detected for <gfid:31bcb959-efb4-46bf-b858-7f964f0c699d>/ban-gai.rss>, 1c7a16fe-3c6c-40ee-8bb4-cb4197b5035d on shared-client-4 and fbf516fe-a67e-4fd3-b17d-fe4cfe6637c3 on shared-client-1.
[2019-12-12 12:28:28.113998] W [fuse-resolve.c:61:fuse_resolve_entry_cbk] 0-fuse: 31bcb959-efb4-46bf-b858-7f964f0c699d/ban-gai.rss: failed to resolve (Stale file handle)

This documentation details how to resolve GFID mismatches


Read more…

Nintendo Switch Joycon Analog Stick Replacement

Over time the analog sticks on the Nintendo Switch's joycons tend to fail, usually resulting in drift (i.e. it generates movement despite the stick being dead centre).

This used to be an issue on N64 controllers too, though in fairness to Nintendo the sticks do take a hell of a beating, particularly if you're playing Super Smash Bros. On the other hand, outside of the 2 year warranty period Nintendo are downright predatory on their pricing for what's actually quite a simple fix.

This documentation details how to replace the analogue stick on a Nintendo Switch Joycon - there's a video of the process at the bottom for those who prefer video tutorials

All images are clicky.


Read more…

Python3 - TypeError: encoding without a string argument

I thought I'd document this as although the cause/fix is fairly simple, searching for the error string encoding without a string argument gives a lot of hits for a similarly structured but different error - string argument without an encoding.

An example backtrace might be:

Traceback (most recent call last):
  File "./profiler.py", line 346, in 
    meta['config_files']['pdns'] = zip_and_compress(read_file_content('/etc/powerdns/pdns.conf'))
  File "./profiler.py", line 289, in zip_and_compress
    gz = gzip.compress(bytes(s,"utf-8"))
TypeError: encoding without a string argument

With the example code being fairly simple

def read_file_content(path):
    ''' Read the entirety of a file into a variable
    '''
    file_content = None
    with open(path, 'rb') as content_file:
        file_content = content_file.read()

    return file_content

def zip_and_compress(s):
    ''' Config files can get quite sizeable. To keep the size of our output DB down
    we gzip and then ascii armour them
    '''
    gz = gzip.compress(bytes(s,"utf-8"))
    return base64.b64encode(gz).decode("utf-8")


zip_and_compress(read_file_content('/etc/powerdns/pdns.conf'))


The cause of the TypeError encoding without a string argument is that we're telling bytes to encode a variable into a bytes object, and it's expecting a string as input.

However, in read_file_content we're opening the file for reading in binary mode (the codebase this is sourced from uses the same function to read in a sqlite database, which will fail if you let read() try and decode it):

with open(path, 'rb') as content_file:

There are two ways to fix this. In the example above, the file being read is a simple text file, so we could switch to just reading

with open(path, 'r') as content_file:

However, doing this means that zip_and_compress would still fail in the same manner if it were later passed a bytes object (perhaps from later reading a file in binary mode).

So, it's better to adjust zip_and_compress() to include a simple type check

def zip_and_compress(s):
    ''' Config files can get quite sizeable. To keep the size of our output DB down
    we gzip and then ascii armour them
    '''
    if isinstance(s, bytes):
        gz = gzip.compress(s)
    else:
        gz = gzip.compress(bytes(s,"utf-8"))

    return base64.b64encode(gz).decode("utf-8")

 Now, we won't try and decode a bytes object into a bytes object, and all will work happily.


Improving Nextcloud's Thumbnail Response Time

I quite like Nextcloud as a self-hosted alternative to Dropbox - it works well for making documents and password databases available between machines.

Where photos are concerned, the functionality it includes offers a lot of promise but is unfortunately let down by a major failing - a logical yet somewhat insane approach to thumbnail/preview generation.

The result is that tools like "Photo Gallery" are rendered unusable due to excessively long load times. It gets particularly slow if you switch to a new client device with a different resolution to whatever you were using previously (even switching between the Android app and browser view can be problematic).

There's a Nextcloud App called previewgenerator which can help with this a little by pre-generating thumbnails (rather than waiting for a client to request them), but it's out of the box config doesn't help much if, like me, your photos are exposed via "External Storage" functionality rather than in your Nextcloud shared folder. Even when photos are in your shared folder, the app's out of the box config will result in high CPU usage and extremely high storage use.

This documentation details how to tweak/tune things to get image previews loading quickly. It assumes you've already installed and configured Nextcloud. All commands (and crons) should be run/created as the user that Nextcloud runs as.


Read more…

Disk automatically unmounts immediately after mounting

When it happens, it's incredibly frustrating - you've had a disk replaced on a linux box, the disk has shown up with a different name in /dev, so you edit /etc/fstab and then try to mount the disk.

The command runs, without error, but the disk isn't mounted, and doesn't appear in df

This documentation details the likely cause, and how to resolve it

If you look in dmesg, you might see something like the following

[  462.754500] XFS (sdc): Mounting V5 Filesystem
[  462.857216] XFS (sdc): Ending clean mount
[  462.871119] XFS (sdc): Unmounting Filesystem

Which, whilst it shows the disk is getting unmounted almost immediately, isn't otherwise very helpful. It doesn't tell us why.

However, if you look in syslog (e.g. /var/log/messages, journalctl or /var/log/syslog) you may well see this logged again with a couple of additional relevant lines

kernel: XFS (sde): Mounting V5 Filesystem
kernel: XFS (sde): Ending clean mount
systemd: Unit cache2.mount is bound to inactive unit dev-sdc.device. Stopping, too.
systemd: Unmounting /cache2...
kernel: XFS (sde): Unmounting Filesystem
systemd: Unmounted /cache2.

We can now see that the erstwhile init system - systemd - decided to unmount the filesystem

systemd: Unit cache2.mount is bound to inactive unit dev-sdc.device. Stopping, too.

The reason for this is that at boot time systemd-fstab-generator generates, in effect, a bunch of dynamic unit files for each mount. From the output above we can tell the disk used to be sdc but is now sde. Despite fstab saying

/dev/sde      /mnt/cache2   xfs   defaults,nofail  0 0

When we issue the command

mount /cache2

SystemD picks up on the fact that it has an inactive unit file (inactive because the block device has gone away) which should be mounted to that path, decides there's a conflict, and that it knows better, and unmounts your mount again

If you're in this position, then, you should be able to briefly resolve with a single command

systemctl daemon-reload

Keep in mind that if your disk moves back following a reboot, you'll be back to this point where SystemD decides you can't have wanted to mount your disk after all.


SystemD have a bug for this, raised in 2015 and seemingly still unresolved (it's certainly still attracting complaints at time of writing). Rather worryingly, it suggests that the above will not always resolve the issue, and instead suggests the following "workaround"

Remove the line from /etc/fstab and mount it manually (or use a startup cronjob script).


Building a HLS Muxing Raspberry Pi Cluster

It was quite a long time ago now that I started HLS-Stream-Creator, and I've previously released an example of automating HLS-Stream-Creator so that it receives and processes workloads.

I never really expected that I'd actually have much practical use for HLS Stream Creator when I created it (I created it as a means to learning about HLS in advance of a 2nd interview), particularly as I wasn't generating/publishing any video at the time.

Over time, though, that's changed and my needs have grown from occasionally invoking the script to wanting the convenience of having a dedicated muxing pool so that I can simply submit a video and have it come out in HTTP Live Streaming (HLS) format (particularly useful now that I have videos.bentasker.co.uk).

Although I'm not going to focus on the Command and Control aspect (at it's heart it's a simple REST API) in any depth, this documentation will detail the process I followed in order to have 3 Raspberry Pi's PXE boot and run HLS-Stream-Creator as a service in order to receive arbitrary videos, calculate the output bitrates and then generate HLS output.

It's as much an opportunity to document the process I used to PXE boot Raspberry Pi's with a NFS root filesystem.


Read more…

Building a DNS over TLS (DoT) server

WARNING: This article is outdated and has been superseded by Configuring Unbound for Downstream DoT.

Since Unbound 1.6.7 there's a better way than the one described here

I previously posted some documentation on how to build a DNS over HTTPS (DoH) Server running Pi-Hole and/or Unbound.

There's another standard available, however - RFC 7858 DNS over TLS (DoT)

DoT isn't as censorship resistant as DoH (as it's easier to block), but does provide you with additional privacy. It also has the advantage of being natively supported in Android Pie (9), so can be used to regain control of your queries without needing to run a dedicated app link Intra, with all the issues that might entail.

In this documentation we're going to trivially build and place queries against a DoT server.


Read more…

Saab Keycase Replacement

The key for both the Saab 93 and 95 is essentially a large plastic sheath around a hidden key with some rubber buttons on the front.

Unfortunately rubber has a tendency to degrade over time, and the buttons eventually either fall out, or collapse in.

Replacement of the keycase is quick and easy, though, this documentation details how to do it, including replacing the battery. For those who prefer following a video, there's also a video tutorial at the bottom of the page


Read more…

Installing iRedMail on Debian (Jessie) 8

I've run my own mail server for quite some time, but it's started to reach the point where a refresh is probably in order.

Normally, I'd prefer to build from scratch, but I thought, this time, I'd have a look at some of the "off-the-shelf" solutions that now exist. Mailinabox was quickly discounted because there's no real configurability, which doesn't sit well with me (it does simplify installation, but makes long-term management that much harder).

iRedMail seems to have a reasonable following, and a scan of it's website and documentation suggested that it is, at least, reasonably sane.

This documentation details the process I followed to install iRedMail on Debian 8 (Jessie). I used Jessie rather than Stretch (9) because that's what the VM I was repurposing was imaged with.


Read more…

Asus Nexus 7 Charger Port Repair

The ASUS/Google Nexus 7 suffers from an issue where the USB charging port wears out, so the charger no longer makes proper contact and the device won't charge. The headphone socket (which is on the same board) can also fail.

In order to repair this, a small board must be replaced (which will mean replacing the headphone port as well). Replacement boards are available on Amazon for about £8. It's a pretty straightforward process, and doesn't require any special tooling.

This documentation will walk you through the necessary steps (there's a video at the bottom for those who'd prefer a video guide) to remove the old USB charging port and install a new one.


Read more…

Saab 9-3: Front Brake Pads and Disc Replacement

Replacing the front brake rotors and pads on a Saab 9-3 is pretty straight forward (in fact, it's almost identical - down to the caliper springs, to the process of doing the same on a Volvo S60).

Before you begin, you'll need to have made sure you've ordered the correct size of replacement disc for your car. If you're not sure what size discs you require, see my guide on how to ascertain brake disc sizes.

This documentation will walk you through the process of replacing pads and discs on your Saab 9-3. The car I've used in this documentation is a UK 2010 model, but the process should be more or less the same across the years (the caliper spring does differ in shape on earlier models though).

The process is simple, however, these are your brakes - if you don't feel entirely confident then either get a garage to do it, or get someone who is confident to help/supervise.

I started on the passengers side, but that's purely because of the direction the wind was blowing in, it doesn't matter which side you start with, so long as both get done (never do just the one side).


Read more…

Building and running your own DNS-over-HTTPS Server

There's been a fair bit of controversy over DNS-over-HTTPS (DoH) vs DNS-over-TLS (DoT), and some of those arguments still rage on.

But, DoH isn't currently going anywhere, and Firefox has directly implemented support (though it calls them Trusted Recursive Resolvers or TRR for short).

Although DoH offers some fairly serious advantages when out and about (preventing blocking or tampering of DNS lookups by network operators), when left with default configuration it does currently come with some new privacy concerns of it's own. Do you really want all your DNS queries going via Cloudflare? Do you want them to be able to (roughly) tell when your mobile device is home, and when it's out and about (and potentially, also your employer - if they own the netblock)? The same questions of course go if you use Google's DNS too.

That, however, is addressable by running your own DNS-over-HTTPS server. This also has advantages if you're trying to do split-horizon DNS on your LAN, so I'll discuss that later too.

The primary purpose of this documentation is to detail how to set up your own DoH server on Linux. The main block of this documentation is concerned with getting a NGinx fronted DoH server backed by Unbound up and running, but will also discuss the steps needed to add Pi-Hole into the mix.

Unless otherwise noted, all commands are run as root


Read more…

Saab 9-3: Reading Brake Replacement Codes

Just like many other models, the Saab 9-3 had a variety of possible disk rotor sizes. You'll need to know the correct size to order when replacing discs.

One option is to jack the car up, remove the wheel and measure, but on models newer than 2006, there's a much easier way.

This documentation details how to decode the VIN plate in order to identify brake disk and caliper sizes on Saab 9-3's.


If you open the passenger side door, you should find the VIN plate in the lower part of the door way. Along the bottom is a string containing the brake codes


The format of this string is

n-nn-nn-[front disk]-[rear disk]-[Front Brake Caliper]-[Rear Brake Caliper]-

Where the various alpha values for each of these is as follows


Read more…

Performance Power 1Kva Generator has no output

Although this isn't technically a vehicle, there isn't a more appropriate category, and it is basically just a petrol engine and stator, after all.

My Performance Power 1Kva (label reads as Ikva though!) petrol generator failed in service, and I've just got around to stripping it down to look into why and whether it can reasonably be repaired.

This documentation details the process I've followed.


Read more…

Gameboy Cartridge Battery Replacement

Pokemon has been around for years, and it's awesome to see kids fall in love with something I played when I was younger (though I never developed quite the obsession with it that some did).

For many, Pokemon on the Gameboy was the most memorable. Unfortunately, those cartridges have been doing the rounds for two decades now and are often in need of a little rescue.

Within the cartridge is a CR2032 battery which maintains a charge to the SRAM so that things like save files are retained. There are sometimes some early signs of failure (like the clock going out of sync), but once the battery goes flat you'll generally find that save files will be lost whenever the cartridge is removed.

Changing the battery is relatively straightforward, though you will need to make or obtain a special tool for it. This documentation details the process.

I've used a Pokemon Red cartridge for this example, but have just been through the process for Red, Blue, Crystal, Green, Gold, Silver & Yellow. Once you've done one, the others follow on quite easily.


Read more…

Honda Civic EGR Valve Replacement

This documentation details how to remove and replace the EGR Valve on a 2004 Honda Civic 1.6 with a Petrol engine.

You may need to do this if you're getting an engine management light (MIL) with diagnostic code P0401 (EGR Flow Insufficient). Some people prefer to start by cleaning the valve rather than replacing it - the process is exactly the same as detailed here, just that you'll put the old one back on after cleaning it (remember to order a new EGR gasket though).

Honda used a variety of engines in different models of the civic though, so your EGR may be different. Before starting, pay close attention to the first picture in this document to check that your EGR location is the same (the EGR valve is the thing within the blue sticker on it in the photo).


Read more…

Integrating against the RequestRouter Alt-Svc Hints API

Version 0.4 of RequestRouter introduces a new feature - an API designed to give edge devices (such as delivery appliances) hints to allow them to generate an RFC 7838 Alt-Svc header to further optimise routing for clients located behind a DNS server that does not support the EDNS Client Subnet (ECS) extension.

This documentation provides a reference implementation, allowing an OpenResty based edge device to connect back to the Alt-Svc Hints API, whilst minimising the potential latency impact to some extent.


Read more…

Vauxhall Corsa D Headlight Bulb Replacement

The Vauxhall/Opel Corsa D was designed and manufactured whilst GM was firmly in control of production. As a result, the simple task of replacing a headlight bulb has been made needlessly complicated (and frankly, shouldn't be legal).

If you're stuck on the side of the road reading this, then the bad news is this isn't something you're going to want to try.

In order to replace headlight bulbs (particularly the dipped beam) on a Vauxhall Corsa D it's necessary to remove the front bumper. It is, at least, relatively straightforward to do, just a little involved.

This documentation details the procedure to follow.


Read more…

Saab 9-3 Door Lock Unit Repair

The central locking door lock mechanisms on Saab 9-3s (and 9-5s) are known to occasionally malfunction/stop working. When you hit the central locking button on the remote, the affected door often won't lock (or won't unlock if it was already locked). The issue tends to start out intermittent and then worsen with time.

A new unit is currently around £140 (without labour), but they can be obtained second hand on ebay for around £30. Replacing them is incredibly easy.

It is also possible to strip the unit down to repair it, however, it's not without it's risks. While the door lock unit is removed the door won't latch closed (and certainly won't lock), so if you damage the unit trying to repair it, you're going to be in a tricky position. The route I took was to buy a second hand unit from ebay, fit that and then look at repairing the original (so I've got it on the shelf if the replacement starts exhibiting the same symptoms).

This documentation details how to dismantle and repair the locking unit mechanism


Read more…

Gearbox Rebuild on Generic Chinese RC Car

I bought some cheap(ish) remote control cars from Amazon, although they're pretty good fun (and have taken some abuse) longevity has been somewhat mixed so far. An early failure was caused by the pinion being improperly fastened to the motor's shank, leading me to strip down the car to repair it.

These cars also suffer from another issue - common to almost anything remote control with a gearbox: when you give it to a kid, they have a tendency to sometimes crash into things and not subsequently release the throttle, leading to stripped teeth in the gearbox.

That's exactly what happened with one of the cars, marketed on Amazon under the mouthful of a name "Remote Control Car RC Cars Karting Car Electric Remote Control Off Road 2WD 1:16 Scale 2.4Ghz High Speed Racing Buggy Off-road Fast Radio Controlled Electric Model Cars" (though the box says "Warrior"). Although it can happen to almost any RC Toy, in this case it wasn't helped by the manufacturer using a brass pinion but plastic gearing.

This documentation details the process I followed in order to replace the damaged gear and rebuild the gearbox


Read more…

Gearbox Repair on ZFLIN RC Car

I bought a couple of (relatively) cheap Remote Control off-roaders on Amazon - primarily for having a bit of fun driving them about in the garden.

Although ostensible different brands, models and sellers, the two cars are exactly the same except for the colour of the wheels and the cowling fitted.

The cars are:

Although they differ on Amazon, the boxes both show as "Top Racing Series". The ZFlin car carries a model name of the "Pillager" whilst the other is the "Warrior".

They were fairly cheap when I bought them, and unsurprisingly, are made in China. They do nip around quite nicely

However, I hit an issue that's alluded to in some of the reviews (on both) - after a few outings the gearbox appears to fail.

Initially, you get a slipping clutch effect where the motor will rev up quite a bit before the car starts moving, eventually degrading to it sitting stock still and just making a whining noise (the difference in time between these two states, in my case, was about 10 minutes of driving time). The assumption most have made is that the motor is overrated for the gearbox and has destroyed the gears.

Inevitably, this happens after you've thrown the packaging away. As helpful as Amazon are, I didn't want to deal with their returns system, so I decided to strip the car down instead to see if it could be repaired.

Turns out the issue is much simpler than I'd assumed. This documentation details how to (quite easily) repair the car.


Read more…

Saab 9-3: Installing a rear facing dashcam

I've had a front facing dashcam (in various cars) for quite some time. For a good proportion of that time I've thought about also having a rear facing cam, but in previous cars finding a switched live at the back of the car wasn't particularly straight forward.

The 9-3, though, has an rear electrical centre which includes a rear fusebox, conveniently located in one of the boot side panels.

This documentation details the simple procedure involved in installing a rear facing dashcam into the Saab 9-3 Saloon.


The dashcam I installed is the Nextbase 112, I chose that one because of it's small size (I didn't want too much obstruction when using the rear view mirror). In hindsight it does have some drawbacks though - the mount uses a smaller ball in the ball and joint, so finding an adhesive mount is nigh on impossible. The video quality also isn't quite what I'd hoped - it is a fairly cheap camera, but being Nextbase I'd expected frames to still be quite sharp (albeit at 720p rather than the full-HD supported by other cams). Unfortunately it's fairly grainy, which is disappointing.

To wire the cam in, you will need the following

  • Nextbase dashcam hardwire kit
  • 10mm socket
  • Self-adhesive cable clips (optional but strongly recommended)

You probably also want some form of adhesive mount for your camera - the sucker on mine stayed stuck to the window for about 20 minutes and then fell off. I couldn't find an adhesive mount for the Nextbase 112, so I bought a load of 3M adhesive tissue things and cut one down to size before fitting it to the sucker.


Read more…

Saab 9-3 Rear Fusebox layout

The rear fusebox is located in the boot, behind the right hand side panel. The panel should just pull outwards and then you'll see the fusebox and rear electrical centre (also the stock amp if it was fitted at the factory).

This documentation details what each of those fuses are. The image is clicky so you can view a larger version if required.

There's another page with details of the front fuse box layout


Saab 93 Rear Fusebox Layout


Fuse Rating Circuit
F1   Maxifuse
F2   Maxifuse
F3   Maxifuse
F4   Maxifuse
F5   Maxifuse
F6 30A LH Rear Door Control unit
F7 30A RH Rear Door Control unit
F8 20A Trailer
F9   Spare
F10 30A High level stop light, trailer light, rear lighting, indicators, reversing lights, boot light
F11   Spare
F12   Spare
F13   Spare
F14 15A Rear Wiper
F15 15A LH Heated Seat
F16 15A RH heated set
F17 7.5A Automatic interrior Mirror, rain sensor
F18 15A Sunroof
F19 7.5A Telematic control unit
F20 7.5A DVD Player
F21 7.5A Rear door control unit, parking sensor control unit
F22 30A Audio Amplifier
F23   Spare
F24 10A Alarm, CD Changer
F25 30A Drivers Electric Seat
F26 30A Rear foglights, number plate light, boot lights, trailer lights, rear lighting, stop lights, indicators, reversing lights
F27   Spare
F28   Spare
F29   Spare

Saab 9-3: Installing a Dashcam Hardwire Kit

I drive a lot of miles, so statistically it's likely that at some point I'll be involved in a collision. In all my earlier cars, I've fitted a dashcam so that I can show whether or not (hopefully the latter) I was at fault when that day arrives.

Having recently changed car, I once again need to install the dashcam. The cam itself is a Nextbase 412G and simply clips to it's mount (stuck to the windscreen, with one of these adhesive mounts).

This documentation details how to install the Nextbase Dashcam Hardwire kit into a 2010 Saab 9-3 Saloon. It should also apply to most other years and variants of the 9-3 (and, to some extent, things like the Vauxhall Vectra).

Read more…

Saab 9-3 Front Fusebox Layout

Below is the ordering and rating of fuses for the Passenger side fusebox (located in the end of the Dashboard) for the Saab 9-3


There is a separate page for fuses in the rear electrical centre

Saab 9-3 fusebox layout

Fuse Rating Circuit
F1 15A Steering Lock
F2 5A Steering Column Control Unit, Ignition Switch
F3 10A CD Player, phone,SID
F4 10A Instrument panel, climate control, air conditioning
F5 7.5A Front door control units, shift level control unit
F6 7.5A Stop light Switch
F7 20A Fusebox, fuel filler cap
F8 30A Front Passenger Door Contorl Unit
F9 10A Passenger Compartment fusebox
F10 30A Accessory and trailer sockets
F11 15A Diagnostic Connector
F12 15A Interior lighting, glovebox light
F13 30A Accessories
F14 20A Audo,Infotainment control panel
F15 30A Drivers door control unit
F16 - Unused
F17 - Unused
F18 7.5A Manual Climate Control
F19 - Unused
F20 7.5A Manual Headlight levelling switch
F21 7.5A Phone, Brake pedal switch, clutch pedal switch, manual climate control
F22 30A Cigarette Lighter Socket
F23 40A Blower Motor
F24 7.5A Airbag Control Unit
F25 - Unused
F26 5A Yaw Sensor
F27 - Unused


Volvo S60: Offside Driveshaft Replacement

This documentation details how to replace the offside (drivers side/Right hand side) driveshaft on a 2003 right hand drive Volvo S60.

As far as I know, the process for Volvo V70's is exactly the same.

The offside driveshaft on the S60 is commonly damaged when replacing the Lower Control Arm - the shaft can easily be pulled out of the inner CV joint by accident. In order to resolve that, you need to remove the driveshaft and either rebuild the CV joint or put a new driveshaft.

I'm neither delicate nor patient enough to rebuild a CV joint, so I decided just to put a new driveshaft in.

This documentation details the process I followed.


Read more…

The Importance of Checking Amplifier Cables Regularly

I have a couple of aftermarket amplifiers in my car. I spend a lot of time in it, so felt it was worth the effort needed to improve the audio system.

Both amps have a dedicated lead running to the battery (each with an appropriately rated fuse just after the battery), though they share a ground point (to minimise the potential between them and avoid ground loop noises).

From that description, all should be good and safe right? Wrong. Luckily I caught it before it developed into anything more serious, but this post is to demonstrate why it's important not to let yourself get complacent. Check your wiring regularly.

Read more…

Volvo S60: Intercooler Replacement

My intercooler got damaged by some road debris, though they apparently have a habit of blowing anyway due to the high boost pressure used (particularly on diesel models).

This documentation details the process of removing and replacing the intercooler. No part of it is particularly difficult, but it's an involved process and takes some time (especially the first time). As a guide, it took me just short of 4 hours to do (fag breaks included).

I performed this process without lifting the car, however at times it was a little tight, so if I even repeat the process I'll probably put the car on ramps or stands.


Read more…

Volvo S60: Lower Control arm and Balljoint Replacement

After nearly 240,000 miles the rubbers on my lower control arm (or wishbone) were perished, and the lower balljoint (LBJ) was starting to feel questionable too.

This procedure is to replace both on the left hand side (i.e. Gearbox end of the engine). The procedure for the right hand side (i.e. Cambelt end) is almost exactly the same, but with one (fairly large caveat) - to access the front-mount bolts on the right hand side, you will need to raise that end of the engine by about 25mm. You can get away without this if you're very lucky (or have extremely shallow sockets) but for that side of the car, plan as if you're going to have to raise the engine slightly so that your ratchet doesn't foul on the sump.

Also, if you're doing the right hand side (offside), be very careful of the driveshaft - it's incredibly easy to accidentally pull the shaft out of the inner CV joint - if you do this you'll need to replace the driveshaft. It's a common occurrence when changing the offside control arm on the S60 and V70 apparently

I was in a bit of a hurry doing this job, and unfortunately forgot to take pictures. The pictures below were all taken after the fact.


Read more…

Volvo S60: Alternator Replacement

A few days ago, I started bearing noise (like air being released) from the general area of the auxillary belt. As it's freezing outside, I booked it into the garage and hoped it could make it the few days until the garage could see it.

Inevitably, it didn't. After starting the battery warning light came on, and as the belt was still on I checked the battery voltage - 11v and dropping, goodbye alternator bearing...

This documentation details the steps necessary to swap out the alternator on a 2003 Volvo S60 with a Diesel engine. The steps differ slightly for later years (you need to remove the radiator cooling fan to make space to get the alternator out, but can simply move the P/S pump out of the way rather than disconnecting it), but should be applicable for vehicles <= 2003. From what I've seen, it should also apply to V70's of the same age.

Some of the images are a little blurry because the weather was getting ready to snow on me, so there was quite a bit of shivering involved.

The whole process shouldn't take you more than a couple of hours, unless you have to wait for replacement parts to arrive. 


Read more…

Volvo S60: Service Interval Reset

This is one of those things where the procedure's easy, but I use it so infrequently that I always have to look it up.

When a service is due, the S60 will display the message "Time for Regular Service". This documentation details the procedure to reset it once you've done the service.


The procedure's fairly simple, but the timings are quite tight, so read over the steps before starting

  1. Sit in the car with all doors closed
  2. Set the ignition to position 1
  3. Make sure the trip is showing T1 with a non-zero value
  4. Press and hold the reset button for the trip (the left button)
  5. Mileage will appear to clear, keep holding the button in and turn the ignition to position II within 2 seconds
  6. Continue to hold until the mileage re-appears and the orange warning light starts flashing
  7. Release the trip reset within 4 seconds
  8. My car beeps once the value has been reset (though apparently not all do)


Volvo S60: Headlight Unit Replacement

My 2003 S60 had a chip in the headlight lens, which over time, expectedly, developed into a crack.

This documentation details how to replace a headlight unit on Volvo S60's up to 2003 (there are some slightly different mountings on models from 2004 onwards). The procedure is more or less the same for both sides

The entire process doesn't take long, at most it should take a couple of hours


Read more…

OpenVPN, Network-Manager and max-routes

Network-manager, simply, sucks. But sometimes you have little choice but to use it.

Unfortunately, despite a bug being sat idle for some time, Network-manager-openvpn doesn't support various OpenVPN client options such as max-routes. Unfortunately, if your OpenVPN server is pushing more than 100 routes, this is sufficient to prevent you from connecting at all.

This documentation details a way to work around that limitation. It's dirty and hacky, but so far, is the only solution I've found


Basically, we're going to move OpenVPN out of the way and replace it with a shell script that'll take the command it's given, and set max-routes (or any other custom option) appropriately.

First, we need to relocate openvpn, so

sudo
cd /usr/sbin
mv openvpn openvpn.real
touch openvpn
chmod +x openvpn

Then open openvpn in your text editor of choice, and enter the following

#!/bin/bash
#
# 

oldopts=$@
t=`getopt -o r: --long remote: -- $@ 2> /dev/null`
set -- $t
while [ $# -gt 0 ]
do
        case $1 in
        --remote) remote=`echo "$2" | sed "s/'//g"`; break;;
        (-*) continue;;
        esac
done

newopts=$(egrep -e "^$remote" ~/.vpn_additional_opts | cut -d\| -f2)

trap 'kill $PID 2> /dev/null || true' TERM INT HUP
/usr/sbin/openvpn.real $newopts $oldopts &
PID=$!
wait $PID

Now we just need to create a small config file in our home directory. The key for the file is the hostname/ip provided to NetworkManager (in this case, foo.example.com). So, as your user

echo "foo.example.com|--max-routes 200" > ~/.vpn_additional_opts

Everything after the | will be passed to openvpn, so if there are any other arguments you need that are not supported by network manager you can also add them there.

The new script will likely be overwritten when you next update openvpn, so post-upgrade there are a couple of steps you need to follow

sudo
cd /usr/sbin
mv openvpn openvpn.real
cp ~/path/to/backup/openvpn ./
chmod +x openvpn


Volvo S60: Overrun Alternator Pulley

I had an issue recently on my S60 - when the car was first started from cold, there'd be a rhythmic thumping noise from under the bonnet.

Lifting the bonnet, the auxilary belt tensioner was jumping backwards and forwards as slack came into the belt and then was taken up.

Further investigation showed that the Alternator Pulley had started to fail - modern alternator's no longer use a solid flywheel, instead using a clutch-based pulley called an Overrun Alternator Pulley (or OAP). The pulley manufacturer (INA) recommend that it be changed whenever the aux belt is changed.

My aux belt had been changed at the result of an emergency cambelt change (following a water pump collapse). Unfortunately, in VIDA, Volvo list the pulley as a separate service item, rather than listing it as being part of an aux belt change, so the garage missed it.

Because of the time it took to track down and obtain a suitable pulley, the belt was pretty badly chewed by the time I was able to swap the pulley, so I opted to change that as well.

This documentation details the steps required to change the alternator belt and pulley on a Volvo S60 (D5 engine). All images should be clickable.


Read more…

Configuring LetsEncrypt on a CentOS 6 NGinx Reverse Proxy

For those who haven't come across it, LetsEncrypt allows you to obtain free DV SSL Certificates but requires a server side script to be run periodically in order to renew the certificates (for better or worse, a 90 day expiration period has been used).

Although the provided script has plugins to allow support for automatically generating SSL certs based on NGinx and Apache configurations, the script assumes that the server is the origin and that the relevant docroot is available for writing to.

In the case of a reverse proxy - this won't be the case. We want the certificate on the Reverse Proxy (being the endpoint the client connects to) but the websites files are hosted on another server.

This documentation details a simple way to work around that on a NGinx reverse proxy (it should be possible to adjust the config for Apache's mod_proxy if needed).


Read more…

A Practical Demonstration of what IPB will allow

There have been numerous write-ups of the threat that the Draft Investigatory Powers Bill poses to our privacy and security.

The intention of this post is not simply to repeat those, but to provide a practical demonstration of exactly the kind of information that the proposed powers would compel your Internet Service Provider (ISP) to record.

As well as demonstrating what an ISP would soon be collecting (and how simple it is to extract), we'll look at the issues the IPB presents in the context of the information we've extracted.

As the IPB isn't exactly explicit about exactly what it allows, especially in terms of techniques, I've made some assumptions (though I believe their fair and reasonable).

Most of the results were exactly what I expected, but I think describing them explicitly is probably more helpful than not - to that end, I've tried to keep the language as accessible as possible, as those who understand how tech works at the network level are unlikely to find much of surprise here.


Read more…

Installing and Configuring KDump on Debian Jessie

Having kdump enabled on a server provides a number of benefits, not least that in the event of a kernel panic you can collect a core-dump to help investigations into the root cause. It may simply be bad luck, but my experience with Debian Jessie has been that JournalD is absolutely hopeless in the event of a kernel panic.

Pre SystemD we used to (sometimes) get a backtrace written out to a log, even a partial backtrace could help point investigations into a rough direction, but even with JournalD configured to pass through to rsyslogd those traces just don't seem to be appearing (which to be fair, might be because of the nature of the panic rather than the fault of journald).

This documentation details the steps required to install and configure KDump on Debian Jessie


Read more…

Building a Tor Hidden Service From Scratch - SELinux

On a system with SELinux, upon attempting to start Tor, you may see errors similar to the following

    [root@localhost tor]# service tor start
    Raising maximum number of filedescriptors (ulimit -n) to 16384.
    Starting tor: Apr 02 15:53:14.041 [notice] Tor v0.2.5.11 (git-83abe94c0ad5e92b) running on Linux with Libevent 1.4.13-stable, OpenSSL 1.0.1e-fips and Zlib 1.2.3.
    Apr 02 15:53:14.042 [notice] Tor can't help you if you use it wrong! Learn how to be safe at https://www.torproject.org/download/download#warning
    Apr 02 15:53:14.042 [notice] Read configuration file "/etc/tor/tor-rpm-defaults-torrc".
    Apr 02 15:53:14.042 [notice] Read configuration file "/etc/tor/torrc".
    Apr 02 15:53:14.056 [notice] Opening Socks listener on 127.0.0.1:8080
    Apr 02 15:53:14.057 [warn] Could not bind to 127.0.0.1:8080: Permission denied
    Apr 02 15:53:14.058 [notice] Opening DNS listener on 127.0.0.1:54
    Apr 02 15:53:14.060 [warn] Could not bind to 127.0.0.1:54: Permission denied
    Apr 02 15:53:14.060 [notice] Opening Transparent pf/netfilter listener on 127.0.0.1:9040
    Apr 02 15:53:14.062 [warn] Could not bind to 127.0.0.1:9040: Permission denied
    Apr 02 15:53:14.062 [warn] Failed to parse/validate config: Failed to bind one of the listener ports.
    Apr 02 15:53:14.062 [err] Reading config failed--see warnings above.
    /usr/bin/torctl start: tor could not be started

Which is almost certainly the result of a selinux policy

    [root@localhost tor]# sestatus 
    SELinux status:                 enabled
    SELinuxfs mount:                /selinux
    Current mode:                   enforcing
    Mode from config file:          enforcing
    Policy version:                 24
    Policy from config file:        targeted

There should be a Tor type within selinux, so rather than disabling completely, we'll just tell selinux to be permissive

    [root@localhost tor]# yum install policycoreutils-python
    [root@localhost tor]# semanage permissive -a tor_t

Alternatively, to make selinux enforce, but to instead allow tor to bind to non-reserved ports

    [root@localhost tor]# semanage permissive -d tor_t # Undo the change we made above
    [root@localhost tor]# setsebool -P tor_bind_all_unreserved_ports 1

The latter approach will not help if you've told Tor to bind to a reserved port (for example if DNS is set to bind to port 53). In the example output above, Tor had been configured to bind it's DNS services to port 54, so simply allowing tor to bind to unreserved ports would be insufficient.

Note: The ports you configure for hidden services do not need to be taken into account, as Tor does not actually bind to these ports, it simply interprets traffic received via the Tor connection and acts appropriately. Followed by starting Tor

    [root@localhost tor]# service tor start


Building a Tor Hidden Service From Scratch - Part 3 - General User Anonymity and Security

This is Part 3 of my Hidden Service From Scratch documentation. In Part One we designed and built our system, in Part Two we configured HTTP Hidden Service hosting.

In this documentation, we'll be looking more generally at user account and identity protection, as well as examining why you may need to maintain a certain level of paranoia even if your hidden service doesn't fall outside the law in your home country.

Introduction

This section will cover how to implement various mechanisms which may be of use in protecting from Spam/bots and user account compromise.

Many of the approaches used on the Clearnet are effective, but may lead to a small loss of privacy. Most Hidden Service users use Tor precisely because they care about privacy and will expect that design decisions that you make will take that into consideration

In the previous module, it was stated that using server-side scripting should be avoided where possible. For some sites, though, it simply isn't possible - forums for example simply don't work without some form of scripting.

Credential phising is particularly prevalent on the darknet, so you may wish to implement 2 Factor Authentication so that your users can choose to use an additional level of protection. Mechanisms such as Google Authenticator and the Yubikey obviously aren't going to be particularly welcome, as they require information to be disclosed to a third party.

Similarly, you may wish to send emails to users, but care needs to be taken in order to do so without revealing the identity of your server.

In this short module, we'll be looking at

  • Bot/Compromise Protection
    • CAPTCHA's
    • 2 Factor Authentication (2FA)
  • Email
    • MTA -> Tor
    • HS -> Public Mailserver
  • Handling User Data in General
  • Opsec is essential
  • Backups
    • Push
    • Pull
    • Encryption


Bot/Compromise Protection

Read more…

Building a Tor Hidden Service From Scratch - Part 2 - HTTP and HTTPS

Despite some fairly negative media attention, not every Tor Hidden Service is (or needs to be) a hotbed of immorality. Some exist in order to allow those in restrictive countries to access things we might take for granted (like Christian materials).

Whilst I can't condone immoral activities, Tor is a tool, and any tool can be used or misused

This is part Two in a detailed walk through of the considerations and design steps that may need to be made when setting up a new Tor Hidden Service.

The steps provided are intended to take security/privacy seriously, but won't defend against a wealthy state-backed attacker.

In Part One we looked at the system design decisions that should be made, and configured a vanilla install ready for hosting hidden services.

Introduction

This section will cover the steps required to safely configure a Tor Hidden service on ports 80 and 443

  • Basic setup
    • Installing and Configuring NGinx
    • Enabling a static HTML Hidden Service
    • CGI Scripts
    • Installing and configuring PHP-FPM
  • HTTPS
    • Safely generating a self-signed certificate
    • Configuring NGinx to serve via HTTPS
  • Hidden Service Design Safety


Basic Setup

Read more…

Building a Tor Hidden Service From Scratch - Part 1 - Design and Setup

Despite some fairly negative media attention, not every Tor Hidden Service is (or needs to be) a hotbed of immorality. Some exist in order to allow those in restrictive countries to access things we might take for granted (like Christian materials).

Whilst I can't condone immoral activities, Tor is a tool, and any tool can be used or misused

This is part one in a detailed walk through of the considerations and design steps that may need to be made when setting up a new Tor Hidden Service.

The steps provided are intended to take security/privacy seriously, but won't defend against a wealthy state-backed attacker.

How much of it you'll need to implement will obviously depend on your own circumstances, and in some cases there may be additional steps you need to take

Introduction

This section will cover the basics of setting up a hidden service, including

  • Decisions you need to make regarding hosting and hidden service operation
  • Controlling/Securing SSH access via Clearnet address
  • Basic Opsec changes to the server
  • Installing and Configuring Tor
  • Enabling a Tor Hidden Service for routine SSH access
  • Configuring an SSH client to connect to that hidden service


Hosting Theory

Read more…

Multi-homing a Joomla site between the WWW and a Tor Hidden Service

I did some work recently on making BenTasker.co.uk available via both a Tor Hidden Service (otherwise known as a .onion) and via the WWW.

The reasons for doing this are published elsewhere, but this documentation summarises the steps I had to take (and why) in order to have the site safely accessible via both routes of access.

For those who are interested, there's a far higher level of detail over on Projects.bentasker.co.uk.


Read more…

Copying a Linux Kernel From One System to Another

There may be occasions where, for testing purposes, you want to copy a kernel from one machine to another.

There are some fairly self-explanatory caveats:

  • The donor and target system must be running on the same architecture
  • The target machine shouldn't have any (important) hardware that's unsupported by your donor kernel

Obviously, you'll ideally want to make sure that the hardware is as close to identical as possible (otherwise your testing may be invalid) so the above should be considered a minimum


Read more…

sar Cheatsheet

sar can be an incredibly helpful utility when examining system performance, but if not used regularly it's easy to forget which flags to use.

This short post details a number of useful arguments to pass


Basic Output

sar


CPU Usage per Core

sar -P ALL


Memory Usage

sar -r


Swap Usage

sar -S


I/O

sar -b


I/O by Block Device

sar -d -p


Check Run Queue and Load Average

sar -q


Network Stats

sar -n DEV

Where DEV can be one of the following

  • DEV – Displays network devices vital statistics for eth0, eth1, etc.,
  • EDEV – Display network device failure statistics
  • NFS – Displays NFS client activities
  • NFSD – Displays NFS server activities
  • SOCK – Displays sockets in use for IPv4
  • IP – Displays IPv4 network traffic
  • EIP – Displays IPv4 network errors
  • ICMP – Displays ICMPv4 network traffic
  • EICMP – Displays ICMPv4 network errors
  • TCP – Displays TCPv4 network traffic
  • ETCP – Displays TCPv4 network errors
  • UDP – Displays UDPv4 network traffic
  • SOCK6, IP6, EIP6, ICMP6, UDP6 are for IPv6
  • ALL – This displays all of the above information. The output will be very long.


Historic Information

By default, sar will output for the previous 24 hours, however previous days can be checked with

sar -f /var/log/sa/sa15 -n DEV

ls -l Shows Question Marks instead of Permissions

Occasionally, when running ls -l within a directory, you might find that the output shows question marks (?) instead of the usual permissions indicators:

ben@Queeg:~$ ls -l ~/test
ls: cannot access /var/www/html/Vx/Notes: Permission denied
total 0
d????????? ? ? ? ? ? Notes


This is because whilst the user has permission to read the directory, they don't have permission to stat the entries within it. At some point, the chmod command has likely been used to remove the executable bit.

ben@Queeg:~$ ls -ld ~/test
drw-rw-rw- 6 ben ben 4096 Nov 7 10:30 /home/ben/test

Fixing the issue is as simple as adding execute permissions

chmod +x ~/test

If you've accidentally removed the executable flag using a recursive chmod, you can re-instate it with the following command

find ~ -type d -exec chmod +x {} \;

Where ~ is the basepath you want to start searching from (in this case /home/$USER. The -type argument ensures the change will only be run against directories

Avoiding BCC Leaks with Exim

This issue is, by no means, Joomla specific - but Joomla's mass mail functionality provides a good example of what can go wrong.

The expectation that most users have, is that the list of recipients BCC'd on an email will never be visible to any of those recipients.

Unfortunately, whether or not that's the case may well depend on the Mail Transport Agent (MTA) that you are using.

Those familiar with Joomla's Mass Mail feature will know that by default, recipients are BCC'd - unfortunately, if you're using Exim (which most CPanel servers, for example, are) then you may in fact find that those receiving your message can see exactly who it was sent to.

Whether or not this BCC Leak is visible to the recipients will depend on what mail client they use (assuming they're not in the habit of looking at the mail headers anyway....), but those using Google Apps/Google Mail will have the list clearly presented to them when viewing the mail.


The issue stems from the fact that the Exim developers appear to have adopted a simple philosophy - An MTA should never change mail headers, that's for the Mail User Agent (MUA) to do.

For the most part, I'd agree, but add the qualification - with the exception of BCC...

As a result of this do not touch mentality, if Exim receives the mail with the BCC headers intact, it will faithfully relay that mail onto the recipients SMTP servers with the full header intact (something Mutt users discovered a little while back).

The issue being, that if your Joomla site is configured to use either PHPMail or Sendmail, there isn't an MUA to speak of, and so Exim helpfully discloses your BCC recipient list. 


Read more…

PGP Encrypted Text Chat Via DNS

In a recent post, I alluded to having given a little bit of thought to ways in which clandestine communications could be achieved.

Having given a little more thought to the idea, I was unable to resist the temptation to build a small proof of concept - if only to see whether there were any obstacles that I hadn't considered.

This post is the documentation for DNSChat - a small proof of concept enabling PGP encrypted text chat using DNS Queries as a transport mechanism


Read more…

Installing Mailpile on CentOS 6

I've been meaning to play around with Mailpile since the beta was released back in September. Thanks to a bout of insomnia I finally found time, though it turns out that getting it up and running on CentOS 6 is initially something of a pain.

This documentation details the steps required to install and run Mailpile on CentOS 6

DISCLAIMER: For reasons I'll discuss in a separate post, at time of writing I'd only recommend following these steps if you want to test/play with Mailpile - Personally I don't feel at all comfortable with the idea of using Mailpile in production in it's current state.


Read more…

Hosting TOR Hidden Services (.onions)

The level of effort required to set up a TOR Hidden Service (known as a .onion) largely relates to the amount of paranoia you need to exercise regarding your anonymity.

Whilst the ins and outs of Operational Security (Op-Sec) are a little too intricate for a single post, this documentation will take you through the steps required to configure a Debian server to host a .onion site with reasonable protections in place.


Read more…

CentOS: Requiring a Yubikey OTP for SSH Password logins

This documentation was written in 2014. A more up to date version can be found in CentOS 8: Requiring a Yubikey OTP Press for SSH logins


The increasing ubiquity of the Yubikey makes it an ideal candidate for a Two-Factor Authentication mechanism, and configuring a CentOS based server to require a push of a Yubikey is particularly easy.

By the end of this documentation, we'll have configured a CentOS server to require that a user provide the following in order to login via SSH, unless they already have a valid RSA key pair configured on the server

  • Username (obviously)
  • Account password
  • Valid Yubikey OTP

For the sake of this documentation, we'll assume that you're using Yubico's validation servers (Yubicloud) rather than running your own (though if you are doing the latter, there's only one change in the configuration).


Read more…

Sending commit notifications using Git post-receive hooks

I make heavy use of Git, and have plugins that allow me to view my commits when viewing issues in JIRA. Unfortunately these plugins rely on Lucene indexes which has proven to be a bit of an issue when archiving projects (or maintaining a HTML fallback).

There are various post-receive hooks out there for sending mail notifications out whenever someone runs 'git push', however they're generally tailored towards notifying a group of developers.

I simply wanted the equivalent of 'git log' to appear within my JIRA activity flow on any issue which is mentioned in the commit message.

This documentation provides a python based post-receive hook intended to do just that, and also documents exactly how to go about applying that hook to all existing and future repos on your server.


Read more…

Understanding the Difficulty of Assessing True Randomness

I've had to explain, more than a few times, quite why it's so hard to assess whether a Random Number Generator (RNG) is compromised unless you have access to how the specific implementation works. Just because the data appears to be random, does not necessarily mean that it is actually unpredictable.

In this short piece of documentation, I'll be attempting to demonstrate exactly how a compromised RNG can appear to be generating random data, based on the tests that are available to us.


To best demonstrate this, it seems best to work backwards (start with the test and then show how the 'random' data isn't as compromised as first thought). If you want to follow along, you can grab the dataset here. It's a pretty small sample but should be sufficient to demonstrate the issue

Let's start by testing our dataset 

cat randomdata.txt | rngtest

Which should give us

rngtest 2-unofficial-mt.14
Copyright (c) 2004 by Henrique de Moraes Holschuh
This is free software; see the source for copying conditions.
There is NO warranty; not even for MERCHANTABILITY or FITNESS FOR A PARTICULAR PURPOSE.

rngtest: starting FIPS tests...
rngtest: entropy source exhausted!
rngtest: bits received from input: 2311168
rngtest: FIPS 140-2 successes: 115
rngtest: FIPS 140-2 failures: 0
rngtest: FIPS 140-2(2001-10-10) Monobit: 0
rngtest: FIPS 140-2(2001-10-10) Poker: 0
rngtest: FIPS 140-2(2001-10-10) Runs: 0
rngtest: FIPS 140-2(2001-10-10) Long run: 0
rngtest: FIPS 140-2(2001-10-10) Continuous run: 0
rngtest: input channel speed: (min=19.364; avg=263.319; max=1467.191)Mibits/s
rngtest: FIPS tests speed: (min=4.659; avg=6.107; max=6.239)Mibits/s
rngtest: Program run time: 377113 microseconds

A bigger dataset generated in the same manner, yields a few failures, but nowhere near enough to be of any concern

Let's ask ent what it thinks

ent randomdata.txt

Which gives us

Entropy = 7.999943 bits per byte.
Optimum compression would reduce the size of this 3388896 byte file by 0 percent.

Chi square distribution for 3388896 samples is 268.84, and randomly
would exceed this value 50.00 percent of the times.

Arithmetic mean value of data bytes is 127.5107 (127.5 = random).
Monte Carlo value for Pi is 3.140371378 (error 0.04 percent).
Serial correlation coefficient is 0.000636 (totally uncorrelated = 0.0).

We've got almost 8 bits of entropy per byte, so ent believes the data is essentially random

Perfect, so surely it should be safe to generate Crypto keys with? Wrong... The data is absolutely and utterly predictable, as random as it might appear to be.


Read more…

Implementing Secure Password Storage with PHPCredlocker and a Raspberry Pi

Password storage can be a sensitive business, but no matter whether you're using PHPCredlocker or KeePassX, dedicated hardware is best. The more isolated your password storage solution, the less likely it is that unauthorised access can be obtained.

Of course, dedicated hardware can quickly become expensive. Whilst it might be ideal in terms of security, who can afford to Colo a server just to store their passwords? A VPS is a trade-off - anyone with access to the hypervisor could potentially grab your encryption keys from memory (or the back-end storage).

To try and reduce the cost, whilst maintaining the security ideal of having dedicated hardware, I set out to get PHPCredlocker running on a Raspberry Pi.

This documentation details how to build the system, a Raspberry Pi Model B+ was used, but the B should be fine too


Read more…

Implementing Encrypted Incremental Backups with S3cmd

I've previously detailed howto use S3cmd to backup your data from a Linux machine. Unfortunately, because of the way that s3cmd works, if you want an incremental backup (i.e. using 'sync') you cannot use the built in encryption.

In this documentation I'll be detailing a simple way to implement an encrypted incremental backup using s3cmd, as well as a workaround if you're unable to install GPG - instead using OpenSSL to encrypt the data. Obviously we'll also be exploring how to decrypt the data when the backups are required

It's assumed that you've already got s3cmd installed and configured to access your S3 account (see my earlier documentation if not


Read more…

Vulnerability: Infiltrating a network via Powerline (HomePlugAV) adapters

As I posted recently, I've been playing around with some of ON Network's PL500 HomePlugAV Adapters. Given my previous experience with Powerline adapters, as part of that tinkering I thought I'd see whether they contain (or are) a security issue.

Unfortunately the news isn't great, as I can now get effective physical network access using the HomePlugAV adapters as my entry point. It does, of course require some proximity to the target network, but is otherwise pretty straight forward.

As I don't have $5,000 to spare, I did this without reading the HomePlugAV technical specification.


Responsible Disclosure: Before publishing, I contacted the HomePlug Alliance to notify them of the issues I'd identified, but have had no response


Prior Analysis

Read more…

Communicating with HomePlugAV Devices using Python

I've got a couple of pairs of ON Networks' PL 500 HomePlugAV Powerline Adapters and have been playing around with them to see how they compare to the Computrend 902 devices I played around with 5 years ago.

I'm still playing around with the kit, but thought I'd document a very basic example of how to send commands to the devices using Python - the instructions should work for any kit based on Qualcomm's INT6x00 and AR7x00 chipsets (mine use the AR7420/QCA7420) - we'll be changing one of the encryption keys (the NMK) that the devices use


Read more…

Unbound: Adding Custom DNS Records

When I wrote my post on configuring DNS, DHCP and NTP on a Raspberry Pi, I forgot to include information on how to add your own DNS records to Unbound (straight forward as it is). So in this post, I'll give a very brief overview.

All changes should be made in an unbound configuration file (probably /etc/unbound/unbound.conf, though you could also put them into a file in local.d, depending on your distribution - see below)


Read more…

Android: Protecting your network data from local snooping

There's been a lot of news of late about the likes of NSA and GCHQ passively listening to Internet traffic. The steps in this post won't protect you from such a well resourced attacker, but will prevent others on open wifi networks and your mobile data provider from looking at the content of your phone's network traffic.

A good example of the data that can easily be collected can be seen in this recent Ars Technica post.

In this post, we'll be configuring an Android phone to conditionally connect to an OpenVPN server, dependant on whether it's associated with a specific WLAN


Read more…

NGinx: Accidentally DoS'ing yourself

It turned out to be entirely self-inflicted, but I had a minor security panic recently. Whilst checking access logs I noticed (a lot of) entries similar to this

127.0.0.1 [01/Jun/2014:13:04:12 +0100] "GET /myadmin/scripts/setup.php HTTP/1.0" 500 193 "-" "ZmEu" "-" "127.0.0.1"

There were roughly 50 requests in the same second, although there were many more in later instances.

Generally an entry like that wouldn't be too big of a concern, automated scans aren't exactly a rare occurrence, but note the source IP - 127.0.0.1 - the requests were originating from my server!

I noticed the entries as a result of having received a HTTP 500 from my site (so looked at the logs to try and find the cause). There were also (again, a lot of) corresponding entries in the error log

2014/06/01 13:04:08 [alert] 19693#0: accept4() failed (24: Too many open files)

After investigation, it turned out not to be a compromise. This post details the cause of these entries.


Read more…

Citroen C5: BSI Reset

The Body control unit (BSI) on Citroens (and Peugeots) sometimes goes batshit-insane and switches things off for no other apparent reason than it felt like it.

A reset is usually enough to resolve, but the steps need to be followed almost exactly, and the car should be thoroughly checked afterwards to make sure everything is working. 

This documentation details how to perform the reset


To perform the reset;

  1. Put the drivers window down and lift the bonnet (leave the key in the ignition)
  2. Ensure all equipment (stereo etc) is switched off
  3. Ensure all doors are closed and reach through the window to remove the key from the ignition
  4. Wait 3 minutes
  5. Disconnect the battery and then wait 15 seconds
  6. Reconnect the battery and wait 10 seconds (Do not open any doors)
  7. Switch on the ignition (but don't start the engine) and check that all tests pass
  8. Hold the lock button on the key down for 10 seconds
  9. Remove the key, open the drivers door, close it and check the central locking works (I had to hold the lock button down for another 10 seconds at this point)
  10. Start the engine and complete the systems check

Note: When you put the drivers window up, it won't automatically go all the way up. Make sure you close it all the way before putting it down, otherwise the automatic close won't close it all the way until you next turn the ignition on and off

Allowing your Internal Search Engine to Index JIRA Issues

I use a number of tools on my network, including a private JIRA install (i.e. you need to log in to view anything) and the Sphider PHP search engine (I've generated a lot of documentation over the years).

Unfortunately the two aren't exactly compatible, as Sphider has no way to log into JIRA, but I wanted my JIRA issues and comments to be indexed so that relevant items can be included in my search results. One option would be to set JIRA to public mode, but I'd rather maintain the need to log in.

So instead I created a simple PHP script - JIRA Issue Listing - to generate a list that Sphider could index, but would redirect 'real' users to the relevant issue on JIRA.

This post is the documentation for that script


Read more…

Usurping the BTHomeHub with a Raspberry Pi: Part 6 - Conclusion

Throughout this series of articles, we've been aiming to usurp the role of the BTHomeHub on our home network, leaving it to do nothing but act as an Internet Gateway and provide a basic NAT firewall. As we've seen, it can be stubborn and insist on trying to ignore 'off' settings.

In the previous five parts, we've configured our Raspberry Pi to perform many of the functions of the HomeHub, as well as a few extras that BT never saw fit to provide. So, now we're going to step back and look at the functionality we've got.


Read more…

Usurping the BTHomeHub with a Raspberry Pi: Part 5 - Inbound OpenVPN

In Part 4 we configured our Raspberry Pi router to maintain a number of OpenVPN tunnels and to route through them selectively. Now we'll look at the steps needed to allow connection to our LAN via OpenVPN. Although helpful, as the HomeHub doesn't provide VPN connectivity, this stage doesn't really count as Usurping the BTHomeHub.

The steps are almost completely identical to those performed when Installing Open VPN on Debian. We're going to have to NAT connections though, as the HomeHub is a little stupid and we can't add static routes to it (so if we're connected to the VPN and accessing the Internet, it won't know where to route the response packets).

What we'll do, though, is only NAT if the connection isn't to something on the LAN.


Read more…

Removing index.php from SEF URLs

So you set up your Joomla! site, made it live, and later realised that you'd forgotten to enable the HTAccess file for SEF URL's.

The end result being that all your URLs contain /index.php/ What to do?

You could just enable the HTAccess file, but all the old URL's will then return a 404. Not great if your site has already been indexed by search engines, even worse if others have linked to you too.

In fact, on newer sites, it might even be worse - the old link will still be valid, but there'll be a 'new' link too, so you'll end up with two URLs for the same content.

It's actually incredibly simple to resolve, and this documentation details the two steps you need to take to resolve it, without breaking the old URLs.


The first step is simple, we need to enable the HTAccess file (assuming you haven't already). In the root of your Joomla! site is a file called htaccess.txt, rename it to .htaccess

The second step is to add a mod_Rewrite rule to catch and redirect the old-style links.

Open .htaccess in a text editor and find the line "RewriteEngine On". Immediately below add the following (lines with a hash are comments, you can skip these if needed)

# Make sure the requested URL isn't a directory (unlikely to be)
RewriteCond %{REQUEST_FILENAME} !-d

# Use a regular expression to find URL's where index.php is followed by something.
RewriteRule ^index.php/(.*)$ /$1 [R=301,L]

Save the file!

Now if you visit http://yoursite/index.php/category/Blogs/aPost/ you should be redirected to http//yoursite/category/Blogs/aPost/.

Because you're sending a 301 (Permanently moved), the search engines should update their indexes as well, and users browsers will cache the redirect (so if they visit again whilst the redirect is in cache, they'll immediately request the new URL).

So, for example http://www.bentasker.co.uk/index.php/documentation/joomla/266-removing-index-php-from-sef-urls should redirect you back to the correct URL for this article

Audi A6: Front Brake Pad Replacement

Changing the front brake pads on the Audi A6 Savant is a relatively straight forward task to complete. The brakes are one of the areas where Audi appear to have taken the wise decision not to over-complicate things too much.

This documentation applies to the 2000 model, but the steps should be similar for others too

Work on one side at a time (but always replace brake pads as an axle set!), and check your work carefully as you go - a brake failure is a serious and unpleasant event to experience!


Read more…

OpenVPN on CentOS 6 (Updated) - With HMAC

I've previously documented how to install and configure OpenVPN on CentOS 6, but the steps appear to be outdated.

In this documentation, we'll (very quickly) detail how to configure OpenVPN on CentOS 6. We're also going to enable TLS Authentication so that OpenVPN won't even respond unless the connecting client provides the right pre-shared key.

You'll need the EPEL repos installed and enabled.


Read more…

Recovering from corrupted InnoDB Pages

I recently encountered an issue with various InnoDB pages becoming corrupted on the database that plays host to my JIRA install. It was - to some extent - a mess of my own making for mixing production and development databases (or more precisely, for hosting that production database on a dev machine).

Lesson learnt, sure, but I still needed to address the issue so that I could get JIRA up and running again.

This documentation details the steps to follow - it won't resolve every case of corruption, but it resolved the issues I was seeing


Read more…

Usurping the BTHomeHub with a Raspberry Pi: Part 4 - Using a VPN to Tunnel Connections to Specific IPs

Content Filtering is becoming increasingly popular amongst Politicians, ISPs and generally clueless do-gooders. The problem  is, whatever you think of their motives, it's generally poorly implemented and interferes with the end-users browsing experience, even when it's not supposed to (the image to the right appeared with filtering off! - click to enlarge).

As we've been Usurping the BTHomeHub with a Raspberry Pi, we're going to take a brief break to implement some useful functionality that the HomeHub didn't provide.

In this Part, we're going to configure our Raspberry Pi to connect to an OpenVPN server and route some of our traffic over the tunnel - depending on the destination IP (i.e. Split tunnelling). This will allow us to easily bypass the troublesome content filtering, whilst not un-necessarily introducing any latency to any connection that is (for the time being at least) unaffected by the filters.

Note: We'll be manually specifying the connections that are routed via VPN, so that we can 'whitelist' mistakes such as the EFF and Wikipedia, whilst still being 'protected' against other filtered pages.

Unless otherwise stated, all commands need to be run as root


Read more…

OpenVPN on Debian

Setting up OpenVPN on Debian is as straight forward as on CentOS, though some of the file locations differ slightly.

This documentation details how to install and configure OpenVPN on a Debian server.


 The first thing we need to do, is to get openvpn installed

apt-get install openvpn

Next we want to create a configuration file, we'll use and adapt the sample config file

cp /usr/share/doc/openvpn/examples/sample-config-files/server.conf.gz /etc/openvpn/
cd /etc/openvpn/
gunzip server.conf.gz

By default, the OpenVPN server will hand out IP's in the 10.8.0.0/24 subnet, if you want to change this, edit the config as follows (I'll change to 10.14.0.0/24)

nano server.conf

# Find server 10.8.0.0 255.255.255.0 and change to
server 10.14.0.0 255.255.255.0

Save and exit (Ctrl + X, Y)

Next we want to create our keys and certificates, assuming we're still cd'd into /etc/openvpn

mkdir easy-rsa/keys -p
cd easy-rsa/
cp -r /usr/share/doc/openvpn/examples/easy-rsa/2.0/* ./

At the bottom of the file vars are some variable that we probably want to change - they set the defaults used in config generation

nano vars

# Set these to suit
export KEY_COUNTRY="UK"
export KEY_PROVINCE="SUFF"
export KEY_CITY="Ipswich"
export KEY_ORG="myserver"
export KEY_EMAIL="me@adomain.com"

Save and exit

Read more…

Usurping the BTHomeHub with a Raspberry Pi: Part 3 - Routing, Remote Administration and Utilities

In Part One we configured a RaspberryPi to act as a Wireless Access point, providing DHCP services to wireless clients. In Part Two we then configured our Pi to provide DHCP, DNS and NTP services to the entire LAN.

In this part, we'll be taking some more responsibility away from the BTHomeHub, as well as configuring a few conveniences, such as Remote administration and useful utilities, including

  • Wake On Lan
  • Network Troubleshooting Tools
  • Dynamic DNS Update Client (No-Ip.com)


Read more…

Usurping the BTHomeHub with a Raspberry Pi: Part 2 - DNS, DHCP and NTP

In Part One, we configured our RaspberryPi to act as a Wireless access point and bridged the wireless and wired interfaces so that WLAN client's were easily accessible from the LAN.

As part of that setup, we configured a DHCP server, however we haven't yet made it the DHCP server for the LAN - our tired old BTHomeHub is still the authoritative server for the network.

In this part, we'll be reconfiguring our DHCP server so that it takes responsibility for the entire LAN, configuring DNS services, and making our Pi the LANs central NTP (Network Time Protocol) Server

Step by step, we'll be configuring our Raspberry Pi to take over nearly all of the duties performed by the BTHomeHub.


Read more…

Usurping the BTHomeHub with a Raspberry Pi: Part 1

I used to run a nice pfSense box as my router, unfortunately power bills being what they are, I reverted back to using a BTHomeHub. Unfortunately, the BTHomeHub isn't particularly good - the Wifi signal sucks, it's DNS server seems to daydream and it occasionally forgets that it should be assigning some devices the same IP every time (or more precisely, will give their IP away if they are not currently present).

We could, of course, replace the HomeHub with something a bit more up market, but where's the fun in that? In this post, we'll be starting down the route of using a Raspberry Pi to usurp some of the power the BTHomeHub currently holds over the LAN. Eventually, the HH will be acting as nothing but a dumb internet gateway, doing a little bit of NAT and not much else.


Read more…

Creating a Virtual Network Interface in Debian

There are times when you might want to assign more than one IP to a system, even if it only has a single physical NIC. This documentation details how to create a virtual network interface (known as aliasing) under Debian (see here for how to alias in Centos 6).

We'll assume that your NIC is eth0, if not then simply use the name of your network interface.

To check, run

cat /etc/network/interfaces

You should see an entry similar to one of the following

auto eth0
iface eth0 inet dhcp

# OR
iface eth0 inet manual
address 192.168.1.252
netmask 255.255.255.0
gateway 192.168.1.254

Taking the settings from above, we can create the virtual interface by doing the following

nano /etc/network/interfaces

# Add the following
auto eth0:1
allow-hotplug eth0:1
iface eth0:1 inet static
address 192.168.1.248
netmask 255.255.255.0
gateway 192.168.1.254

# Ctrl-X, Y to Save and exit

The configuration above creates a new interface - eth0:1 and sets a static IP of 192.168.1.248. To apply the changes, we simply need to restart networking

service networking restart

It's that simple, now you should be able to see the interface

ifconfig
lo Link encap:Local Loopback
inet addr:127.0.0.1 Mask:255.0.0.0
inet6 addr: ::1/128 Scope:Host
UP LOOPBACK RUNNING MTU:65536 Metric:1
RX packets:129 errors:0 dropped:0 overruns:0 frame:0
TX packets:129 errors:0 dropped:0 overruns:0 carrier:0
collisions:0 txqueuelen:0
RX bytes:16247 (15.8 KiB) TX bytes:16247 (15.8 KiB)

eth0 Link encap:Ethernet HWaddr b8:27:eb:a2:0e:62
inet addr:192.168.1.252 Bcast:192.168.1.255 Mask:255.255.255.0
UP BROADCAST RUNNING MULTICAST MTU:1500 Metric:1
RX packets:902097 errors:0 dropped:0 overruns:0 frame:0
TX packets:432782 errors:0 dropped:0 overruns:0 carrier:0
collisions:0 txqueuelen:1000
RX bytes:203759013 (194.3 MiB) TX bytes:71615701 (68.2 MiB)

eth0:1 Link encap:Ethernet HWaddr b8:27:eb:a2:0e:62
inet addr:192.168.1.248 Bcast:192.168.1.255 Mask:255.255.255.0
UP BROADCAST RUNNING MULTICAST MTU:1500 Metric:1

We can see the interface is up and running, and should be able to ping the IP that we've added

Read more…

Keeping Hitcounts accurate when using an NGinx Caching Proxy

In previous documentation, we've configured sites to use NGinx as a Reverse Caching Proxy, leading to hugely improved response times on popular content. We've also implemented a custom configuration so that we can refresh the cache periodically, ensuring that dynamic content (such as Twitter modules) updates.

One thing we haven't done as yet, though, is to address the issue of internal hitcounts. We've looked specifically at using NGinx with Joomla, and noted that a side effect would be inaccurate hitcounts displayed within Joomla (which remains true even when using the internal page caching).

In this documentation, we'll be implementing a small script to ensure that hits served from the cache are still recorded within Joomla (or Wordpress, Drupal - whatever you happen to be using), albeit a little while after they happen.

Most people won't need a realtime view of hits (if you do, you'll need a different implementation to the one we're going to develop), so we're going to have the hitcounts update hourly.

Put simply, the aim is to parse NGinx's access logs and place a cache bypassing request for each cache hit that we find - as we're running hourly we'll only process requests which occurred in the last hour.


Read more…

CentOS: Using NGinx as an SSL Reverse Proxy for Apache

A little while ago, I published a guide to configuring NGinx to act as a Reverse Proxy for Apache. Although it was briefly mentioned, we never went through the steps necessary to configure NGinx to work in this manner for SSL connections - we simply left Apache listening on port 443.

This documentation details how to go about configuring NGinx to handle your SSL stuff as well. It assumes you've already generated CSR's and got the SSL certificate to use (presumably because they're already being used by Apache).


Read more…

PHP GPX Ingest

GPS eXchange format files (GPX's) allow you to record data from your Global positioning system for processing/import into other systems.

The PHP GPX-Ingest class allows you to import basic GPX files and converts them into an object for easy data retrieval. In the process of doing so, it also generates basic statistics such as average speed, number of track points and journey length.

The resulting object can be exported as a JSON string for easy storage and re-import back into the class at a later date (perhaps to extract more information).

This documentation details how to include and use the class in your project.

PHP GPX-Ingest is licensed under the GNU GPL V2 License.


Read more…

Joomla and NGinx Reverse Proxy Caching: Keeping your dynamic content fresh

We've placed a caching NGinx reverse proxy in front of our Joomla site, but haven't yet addressed the issue of the content that we do want to remain dynamic. We might, for example, have a module such as mod_GoogPlusFeed embedded on a number of pages, but with the configuration we've used so far, this won't update until the cached copy has expired.

In this guide, we're going to walk through the few easy steps to ensure the content is regularly updated - without undermining what we were originally trying to achieve - fast response times.

The primary basis of what we're going to do is very similar to Dealing with Slow modules and Caching, so much so that some of the set up is the same


Read more…

Making your Joomla Site Fly with NGinx Reverse Proxy Caching

I've written previously about configuring NGinx to act as a reverse proxy for Apache, as well as some of the specific tweaks you need to make if you're serving a Joomla! based site. In this documentation, we're going to look at how to use NGinx's Reverse Proxy caching feature to make your site really fly.

There are a small number of technical hurdles which we'll overcome to ensure that the user is experience is fast and smooth without losing interactivity on those sites which demand it. 


Read more…

Transcoding files ready for HTTP Live Streaming on Linux

HTTP Live Streaming (HLS) is an IETF draft standard created by Apple Inc. It's use is pretty widespread, although it was primarily designed to allow video to be easily delivered to iOS devices it works well with a wide range of clients. Later versions of Android support it, as do players like VLC.

Unfortunately, a lot of the tools for creating (and testing) HLS streams are created and released by Apple. Unless you develop for iOS devices, you probably lack a developer login!

It's actually pretty easy to set up at a basic level. In this documentation we'll be looking at what HLS is, and how to prepare video for transmission using HLS.


Read more…

Configuring NGinx to act as a Reverse Proxy for PHPMyAdmin

In a previous post, I detailed how to Use NGinx to serve static files and Apache for dynamic as well as the minor tweaks you need to make to have it work nicely with Joomla.

One thing I didn't cover, though, is setting up PHPMyAdmin. This documentation isn't going to go into the detail of installing and configuring PHPMyAdmin as there's plenty of that available elsewhere on the web. What we will discuss, though, is the NGinx configuration changes you need to make to have the connection reverse proxied to Apache.

These steps only really apply if you've gone for a system-wide installation of PMA. If you've unpacked into a web-accessible directory then you probably don't need to make any changes!

Read more…

Checking for Outdated Joomla Extensions on your server

When you're managing Joomla sites it's reasonably easy to keep track of updates, especially if you use something like Watchful to help you. When you're running a server and only managing some (or none) of those sites, it becomes a little more difficult (especially on a busy shared hosting server).

It's quite easy to shrug and say 'Not my site, not my problem', but the simple fact is that it is. The second someone manages to compromise one of the sites you host, they're going to try and find a way to run arbitrary code, once they've done that they'll try to run an auto-rooter. If they succeed, it's game over for everyone you host!

The extension that always comes to mind, is the Joomla Content Editor (JCE) as they had a nasty vulnerability involving spoofed GIFs some time back. You'd hope that everyone would have updated by now, but there still seem to be a lot of sites running versions older than 2.1.1!

In this post, we'll be creating a script designed to automatically check every one of the sites you host for a version of JCE older than the latest. Adjusting it to check other extensions is easy, so long as that extension has an update stream.

Read more…

RemoteHashStore Documentation

RemoteHashStore is an API designed for use by the PHP Changed Binaries monitoring script. It's function is to simply maintain a database of file hashes and compare those hashes against those submitted when checking files. This documentation relates to the client included in the PHP Changed Binaries system. See the relevant documentation if you're attempting to build a client for the RemoteHashStore API (Coming Soon!).


Configuration

When subscribing to the RemoteHashStore API, you'll have been provided with a security key and your configuration settings.

Read more…

PHP Changed Binaries

PHPChangedBinaries is a simple server monitoring script. It's designed and exists to do one thing - detect and notify when system files change. 

I've been running a very similar script for years, but in the wake of CDorked/DarkLeech decided it needed a refresh. The script works by generating checksums for all files within pre-configured paths (you can add more through the configuration file). These are then checked against a stored hash to see if anything has changed - if it has, the system admin is alerted. 


Installation

Just download and extract the zip file (coming soon), or clone from the PHPChangedBinaries GitHub Repo.

Mode of Operation

There are two main modes of operation - LocalDB and RemoteHashStore. The default behaviour is LocalDB.

Read more…

mod_yourData

mod_yourData is a Joomla! module allowing you to show site visitors exactly what data your site is storing within their browser. It includes support for Cookies, Session Storage Objects and Local Storage Objects. Given ever-increasing awareness of Privacy online, it's important that sites are as transparent as possible.

The ideal use of this module would be to assign it to a custom position and then include with your site's Privacy statement using Joomla's LoadPosition plugin.

This page is the user documentation for the module, you can also view the Demo here

Installation

Installation of the module is identical to any other Joomla extension - use Extension Manager! You'll need either a Joomla! 2.5 or a Joomla 3.x site - this module does not support Joomla 1.5!


Configuration

All configuration takes place through Module manager, and the following options are available in the current version

Read more…

Setting up Xen on Ubuntu 12.04

In order to be able to run some destructive testing on customer's systems, I needed to set up virtual servers. The hardware I have spare doesn't have virtualisation hardware, so KVM is out. Due to time constraints, it means my usual choice of CentOS is out (as RH have dropped support for Xen in RHEL6 and I lack the time to risk delays).

So, I figured I'd use Ubuntu 12.04 (Precise Pangolin) for my Dom0.

The hardware is an old HP G3 with dual Xeon processors and 3GB RAM. It's never going to be much use for testing dedicated servers, but as a lot of VPS configurations are set to 1 core/ 1GB RAM it just about passes the mark.

This documentation details the steps I took to get Xen installed and set up - every step listed can be run via SSH (assuming you do a net install of the base system), but be aware that if something goes wrong you might need physical access to the system to resolve it.


Read more…

Enabling SRS on a CPanel Server

The default MTA on a CPanel server (Exim) has supported both the Sender Policy Framework (SPF) and the Sender Rewriting Scheme (SRS) for quite some time. Unfortunately, whilst CPanel provides configuration options allowing you to enable and configure SPF, the same cannot be said for SRS.

This can cause a major headache if you have set-up mail forwarders on your system. This documentation details how to go about configuring SRS.

Read more…

CentOS: Using NGinx to serve static files and Apache for dynamic

Apache is a great web-server, but it has a pretty heavy memory footprint. It can get quite restrictive quite quickly, especially if you're on a system will limited resources (given how many people now run on a VPS, and the poor disk IO of these systems it's all the more important - swapping is slow).

The way around it, is to configure your system to use NGinx as a reverse-proxy. Depending how many virtualhosts you have, you can make the changes almost completely transparently within about 10 minutes.

Pre-Requisites

First, we need to be able to install NGinx, which means setting up the EPEL repo (if you already have it enabled, skip this step)

CentOS 5.x

http://dl.fedoraproject.org/pub/epel/5/x86_64/epel-release-5-4.noarch.rpm

CentOS 6.x

rpm -Uvh http://dl.fedoraproject.org/pub/epel/6/x86_64/epel-release-6-8.noarch.rpm

Now that the repo is installed, we need to install NGinx

yum install nginx


Read more…

Installing FFMpeg on CentOS 5

I'm not actually a huge fan of running things like ffmpeg on servers without good reason, but the popularity of extensions such as hwdMediaShare means that sometimes you have to install it.

Normally, it'd be a simple yum install ffmpeg but as it's not really server software it's not in the default repositories, this documentation explains the steps needed to install (without compiling from source). It's CentOS 5 specific, but should actually apply to 6 as well so long as you add the 5 specific repos.

 First we need to add a couple of repositories

nano /etc/yum.repos.d/dag.repo [dag]
name=DAG RPM Repository
baseurl=http://apt.sw.be/redhat/el$releasever/en/$basearch/dag
gpgcheck=1
enabled=1

Next we grab the RPM

rpm -Uhv http://apt.sw.be/redhat/el5/en/x86_64/rpmforge/RPMS//rpmforge-release-0.3.6-1.el5.rf.x86_64.rpm

For some, running yum install ffmpeg ffmpeg-devel will now be successful, for others there'll be a dependancy issue with libedit. If you fall into the latter group, try the following steps

#Add the EPEL Repo
rpm -Uvh http://dl.fedoraproject.org/pub/epel/6/x86_64/epel-release-6-8.noarch.rpm
yum install libedit ffmpeg ffmpeg-devel

That should be job done. Of course, if you are wanting to run HwdMediaShare you'll probably also want to run

yum install mencoder

Joomla Performance Tweaks for Busy Websites

Joomla! now runs a fair proportion of websites, and it's interface obviously appeals to a great many users (over 30 million downloads as of April 2012). For big busy sites, however, the performance isn't always as good as it could be. It's not bad, by any means, but can certainly be improved upon.

To clarify: by busy, I mean numerous visitors all hitting at more or less exactly the same time.

Aimed at developers and owners of large Joomla sites, the tweaks in this documentation will help you improve the performance of your site. However, it should be considered advice, and not a step-by-step instructional, if your site is that busy, the database tweaks in particular may actually hinder performance slightly.

If visitors are reporting long load times, especially during busy periods, then these tweaks may be of use to you.

Read more…

Allowing File Uploads direct from Dropbox

It's been over 3 months since Dropbox announced the availability of 'Chooser', a simple way to allow users to upload files to your site direct from their Dropbox, but I've not seen it in use anywhere. That's a little dissapointing really, partially because it's incredibly simple to use and implement, but also because I was really hoping it might prompt some of Dropbox's competitors to create something similar.

It makes life a lot easier for your users (especially those who want to upload from a *cough iOS* device with file uploads disabled ) and the hassle of setting it up is minimal.

In this post, I'll be showing how to implement the Dropbox chooser into a simple PHP site

Read more…

Configuring Postfix to automatically forward mail for one address to another

There seem to be a number of people searching for how to do this, and from what I can see there's very little quick and easy documentation on the net. You've got a server, hosting a website (for example) for example.com.

You want the server to accept mail for example.com but to automatically pass the mail onto a different address.

Assuming you're running Postfix, it's as simple as the steps below

First we make sure the virtual mappings file is enabled

nano /etc/postfix/main.cf 
# Scroll down until you find virtual_alias_maps

# Make sure it reads something like
virtual_alias_maps = hash:/etc/postfix/virtual
# We also need to make sure the domain is enabled
virtual_alias_domains=example.com

Save and exit, next we add the aliases to our mapping file

nano /etc/postfix/virtual 
# Forward mail for admin@example.com to jo.bloggs@hotmail.com
admin@example.com jo.bloggs@hotmail.com

Simple! And if we want to send to two different addresses at once, we just specify them

admin@example.com  jo.bloggs@hotmail.com jos.wife@hotmail.com

 Finally, we just need to create a hash (actually later versions of Postfix don't require this)

postmap /etc/postfix/virtual

It's exactly the same principle as passing mail into a local user's mailbox.

Linking a Git Repo with Pivotal Tracker

Everyone seems to use GitHub nowadays, but occasionally you want a private repo (without paying), so you set up a local Git repo instead. The problem being, you often lose the integration with the other tools that you use to manage projects. Git has the ability, but it is somewhat reliant on you having the relevant scripts available (such as post-receive).

This documentation details how to configure your Git repo to link up with Pivotal Tracker.

Pivotal Tracker is a project management system designed around Agile methodologies, it's not free but it's not particularly expensive in the scheme of things. It's certainly a helpful tool for large projects, and GitHub has the relevant integration available, allowing you to display commits as a comment on a story.

 Unfortunately, for whatever reason, they don't seem to support ordinary webhooks, having opted for an XML API instead, so we need a custom post-receive script.

First we need to fulfil a dependency of my post-receive script, a modified version of dict2xml, so run the following

wget "https://github.com/bentasker/dict2xml2/raw/master/dist/dict2xml2-0.1.tar.gz"
tar xvzf dict2xml2-0.1.tar.gz
python setup.py install

My modified version of dict2xml is now installed. Now, we're going to setup a new repo (skip this step if you already have one)

mkdir mynewrepo
git init

Now we want to add the post-receive script to the repo's hooks

cd .git/hooks/
wget -O post-receive "https://raw.github.com/bentasker/notify-webhook-pivotal-tracker/master/notify-webhook-pivotal-tracker.py"
chmod 755 post-receive
cd ../..

Finally, we need to set some configuration options.

git config hooks.webhookurl "http://www.pivotaltracker.com/services/v3/source_commits"
git config meta.apikey "YOURKEY"

If your commits are publicly available you can add the URL (the commit ID is substitued for %s to whatever you specify) with

git.config meta.commiturl "yoururl/%s"

The next time you make a commit, it's details will be pushed to Pivotal Tracker. If the commit message contains a story id (in the format [#id] i.e. [#123456]) a comment will be added to that story, if you're adding to a remote repo, commits will be sent whenever you push.

You can also change the status of a story with your commit message, see the Pivotal Tracker API documentation for more information.


Read more…

BGitHub Feed

GitHub Feed is a simple module designed to call the GitHub API so that you can display the latest commits to a repository on your Joomla! site. During development of the module, the ability to optionally display a list of issues was added, as was the ability to display a (very) basic profile for a single user.

This documentation details how to configure mod_BGitHub_feed


Demo and Purchase

You can view a demo on my demo site and can purchase from my Shop.

Installation

Install the module as you would any other Joomla! extension.

Module Configuration

Module configuration parameters are found in the right-hand pane (as with any other module)


Read more…

Introducing PHPCredLocker

PHPCredlocker is an Open Source(GNU AGPL V3) credentials locker written in PHP. Featuring strong encryption and a paranoid approach to security, the system has been designed to prioritise the secure storage of credentials over all other considerations.

I'm not an interface designer (not by a long shot) so the system has been designed to be templatable by those who know how to make things look nice!


Read more…

Installing PHPCredLocker

 This documentation details how to install PHPCredLocker, but there are a few pre-requisites

  • MySQL (with an empty database already created)
  • PHP > 5.2 (5.3 recommended as you can use OpenSSL instead of MCrypt)
  • SSL certificate installed (optional, but highly recommended)

So long as you satisfy these requirements, you should be ready to install. Grab PHPCredLocker from GitHub


Extract the archive into a directory on your webserver.


Permissions

Permissions may be correct straight away, but it's unlikely. Many systems will use 755 permissions, but for security reasons we cannot allow this (do you really want to allow all users to read your crypto keys?). So set the following permissions recursively (whether by using chmod or in your FTP/File Manager)

  • /conf 760
  • /plugins 760
  • /sessions 760

Make sure the above directories (and their contents) are owned by whichever user your webserver runs as (if you use CPanel it'll generally be the same user as you log into CPanel as.). This may be nobody, apache, root (if so, you've got problems) or some other user (if you have suExec enabled).

Note: There's no reason you can't set all the PHPCredLocker files/directories to 760, but the ones listed above must be set to deny access to users who are not either the owner or part of the owning group - you could also deny access to group if you wished.

Read more…

Configuring Postfix to block outgoing mail to all but one domain

This is so simple to do, but I have to look it up every time I need it (not something that comes up regularly!);

When configuring a development server, you may find you have a need to ensure that emails will not be sent to any domain except those you explicitly permit (for example if you're using real-world data to do some testing, do you want to send all those users irrelevant emails?).

This documentation details how to configure Postfix on a Linux server to disregard any mail sent to domains that are not explicitly permitted.


Read more…

Magento: Object __tostring() cannot take arguments

I came up against this issue in Magento earlier.

Method Varien_Object::__toString() cannot take arguments

There's quite a lot of documentation about this on the net, so really this post is more for my own reference should I hit up against it again!


Older versions of Magento require PHP 5.3.2, which is great unless of course it turns out that 5.3.2 has security vulnerabilities in it. So, the easy solution of not upgrading PHP can't be used (wouldn't recommend this even if there weren't vulns personally).

So what we've got to do instead is get down and dirty with the code. Actually there's two things to change, so it's not really the end of the world!

Open file lib/Varien/Object.php

On or around line 488 you should see

public function __toString(array $arrAttributes = array(), $valueSeperator=",")


We simply need to change the name of the function to __invoke, so

public function __invoke(array $arrAttributes = array(), $valueSeperator=",")


If you load the page now you'll probably get an error about too many redirects, so we need to replace use of split() with explode().

Open app/code/core/Mage/Core/Controller/Request/Http.php

On or around line 274 will be

$host = split(':',$_SERVER['HTTP_HOST']);

change this to

$host = explode(':',$_SERVER['HTTP_HOST']);


Now you should find your site is working. Honestly, it's pretty poor when your software relies on a specific minor release of PHP, but I guess if a major change is made between minor releases what are you going to do? The latest version fixes this though, so if upgrading Magento is an option for you, it's worthwhile.

Finding the cause of high CPU utilisation on Linux

We've all had it happen from time to time, suddenly sites on a server we manage appear to have slowed to a crawl. Having logged in you take a look at the running processes to find the cause. 9 times out of 10 it's something like a backup routine overrunning, so you kill the task and everything's OK again.

What do we do, though, if that's not the cause. It can sometimes be difficult to narrow down exactly what's causing it if the process list shows everything's currently OK. The slowdown may only kick in for a few seconds, but the perfectionist in us still needs to know what the cause is so we can mitigate it (if it's a particular page on a particular site, what happens if it suddenly gets a lot of hits?)

This documentation details ways to monitor usage without needing to spend all day looking at top. The main aim being to try and identify which process is responsible to then dig a little further.


I'm assuming you've already done the basic investigation, top iostat etc.  This is more about how to implement logging to try and pick up the longer term issues.


The first thing to do is to set up a script found on UnixForums, and make a few tweaks to iron out a couple of minor bugs

#!/bin/bash
export fa=/tmp/ps.a.$$ fb=/tmp/ps.b.$$
export PS='aux'
ps -fp$$ | read zh # capture ps header
ps $PS | sort >$fb # prime the comparison

while [ 1 ]
do
sleep 60
mv -f $fb $fa
date
ps $PS | sort >$fb
echo "$zh"
comm -13 $fa $fb | grep -v '0:0[01] '
echo
done

The script takes the output of ps and then takes another to compare. It strips out any processes that are only using the CPU for 0 - 1 seconds (as they're not a major concern) and then spits out details of the changed processes.

To be of real use we want to leave this running for quite some time, preferably logging to a file, so assuming we saved the script at ps_monitor.sh we run

ps_monitor.sh > ps_log.log

We'll then be building a historic log, but probably don't want to have to read it all manually. Given the format it gives us we can check for excessively high usage another way. Create a BASH script called parselog.sh

#!/bin/bash

# Get the filename to read from the arguments
export FILENAME=$1
export MAXLIM=30

echo "USER PID %CPU %MEM VSZ RSS TTY STAT START TIME COMMAND"

while read -r a
do
if [ "$a" != "" ]
then
CPUUSAGE=$( echo "$a" | awk -F\ '{print $4}');
echo $CPUUSAGE | grep ":" > /dev/null
if [ "$?" == "1" ]
then
ABOVEMAX=$( echo "$CPUUSAGE > $MAXLIM" | bc );
if [ "$ABOVEMAX" == "1" ]
then
echo $a | sed 's/ / /g' >> /tmp/pslogresults.$$
fi
fi

fi
done < $FILENAME

cat /tmp/pslogresults.$$ | sort -t" " -k 3 -r
rm -f /tmp/pslogresults.$$

To run the script, we simply invoke it (you've already made it executable, right?) and pass it the name of the file we directed our output to in the earlier command. So in this example we'd run

parselog.sh ps_log.log

Although not pretty, this will output a list of all processes recorded as having a higher CPU utilisation that that specified in the parselog script. You may find (as I did) that one instance has a rediculously high usage (90%) so you'll then be able to go and take a look.

Keep an eye out in the original log file for signs of infinite loops as well, but these two scripts can be very helpful in tracking down errant scripts that are hogging resources.

intel_do_flush_locked on Kubuntu 12

A lot of people have updated to the latest build of Kubuntu, but those with Intel graphics cards may be finding that KWin crashes regularly. This documentation details how to identify whether it's an issue with intel_do_flush_locked, what this means and how to resolve it until an official fix comes out.


Firstly wait until KWin has crashed (your windows will lose their headers and your taskbar will dissapear), based on the systems I've seen exhibiting this issue it won't be long.

Now press Ctrl-Alt-F2 to switch to a virtual terminal.

Login using the same username/password you log into KDE with.

Run the following commands

export DISPLAY=':0.0'
kwin

You'll see some output. Now press Ctrl-Alt-F7 to switch back to KDE. You should have everything back. Do whatever you were doing until it crashes again.

Ctrl-Alt-F2 to switch back to the VT. Now look at the output, in most cases the last error will be

intel_do_flush_locked failed: Invalid Argument


What causes it

Basically, the call 'intel_do_flush_locked' isn't supported in earlier kernels (such as the one that ships with K/Ubuntu), so the system is trying to run a command that just doesn't exist (in simple terms).


Temporary Fix

To get around it, we need to disable OpenGL as most of these calls are coming through MESA. So on your KDE desktop

  • K Menu
  • System
  • System Settings
  • Desktop Effects
  • Untick Enable Desktop Effects on Login
  • Choose Advanced tab and change Compositing type to XRender
  • Save/Apply
  • Log out and log back in (or restart your machine if you want)

The issue should have gone away. Hopefully a kernel update will be out soon which will include the missing call. Until then unfortunately it means you have to cope with minimal or no desktop effects.


Creating an IPv6 Tunnel on Linux

RIPE, the European internet registry has started heavily rationing IPv4 addresses, meaning that the day of IPv6 only connections is fast approaching. BT don't yet support IPv6 on their connections, but I need to be able to use IPv6 to help ensure that servers are correctly set up to handle IPv6 only traffic.

So, I need to create an IPv6 over IPv4 tunnel.

This documentation details the steps to do this using Helium Electric's (free) tunnelbroker service


Firstly we need to sign up for a free account at http://tunnelbroker.net. Once your username and password have been emailed to you, login and start the process of creating a tunnel. If you're on a BT connection behind a BTHomeHub you're going to hit issues almost straight away!

The BTHomeHub doesn't respond to WAN Side ICMP echo requests (Pings) and there's no way to configure it to do so. You'll need to put one of your machines into the DMZ so that tunnel broker can check your IP. To do so

  • Browse to BTHomehub.home
  • Click Settings
  • Enter your Administrator password
  • Click Advanced Settings
  • Click Advanced Settings again (why do BT make us click twice?)
  • Click Port Forwarding
  • Click DMZ
  • Set the radio to Yes and select the machine you're currently on
  • Click Apply

Now Tunnelbroker should be able to ping your machine, so continue with the set up process. Once the tunnel's created, make a note of the settings you are given and then run the following set of commands from a console

Change the addresses to those that you were given

# replace 216.66.80.26 with the Server IPv4 address you were given
# Replace 109.151.91.144 with the Client IPv4 address you were given
ip tunnel add he-ipv6 mode sit remote 216.66.80.26 local 109.151.91.144 ttl 255
ip link set he-ipv6 up

# Replace 2001:470:1f08:4cc::2/64 with Client the IPv6 address you were given
ip addr add 2001:470:1f08:4cc::2/64 dev he-ipv6
ip route add ::/0 dev he-ipv6
ip -f inet6 addr

In theory you should now be able to ping using an IPv6 connection

ping6 ipv6.google.com

Did it work? No it didn't for me either at first! (Network is unreachable).

I found two things - first that my machine has to be in the DMZ as the HomeHub won't route protocol 41 (I'd taken it back out of the DMZ once the tunnel was created on tunnelbroker), but also that the routes created above didn't seem to work.

So what I did was to remove all the routes

# I ran each of these twice

ip -6 route del 2001:470:1f08:4cc::/64
ip -6 route del default

Now I was able to use ifconfig to set things up (the commands above helpfully created the sit devices for us!). I did originally try re-adding the routes using ip but received errors

ifconfig sit0 up
ifconfig sit0 inet6 tunnel ::216.66.80.26
ifconfig sit1 up
ifconfig sit1 inet6 add 2001:470:1f08:4cc::2/64
route -A inet6 add ::/0 dev sit1

Following this I was able to run

ping6 ipv6.google.com

and get a response!

Browsing to http://www.whatsmyipv6.org/ also showed that I was connecting via IPv6.

Now I can go and add some AAAA records for websites, as I'm able to check that the sites/servers are actually working with IPv6 rather than having to click and pray.


Update: Once the tunnel is established you can move the machine out of the DMZ. It seems the HomeHub will route the packets if the state is ESTABLISHED. You'll need to move back into the DMZ if you want to re-connect (say after a reboot) but it's better than leaving a client in the unprotected area the whole time (though you are running a software firewall, aren't you!)

Howto root the Samsung Galaxy S2 from Linux

One of the first things I do when I receive an Android phone is to root it, primarily so that I can use OpenVPN but it does carry some other benefits (including getting rid of the rubbish the carrier installs on your behalf!). This documentation has been sitting in my to-do pile for a little while, but for any looking to root a Samsung Galaxy S2 from a Linux machine, I hope it's of help (I know my article on rooting the Sony Xperia has been well visited!). 

Read more…

Mod_GoogPlusFeed

mod_GoogPlusFeed logoGoogle+ Feed (Mod_GoogPlusFeed) is a module designed to embed your Google+ posts into a Joomla site in the way that mod_btwitter does for Twitter. The core principle of the design is that it shouldn't contain un-necessary chrome and shouldn't slow page load.

The module can also display all posts within a Google Community - Simply specify the community ID instead of a user ID!

This documentation details how to configure mod_GoogPlusFeed


Demo and Purchase

A demo is available on the Demo Site and can be purchased from my shop.


Installation

Install the module as you would any other Joomla! extension


Module Configuration

Module configuration parameters are found in the right-hand pane (as with any other module)


Read more…

Unable to check for Euro Symbol in POST data

I came across an interesting issue this week, having created a form to submit data I then needed to check against stored values to pre-populate fields if a user had already completed the form. Pretty simple stuff really, not much more to it than

?>
<input type="checkbox" value="$val" <?php if ($stored == $val){ echo " checked"; } ?>
>

But, I found that where the euro symbol (€) is concerned, things can get quite difficult. 

This documentation details the issue I found and how to work around it.

In theory, the code should work in the way this next block does

$val = "&euro; 300"; $storedval="&euro; 300";
if ($val == $storedval){ echo "Yay"; }
// Outputs Yay!

Now where the issue arises is that the value has been submitted via POST (may also affect GET requests as well, I've not got as far as checking). When submitted the euro symbol is converted to %80. No major issue there, that still correlates to the euro symbol, but for some reason PHP was converting that into a Euro symbol using an encoding not supported by HTML Entities (I can't tell which though).

What that meant was the result of running

htmlentities($_POST['eurofield']);

Was that I simply got a euro symbol back, whatever encoding I specified afterwards. I've had a similar issue with url decoding of post data in the past, so implemented a similar fix.

function FixPostVars(){
// Get the raw post data $postdata = file_get_contents("php://input");
// Check for %80
if (strpos($postdata,"%80") !== false){ // It exists so do something with it
// Seperate the pairs $pairs = explode("&", $postdata);
$vars = array();
// Cycle through each foreach ($pairs as $pair) {
$nv = explode("=", $pair);
// Check for the euro if (strpos($nv[1],"%80") !== false){
// Get the field name $name = urldecode($nv[0]);
// Make the change $newval = urldecode(str_replace("%80","&euro;",$nv[1]));
// Update the global $GLOBALS['_POST'][$name] = $newval;
}

}

}


Now it's just a case of calling the function once when loading a page that processes POST data.

I don't know if it's specific to the version of PHP or not, it's a pretty old version and unfortunately can't be updated for a number of reasons, but should anyone else encounter this issue that's the fix. 

$storedval = "&euro; 300";
echo $_POST['eurofield']; // Would output € 300
// Comparison would fail

// Fix the input data FixPostVars();
echo $_POST['eurofield']; // Would output &euro; 300 // Comparison would now work!
You can also convert it back, if you need to, by using html_entity_decode
html_entity_decode($_POST['eurofield']); // Should give €300

Creating a virtual Network Interface in CentOS 6

Sometimes you need to assign more than one IP to a server, even if it only has one NIC. To do so, you create a virtual (or aliased) interface, attached to the physical NIC.

This documentation details how to do this in CentOS5 / CentOS 6 (this also applies to CentOS7 if you're not using Network Manager).

 We'll assume that your NIC is eth0, if not simply substitute for the name of your NIC

cd /etc/sysconfig/network-scripts

# Use the real NIC's details as a template cp ifcfg-eth0 ifcfg-eth0:0

# Now we need to make a few small changes nano ifcfg-eth0:0

# Change the file to contain the following (substitute your desired IP!)
BOOTPROTO=static
BROADCAST=192.168.1.255
IPADDR=192.168.1.99
NETMASK=255.255.255.0
NETWORK=192.168.1.0
ONBOOT=yes
TYPE=Ethernet

In essence, we're removing HWADDRESS and changing the IP to suit our needs. The next step is to restart the networking subsystem on the server. If our physical NIC uses DHCP we'll need to change BOOTPROTO from dhcp to static.

/etc/init.d/network restart


Read more…

OpenVPN on CentOS 6

Setting up OpenVPN is seldom complicated nowadays, but on CentOS it's far more straightforward than I've experienced on most other distro's.

This documentation details how to install and configure OpenVPN on CentOS 6

 Install and enable the epel repo's and then run the following

yum install openvpn 
cp /usr/share/doc/openvpn-*/sample/sample-config-files/server.conf /etc/openvpn/
nano /etc/openvpn/server.conf
# Change localserver to the IP of your machine # Exit and save (change anything else you don't want at the default)

# Handle keys mkdir /etc/openvpn/easy-rsa/keys -p cd /etc/openvpn/easy-rsa cp -rf /usr/share/openvpn/easy-rsa/2.0/* . nano vars

# Change the relevant vars (country, state etc) # Exit and save

# Now we're going to create a certificate authority ./clean-all ./build-ca
# Build the server certificate ./build-key-server server #You can replace server with a different name if you want to use one
# Build the diffie-hellman files (Used for key exchange) ./build-dh
# Copy the keys to the openvpn dir cd keys && cp ca.crt cert SERVER.crt key SERVER.key dh dh1024.pem /etc/openvpn/
# Build a key for a client # Note: If you want to password protect the key, use build-key-pass instead cd ..
./build-key BensPC
# Set up NAT iptables -t nat -A POSTROUTING -s 10.8.0.0/24 -o venet0 -j MASQUERADE

# Start the service
/etc/init.d/openvpn start

# If that worked without error, make boot automatically
chkconfig openvpn on

We're now ready to install on the clients, whether that be an Android phone, Windows or *NIX work stations etc. To do so, simply copy the client key (in my example it's /etc/openvpn/easy-rsa/keys/BensPC.key and BensPC.crt ) to the client and use with OpenVPN.

Don't forget to logon to your firewall/NAT Router and forward port 1194 to your OpenVPN server (if you left the defaults, the protocol will be UDP).

Virtualisation with Xen on CentOS 6.3

It's been a while since I've had to set up a virtualisation server, but today I needed to configure a brand-new install of CentOS 6 to act as a virtual host. The hardware doesn't have virtualisation support (an old G3) so I had to use Xen so that paravirtualisation was available (not currently supported by KVM). Oops, not so easy now that Xen isn't included by default, Red Hat having opted to use KVM instead.

Despite that, getting things set up isn't that hard, although not nearly as easy as it was when you could just

yum install xen

 This documentation details the steps you'll need to follow.

So let's start with a few basic pre-requisites;

yum install sanlock presto libblkid


Read more…

Dealing with Slow modules and Caching

One thing I often come across is sites that load slowly due to a single module needing to load data from an external source. Caching helps with this considerably, at least until the cache expires.

As a prime example, let's use a Twitter module. To load the feed data, the module needs to access Twitter's API. This happens when the page request is received by the hosting server, and one of two things will then happen. If the cache data exists and is still valid (i.e. hasn't expired) the page will load lightning fast.

Unfortunately, if the cache has expired, or just doesn't exist, the module will need to access Twitter's API. Occasionally the API runs slowly and so the user has to wait for your homepage (or whichever page the module is on) to load. This provides the user with a bad experience, made worse if the module doesn't actually form part of the core content that the user is (im)patiently trying to view.

This documentation details a quick and easy way to resolve this issue.

Read more…

mod_btwitter

mod_BTwitter is a simple module designed to embed a users timeline into Joomla based sites.mod_BTwitter logo At the core of it's design is the principle that there should be no un-necessary chrome and page load speed should not be adversely affected.

This documentation details how to use mod_BTwitter


Demo and Purchase

A demonstration of mod_BTwitter can be seen on the demo site and the extension can be purchased from my shop.


Installation

Install the module as you would any other Joomla component - with Joomla's Extension Manager.


Module Configuration

As with most Joomla! modules, configuration options are found in the right hand panes when editing the module.

Read more…

mod_lotto

mod_lotto (AKA LottoPredict) is a module for Joomla 2.5 onwards. It fulfils a range of functions including the display of recent results.

This documentation details how to configure the module to suit your needs


mod_lotto currently supports the following functionalitymod_lotto Screenshot

  • Display Latest Lotto Results
  • Generate a Lotto Lucky Dip
  • Allow a user to generate up to 10 lucky dips
  • List all Lotto results for a given month (defaults to current month)
  • Allow user to select which month to view results for
  • Check user specified numbers against last 6 months of draws (6 months being the limit for claims)
  • Display latest Thunderball results

In the future, mod_lotto will also support

  • Checking of Thunderball numbers
  • Generation of Thunderball Lucky Dip
  • Listing historic draws
  • All of the above for Euromillions
  • Possible support for other UK National Lottery games (Daily Play etc.)


Naming

The module is actually called mod_lotto but is often referred to as LottoPredict. This is because the module relies on the LottoPredict API in order to fulfil a number of its core functions.

Demo and Purchase

 A demonstration of mod_lotto can be viewed on the mod_lotto section of the demo site. The module can be purchased here.

Installation

Installation of the module is via the normal route: use Joomla's extensions manager and upload the relevant file.


Configuration

To be of any use, the module needs to be configured to display on the relevant page. Log into the Joomla back-end and select Extensions -> Module Manager.

A default module called 'LottoPredict' will have been created, but will be unpublished. Assign this module to pages as you see fit (don't forget to hit publish!).


Configuration Options

mod_lotto supports a range of configuration options, all accessible through the panes on the right when configuring the module.

Read more…

Retrieving Akeeba Backups from S3 on a space-limited website

Nicholas Dionysopoulos' Akeeba Backup is a fantastic tool, but what do you do if you're short of space on your hosting? If you're using 4GB of a 5GB limit, you won't have space to store the generated backup file.

The issue of configuring Akeeba to backup to S3 is well covered (Hint: if space is a real issue, enable 'Process each part immediately' and 'Delete archive after processing'), but what happens if you want to retrieve the backup for use elsewhere (perhaps to test Jupgrade on a localhost?). If your backup is 3.8GB you won't be able to use the 'Fetch back to server' option as you lack the space. Do you really want to sit and click each of the Part links to download the files?

This documentation details an easier route to downloading all the parts in one fell swoop (so easy, in fact, it's incredibly obvious when you think about it!).

If you haven't already, follow my instructions on Syncing your files with an S3 account on Linux.

Now, it's pretty simple to retrieve the files. We'll assume the following

  • S3 Bucket: mybucket
  • Directory: site-backups
  • Filename format: site-www.bentaskercouk-{date}.jpa
  • Directory to retrieve to: /var/www

Depending on the size of the backup parts you've opted to use, you probably have tens if not hundreds of backup files to download. Thankfully, we can retrieve them all in one fell swoop


cd /var/www
s3cmd get s3://mybucket/site-backups/site-www.bentaskercouk-20120627.*
wget http://bit.ly/L1VEo4 && unzip kickstart-core-3.5.2.zip

You may need to alter ownership/permissions so that the user running your Apache (or whatever) instance can read/write


chown apache:apache *

Finally browse to your server with a web-browser and away you go!


Note: If you do enable 'Process each part immediately' and 'Delete Archive after processing', Akeeba may report your backup sizes incorrectly. Although you'll get a minor panic when you see a 10MB backup instead of a 4GB one, it's nothing to worry about!

ProFTPD not working with FileZilla (Plesk)

So you've got a nicely configured server, slightly tarnished by the presence of Plesk but everything seems to be running well. Suddenly, you've got users complaining that they can't access the server via FTP.

You're running ProFTPD (as Plesk kindly installed it for you) and can log in from the CLI FTP client (on Windows or Linux), but can't get in using FileZilla, FireFTP or Internet Explorer. FileZilla is probably giving the error "Cannot Retrieve Directory Listing" but will have authenticated correctly just before that. For some, FileZilla will hang just after MSLD or LIST commands.

This documentation details how to resolve a common issue

Read more…

Handling Embedded Video and Proxies

I'm come across this problem quite regularly, but never think to write the steps down so have to think it all through every time! You've got a nice looking site and want to embed a video in it (say via YouTube). Unfortunately there's likely to be high footfall from those behind corporate proxies, and as a number of the embedded systems uses iframes, you end up with a nice error message slap in the middle of the page!

This documentation details a JS approach to handling this by hiding the iframe if the video doesn't load.

We could, create a proxy script that will effectively bypass some firewalls, but that's really not a good idea. At minimum you'll get blocked by a few businesses, or you may just find that you have astronomical bandwidth bills and high server load.

So instead we'll use JS to check whether or not the domain youtube.com is blocked. Sadly, a lot of browsers won't pass back an onerror event for iframes, so we need to do it another way.

So assuming we currently have the following in our markup


<iframe width="560" height="315" 
src="http://www.youtube.com/embed/fCIMYVOIokg" 
frameborder="0" allowfullscreen></iframe>


We need to add something from YouTube using something that does report back onerror. We can use an image for this, but its not always immediately obvious which one. Most of the images displayed are from Content Distribution Networks. The domain for the CDN may not have been blocked as administrators will often just block Youtube.com etc. But, one image that is always present is the Favicon. So we'll add favicon.ico


<iframe width="560" height="315" 
src="http://www.youtube.com/embed/fCIMYVOIokg" 
frameborder="0" allowfullscreen></iframe>
<img src="http://www.youtube.com/favicon.ico" 
style="width: 1px; height: 1px; display: hidden;">


We assign a small width and height as some browsers may not load the item if we use display none. Although the space will be occupied, it's only 1p x 1px so shouldn't be noticeable. Next we'll add some JS to finally do what we want (it really is this simple!)


<script type="text/javascript">

function youtube_borked(ele){
document.getElementById(ele).style.display = 'none';
</script>

<div id="YouTube1">
<iframe width="560" height="315" 
src="http://www.youtube.com/embed/fCIMYVOIokg" 
frameborder="0" allowfullscreen></iframe>

</div>
<img src="http://www.youtube.com/favicon.ico" 
style="width: 1px; height: 1px; display: hidden;" 
onerror="youtube_borked('YouTube1');">


It's a simplistic way of doing it, but it works. By calling a function, you've saved some typing if you need to call it more than once (put it in your sites main JS file). You could use a CSS class instead, but I've had problems with Internet Explorer in the past.


Using The Volvo 440 Diagnostic System


The Volvo 440 dates back to an era where Car manufacturers were actually helpful (or at least some of them were), and as a result has a built in Diagnostic system. No going to the Garage to have fault codes read, so long as you know how to use the system.

This article tells you exactly how to do just that!

Under the bonnet, just above the airbox should be a little black box with a white connector in it. Simply lift the top of this box up to open the Diag system. You should see an LED, a button and 7 holes (each numbered).

We'll discuss what each of these holes is in a minute, but let's get the important first steps down first so that you don't risk blowing your ECU!


Read more…

Resolving KDE issues with Dual Monitors

Quite a number of users are reporting issues with KDE4 forgetting monitor settings when the log out. The end result being whenever you log back in you need to sit and reconfigure KDE to make proper use of a dual-headed system rather than cloning the primary screen onto your second.

Although the issue is apparently fixed in KDE 4.6, many aren't running this version yet.

This documentation shows a workaround that can be used in order to get KDE to remember the settings.


Read more…

POST Data going missing in PHP

I came across an incredibly frustrating issue earlier today, whilst building a class to parse data and insert it into a database I discovered some serious data loss. Sniffing the traffic showed the data was being submitted, but when I tried to access it in PHP bits were missing!

Consider the following

Raw Post data: foo=blah+blah+blah&bar=This+is+a+block+of+text%0D%3Cbr%3EThis+is+line+2&zulu=bah

So in PHP, you'd expect that;

  1. echo $_POST['foo'] would give "blah blah blah"
  2. echo $_POST['bar'] would give "This is a block of text<br>This is line 2"
  3. echo $_POST['zulu'] would give "bah"

Unfortunately, this isn't the case! Instead number 2 returns "<br>This is line 2". How very frustrating, but thankfully I eventually found the solution

Read more…

Howto stop Ubuntu nagging you about Distribution Upgrades

It's a fairly common scenario, you've just got your system set up the way you like it and then there's a new release. Your update manager starts nagging that you should upgrade, no matter how many times you dismiss it it just won't get the message!


You can disable this using the method below, but don't stick on old versions for too long!


nano /etc/update-manager/release-upgrades
#change Prompt=normal to Prompt=never
Ctrl-X, Y

Job done, just keep in mind that you'll actually have to remember to upgrade! Standard updates and bugfixes will still come down, but upgrades to the next version of the distribution won't.

Registering Existing MySQL Databases in Plesk

Many businesses use Plesk to manage their webserver, what happens though if you import databases from the command line rather than through Plesk? The databases will be valid, and will work but won't be visible in Plesk (meaning no PHPMyAdmin access).

There are a lot of solutions to this listed on the net, but all either seem to carry the potential for extended downtime or are quite mandrolic. This document details an alternative method, which should hopefully leave downtime at less than a minute, but only applies to Plesk running with a MySQL server (usually on Linux or similar).

Read more…

Automatically clearing old emails using CPanel

Depending on the setup of your system, old emails can be a bane. If you forward a copy of all emails to a single account for retrieval by the MS Exchange POP3 connector, you'll experience issues when the other mailboxes become full (a lot of servers won't accept a wildcard redirect for email addresses!).

It's actually fairly simple to solve so let's take a look at a sample setup;


Mailboxes on Example.com

  • Ben
  • Postmaster
  • Brian
  • Bill


Mailboxes on Exchange

  • Ben
  • Brian
  • Bill


I've forwarding rules setup so that all mail is forwarded from Ben, Brian and Bill to the Postmaster mailbox. The POP3 connector then downloads from the Postmaster account (and deletes the retrieved mail) so that it can be distributed to the correct mailboxes on the Exchange Server.

The problem comes when mailboxes Ben, Bill and Brian on Example.com fill up and reach their respective quotas. At that point, mail will start bouncing back to the sender with "Mailbox full" messages. Not good!

Thankfully, it's actually reasonably simple to resolve.

  1. Log into Cpanel account for Example.com
  2. Choose Cron Jobs
  3. Create a new cron job (I selected to run weekly)
  4. As the command enter

find /home/example/mail///cur -name "*" -mtime +days -exec rm {} \;

But replace example with your Cpanel username, and days with the oldest email you want to keep (I want 21 days so simply enter 21).

Save the Cron job and leave it to it, as you're now done!


Note: You will receive error messages when a mailbox is already empty, the system will report that it's unable to delete an item because it is a directory. I find this a useful reminder that the job is executing, but if you find it annoying simply add "-type f" to the command so that it becomes;


find /home/example/mail///cur -type f -name "*" -mtime +days -exec rm {} \;

Couldn't really be much simpler once you know how to do it!


Automounting Samba Shares over OpenVPN

So you've got a working OpenVPN setup, but now you want to be able to access the Samba shares hosted on the remote network.

It's very easy to do manually, but most users don't want to have to learn to map network drives (or shudder use some of that commandline black magic). Thankfully, they don't need to as you can tell OpenVPN to do the legwork for them;


A minor downside is that this can't be configured on the server (which makes sense as the commands needed would differ between each OS), and so needs to be configured for each client.

Edit the clients OpenVPN Configuration file (if you followed my tutorial it's probably named client.ovpn) and add the following to the bottom;


route-up client_up.bat

Now open Notepad and enter the following


net use [Driveletter] \\[Server]\[Share]

Where Driveletter is the letter you want to use, Server the servername and Share the sharename;


net use J: \\Myserver\Someshare

Save this as client_up.bat in the same folder as client.ovpn. Now when you connect to OpenVPN this script will run and map the samba share to the drive letter you specified.


Read more…

OpenVPN on Windows 2003

We all know that Microsoft probably couldn't organise an orgy in a brothel, so I'm not sure why I was so surprised that their "Routing and Remote Access" service was interfering with other applications that may wish to add a route (in this case OpenVPN).

This tutorial will show you how to install and configure OpenVPN on Microsoft Windows 2003 (including Small Business Server).

Read more…

Removing pre-installed Apps from a rooted Android Phone

So I've got a newly rooted Xperia X8, and it's time to get rid of the useless apps that Three UK have decided to foist on users!

Irritating as it may be, thankfully it's an incredibly simple process!


The Apps I want to remove are;

  • Spotify
  • Roadsync
  • Foursquare
  • Postcard
  • Wisepilot
  • All other Three related garbage


There are but two requirements before we can begin the process;

  • Phone must be rooted
  • BusyBox must be installed (if you haven't installed it yet, grab it from Android Market)


Assuming the pre-requisites are fulfilled, go back to Android Market and search for Titanium Backup, there should be a free app called "Titanium Backup (root)". Download and install it, then once installation is complete run the app.


Note: You are more than able to brick your phone if you remove the wrong app. Be very, very careful!


  • Choose the button at the top - Backup/Restore
  • The Apps are listed in alphabetical order so scroll down to the first that you wish to remove (I hit Foursquare first)
  • Select the app and a dialog will appear, choose "Uninstall App"
  • Confirm that you wish to remove it (and you know the risks of removing the incorrect thing)
  • The App is removed, repeat for all the rubbish that your provider has installed!


Note: You are more than able to brick your phone if you remove the wrong app. Be very, very careful!

Finding the Application

Removing the application


Howto root the Sony Erricson Xperia X8 (Android 2.1) from Linux

I recently bought a new X8, and unlocked it from Three. Unfortunately, when branding the phone they decided to install all manner of crud that the user won't necessarily need. Apps such as Spotify load whether you want them to or not, and there's nothing you can do about it!

Well, nearly, you can root the phone and then uninstall the problem apps.

There's plenty of guides out there on how to root the X8 from Windows, but information regarding Linux and Mac systems is much harder to find! Let's begin;

  • Download and install the Android SDK
  • Create a folder (in your home directory) called X8_root
  • Download SuperOneClick (below) - Credit to XDA Developers
  • Save SuperOneClick to our new folder

Open a BASH shell and run the following commands

/home/$USER/X8_root
unzip SuperOneClickv1.9.1-ShortFuse\[1\].zip
cd SuperOneClickv1.9.1-ShortFuse\[1\]/

Now switch on your phones USB Debugging mode (Settings --> Applications --> Development --> USB Debugging)

Unmount the SD Card (Settings --> SD Card --> Unmount SD Card)

Connect your phone to the computer using the USB lead, when the phone asks chose "Charge Phone".

Now back to BASH;

adb push Exploits/psneuter /data/local/tmp/psneuter
adb push Root/su-v2 /data/local/tmp/su                          # See Note 1 below
adb push Root/superuser.apk /data/local/tmp/superuser.apk
adb shell
cd /data/local/tmp
chmod 755 psneuter
./psneuter

Once this has run, the adb shell will close and you'll need to reconnect;

adb shell
cd /data/local/tmp
mount -o remount,rw -t yaffs2 /dev/block/mtdblock0 /system
cat su > /system/bin/su
cat superuser.apk > /system/app/superuser.apk
chmod 06777 /system/bin/su
chmod 777 /system/app/superuser.apk
reboot # See Note 2 below

Assuming all went well, your phone is now rooted. When it reboots, you should see a new menu item called "Superuser". The easiest way to check that you've gained root access (as you'll probably need to install this anyway) is to access Android Market and install BusyBox. Once it's downloaded, run the BusyBox Installer app from your menu and follow the instructions, it'll soon tell you if you don't have root!

You can now enjoy the benefits of having root access, such as removing those irritating pre-installed apps!


Notes

  1. The Zip file contains three versions of su (su-v1, su-v2 & su-v3). I originally used su-v1 but couldn't gain root access, you may find the reverse. The easy way to find out is to run the command in Note 2, and if necessary adapt the push command to push one of the other versions
  2. To check that you've installed the correct version of su, you can run one other command before issuing the reboot command;
    su
    if you are returned to the shell, you are good to go and can run reboot. If, however, you receive an error like this

    reloc_library[1245]:  2381 cannot locate '_ZNK7android6Parcel15setDataPositionEj'...CANNOT LINK EXECUTABLE

    you need to use one of the other versions of su stored within the Root folder.
  3. Although I've not tested it, this process should work for Mac users as well, in fact with a little tweaking there's no reason it shouldn't work on Windows (although the ZIP file also contains the easy one-click method for Windows users)


File: SuperOneClick.zip

Archiving a large backup across multiple discs on Linux


Hopefully, we all back up our data, but what should we do once our data won't fit on our chosen media?


We have two options (as we obviously don't want to delete our data!)

  • Use a different backup medium
  • Split the backup across multiple volumes

Sometimes the former just isn't appropriate, as much because of the cost of harddrives vs Optical Media (i.e. CD's/DVD's).

This short tutorial will explain how to create a single backup archive, and then split it across multiple CD's/DVD's.


In this tutorial, I want to backup to DVD (as my photo collection would require more than 40 CD's).

So from BASH;


tar -cf Pictures_backup.tar Pictures/

split -d -b 4480m Pictures.backup.tar


This will then give you multiple files to burn to disc (each beginning with x). Burn these files with your favourite CD Burner

To restore the files, copy them all to one directory and then run the following


 cat * > Pictures_backup.tar

tar xvf Pictures_backup.tar


Read more…

A User's Guide to Data Security and Control

Data Security is the subject of renewed focus within society following some very high profile leaks of information. Worryingly, recent studies suggest that users fail to accurately appraise the value of the data they handle.

This presentation is part of the Virya Technologies free training selection and is intended to provide users with a basic introduction to the importance of Data Security.


You can download the presentation in the following formats;


page1
page2
page3
page4
page5
page6
page7
page8
page9

Howto Install the Realtek 8171 Wireless Driver in Linux

I was asked to install Linux on a brand new laptop today (yet another who doesn't like Win 7!), it was an Advent M100 which contains the Realtek SemiConductor 8171 Wireless Adaptor.

The card is detected by the kernel (on Kubuntu) but no drivers are available, so neither ifconfig or NetworkManager find the device.


It's been a while since I've had to deal with Linux not having drivers (nearly everything is supported now!) but there's no pain involved in resolving this one;

  • Go to www.realtek.com and locate drivers for the RTL8191SE-VA2.
  • Download the drivers onto your system (I plugged a CAT-5 into the laptop, but you could download on another system)
  • Put the tarball somewhere convenient (I tend to use ~/Programs/ )
  • Extract and install it:

    tar xvpzf rtl8192se-*.tar.gz

    cd rtl8192*

    # Next step needs to be as root, so either

    sudo -s

    # or

    su

    make && make install

  • The next time you reboot the system your wireless card will be detected.


Howto Encrypt your Harddrive in Microsoft Windows

Some versions of Windows 7 include Bitlocker, a utility which allows you to encrypt the system drive. This, however, is of little use to those not running the 'Ultimate' version of Windows 7. There is, however, a free alternative – TrueCrypt. TrueCrypt supports Windows 2000/XP/Vista and 7.

This walkthrough will show you how to encrypt your entire harddrive so that should your laptop be lost, an attacker will be unable to access your sensitive information (unless, of course, you left the laptop powered on!)


  1. Visit http://www.TrueCrypt.org and download the latest version

  2. Run the installer

  3. When asked, it's strongly recommended that you create a System Restore Point.

  4. Once installation has completed, run TrueCrypt

  5. Press the “Create Volume” button

  6. Select “Encrypt System Drive

  7. Choose “Normal

  8. Choose “Encrypt the Whole Drive

  9. Don't Encrypt the Host Protected Area

  10. Set Encryption Algorithm to AES

  11. Leave Hash Algorithm at the default (RIPEMD-160)

  12. Set and confirm a password (See Bootnote 1)

  13. Move mouse to help randomise the cryptographic pool (the more random your movements, the better)

  14. Set the Rescue CD to save to the Desktop (or somewhere you can easily find it)

  15. Burn the Image to CD (see here if you don't have burning software)- Bootnote 2

  16. Choose a Wipe mode (A higher number of passes is more secure, but takes longer. Do Not select 'No Wipe' unless you have had no sensitive files on the system yet)

    Enter TrueCrypt Password

  17. TrueCrypt will restart your computer

  18. Enter the password you set in step 12 (the system may take a couple of seconds to begin booting)

  19. TrueCrypt will load once the system is booted - Press Encrypt

  20. Leave the system to it (May take a few hours - Bootnote 3).


Read more…

Getting Started with Linux

I originally began the 'Getting Started with Linux" series in November 2006. Although a lot of the information is now outdated, thanks in part to work on User Interfaces, I hope the series will still be able to answer some of the questions that those new to Linux often have.


Originally six sections were planned but, unfortunately, I never found the time to write the final two;

  1. Introduction Part One - Why use Linux?
  2. Introduction Part Two - Hardware
  3. Getting Started With Linux Part One
  4. Installing Software
  5. Configuring Additional Keys on your Keyboard
  6. Window Managers and Desktop Environments

I also made a 'revision' script available here.

Howto use one instance of tcli for multiple Twitter accounts

This documentation details how to allow one instance of tcli (OAuth) to be used for multiple user accounts,

open tcli.sh (you can grab a modified version here) in a text editor and change the line

      
    source .tcli.rc to
        source "$TCLICONFIG"    


Pass the path to the appropriate .tcli.rc when calling the program;
        
    TCLICONFIG="/home/ben/OAuthprog1/USER1CONFIG/.tcli.rc" \
    ./tcli.rc -c statuses -s "tcli.sh rocks!"

Note: Remember to cd into the directory containing the Twitter Module. If for some reason you can not/would prefer not to do this every time. You can use a similar method to define the path to the programs;
Locate the line;
        source TwitterOAuth.sh    
and change to
    source "$OAUTH_PATH"/TwitterOAuth.sh    
Then open TwitterOAuth.sh and locate the line
        source OAuth.sh    
and change to
        source "$OAUTH_PATH"/OAuth.sh    
Then when calling tcli.sh simply pass the variable OAUTH_PATH;
        OAUTH_PATH="/path/to/OAuth" TCLICONFIG="/home/ben/OAuthprog1/USER1CONFIG/.tcli.rc" \
    ./tcli.rc -c statuses -s "tcli.sh rocks!"


Happy Coding!

An easier method of recovering deleted files on Linux

A little while ago I posted some Documentation on how to Recover Deleted Inodes on an Ext2 filesystem. After a self-inflicted disaster last night, I found an eaier way to recover deleted files. It also has the benefit of being largely filesystem agnostic, there have been reports that it doesn't work with ReiserFS but otherwise it can recover deleted files from almost any filesystem on any medium.

WARNING: The Steps Given in this Article are potentially Dangerous, Proceed at your own risk and read the Article in full before starting

Read more…

Republished: Verification, Validation & Testing

Originally published on Benscomputer.no-ip.org Jan 2010.


Verification, Validation and Testing has become an intrinsic part of the Software Development Life Cycle, the importance of Testing throughout an applications development has been recognised with most companies now designing their processes by using the 'V' Model.

Recognition of the importance of formal testing and planning is only a relatively recent development in comparison to the art of programming itself. Not so many years ago, software was designed on the back of a cigarette packet in the pub, and then implemented, there was litle to no documentation, and very little structured testing.

Contrary to Popular Belief, Testing is not just about seeing if the end product works, if Testers are involved as soon as the Initial Specification is written, they can begin to plan later tests and also pick up on requirements that may have been omitted from the Specification. If a requirement has been incorrectly stipulated, badly defined or omitted it is far more expensive to rectify once the Implementation stage has been passed.

Consider the old waterfall model;

Analysis and Design --> Planning --> Implementation and Execution --> Reporting --> Testing ----> End Product

Using this process map, Testing is left until the last minute, and any errors will require moving at least of a section back to the Analysis and Design section. If a programmer has misinterpreted a requirement, then the process must once again be moved back. Using the V Model combats this, allowing Testers to become involved in every aspect of the process, checking requirements are well defined, looking for bugs in the software etc.

Once the software is written, it needs to be tested and evaluated. Whilst programmers should run basic tests on their code, full testing should be implemented by an Independant party. Depending on the size of the ogranisation, there will probably be an Independant Test Team. Ths is done to avoid the bias felt by programmers towards their own code, there is often a stronger urge to show how good their code is than there is to actually find errors.

Once the code is in the hands of the test team, they will begin checking it for errors. First they will use Static Analysis to check the code itself. They should look for structural errors, where the coder may have forgotten to close an IF statement, or forgotten to Declare and Define a variable. This can be done manually or automatically.

The tool will also check for Cyclomatic Complexity (Count the 'Decisions' and add 1, should be less than 11), and various other errors that can be introduced. This type of testing is known as 'White Box' Testing as it requires the Tester to know and understand how the software makes the end product work.

In contrast to this, Black Box testing is conducted with no understanding of how the product works, just that it should. This type of testing is best conducted by someone who could use the product in future, the test design will stipulate what the Input Variables should be, and also what the expected output variables are. The tester would the proceed to test the item using methods such as Equivalence partitioning, Boundary Value Analysis or State Testing.

Whilst the term Equivalence Testing sounds quite complex, the actual procedure is relatively simple. For example a tester is provided with a box that will output "Valid" for any number between 1000 and 2000, and any numbers outside that range will produce an "Invalid" Output. To test the box using Equivalence Partitioning, the tester would enter a number less than 1000 (expecting an invalid output) a number between 1000 and 2000 (Expecting a valid output) and finally a number greater than 2000 (again expecting an invalid output). This simple, and reasonably obvious test, is Equivalence Partitioning.

A test complementary to this is Boundary Value Analysis, this tests the boundaries themselves so in the above test you would also enter 999 (should be invalid), 1000 (Should be valid), 2000 (Should be valid), 2001 (Should be invalid). When programming, the boundary values are often the source of an error, especially if the coder is tired. It is all to easy to forget to state that the value should be greater than OR equal to another value.

Not every application can be tested using Boundary Value Analysis or Equivalence Partitioning. Some applications just do not accept input in a range in quite the same way, some of these can be tested using State Transition Diagrams. Consider the CD Player below


OFF ----> Press Power Button ----> STANDBY ---- Press Play ----> PLAY
STANDBY <---- Press Stop ---- PLAY


Although a very simple example, it does show how each link between a state can be tested, and checks for other transitions can be made. For example if the CD Player is switched off, and I press the Play button, will it bypass the Standby state and start playing? Whilst a CD is playing, does it actually switch back to Standby when I press Stop?

State Transition diagrams are usually far more complex, but ideally you want to test every possible route through the systems states, it doesn't matter if you test each transition more than once, so long as they all get tested.

Of a similar ilk, is Decision Table testing. As an example - If it is a workday, John goes to work, but if it is not and it is early he will go fishing (But only if the weather is good). If it is late he will clean the house.

So we would draw this scenario out in the following table


Workday? T T T F F F T F
Early? T T F F F T F T
Good Weather? T F F F T T T F
Go to Work? T T T F F F T F
Go Fishing? F F F F F T F F
Tidy? F F F T T F F F


Each column contains a possible outcome, based on a simple True or False. In that example, we identified a missing requirement as the scenario did not state what John actually does if it's not a workday, is early but the weather is bad. You would then pass this information back so that the requirements specification could be updated. This is a very good example of exactly why Testers should be involved as early as possible in the development lifecycle.

Black box testing can also look at asthetic requirements, if the requirements say it should be in a brown 3x3 box, is it? If the specification is vague and states that it should be in a dark box, this can be reported back for clarification.


These forms of testing can be used throughout the lifecycle, ideally many of the tests will be designed as soon as the requirements specification is published. That way any vague or missing requirements will be identified as quickly as possible.

Once the software is actually written, each component of the software should be tested using the various techniques detailed above, and then an Integration test should take place. This is done to ensure that all the modules will work together, and largely focuses on the interfaces between each module, whether it be hardware or software.

Once this is done a System Test will take place, this helps to check that the intended environment for the software is suitable.

An acceptance test will then be run, aimed primarily at ensuring the system meets the specifications laid out in the relevant documentation, you may or may not invite the customer to participate in these tests. They will have a far keener understanding of what they require the system to do, and seeing a working system in test conditions will help to build confidence about the suitability of the product.

However, be aware that once the product is released to the customer, the number of bugs found typically soars. This is because end-users are ingenious at finding ways to break a system, and are using it with real world data.

So with this in mind, when should Testing end? Managers will refer to timelines and budgets, but that has little relevance. It depends on the risk involved in a failure, if the software is a 'critical system' then a failure could affect life and limb, if your system is a commerical game then the risk is not so high. No matter what the product, customers will be upset about any failure, but consider the real world implications, compare the Ariane V (caused by insufficient testing of software) to when MS Windows crashes. What has more of an impact?

The testing end point will be set based on this criteria, if it is a critical system then there should always be extra time and money available (there often isn't unfortunately). This point will be laid down in the Exit Criteria drafted at the beginning of Testing, depending on the type of product being made it will usually refer to the number of bugs found per week. So for example, once we are finding less than 10 bugs a week in software A, it is ready for release.

Even after the software is released, testing will continue. Regression testing is carried out whenever an update is applied, it tests the unchanged bit of the software to ensure that no new bugs have appeared, or been highlighted by the update (if this had been done on the Ariane V.....) Confirmation testing will be carried out once a bug has been fixed, simply to ensure that it has been, there is likely to be the heaviest workload during the beta stage of testing.

Beta testing is the stage that follows alpha testing (testing on the developers site), Beta testing takes palce with a select few customers on their own site, traditionally they often get the software for free as an incentive to help develop the application. This is, of course, not true in all cases.

In conclusion, each stage in the Software Development lifecycle should have an equivalent testing stage. One the Requirement specification is written, testers should be involved. Finding faults early saves money, especially if the fault is in the documentation that the programmers are working from. There are many forms and styles of testing, but no one test will test everything, different tests need to be designed. If timescales are running short, testers can try to find as many bugs as possible by using Defect Clustering (the theory that states that Defects are normally grouped, whether through an inexperienced programmer or due to a bottle of wine - 80% of your bugs will come from 20% of your code). Testing should not end until it's objectives have been acheived, whilst there is no such thing as error free code, the risk of failure must govern the level of testing.

Republished: Managing Change in an IT Environment

Originally published on Benscomputer.no-ip.org Aug 2009.

Whether it's a full network migration, or simply a change of Server Software, it is essential that any change is properly managed. Some changes occur after the IT department suggest them as the best course of action, whilst some are the result of managerial decisions. Whether it's to cut costs, to streamline the workflow or simply to acheive a more stable system, incorrect management of the change can be disastrous.

When preparing for the change, many people make the mistake of only planning for the change itself. You need to go further than that, plan the entire migration period. Create contigency plans, ensure that your disaster recovery plans are suitable for use with the new system.

This article assumes that as part of the change, you are installing a new managed network. If that's not what you are doing, the steps of planning are relevant, it's just that a number of the checks and possible deviations probably aren't.


There are a lot of decisions, and questions, involved in planning any change. To show just the tiniest percentage of them, written in a basic format, look at the paragraphs below;

If you are putting new Workstations onto desks, allot some time to make sure everyone clears space on their desk. Have you got enough power and network sockets to run two workstations side by side, if not, how long will the rollout take? Are you going to be sending workers home? Keep the end-user informed. Create a FAQ for users to read, detailing relevant bits of the new system. Do you really want users coming to find you on rollout day, just so that they can complain that the new PC's have Vista, and they're used to XP?

What you will do if it all goes wrong. what could potentially go wrong, and how you will deal with it? There are new workstations being installed but they've not all arrived, which ones are a priority?
One of the network points is faulty, are you going to halt the rollout whilst the socket is fixed, or do you have enough points in the room to use another, at least until the original is fixed.

Data needs to be migrated, users need to cease using their old systems, and begin using the new. How are you going to implement this change? If you do it without notifying users, they may update a document whilst you are transferring it. End result, they lose the changes, and come to you to fix it. Some users may not like the new system, and may continue using the old, how are you going to prevent this, at least until the old Workstations have been removed?

The block above, contains a lot of questions, with no answers. It also contains a tiny fraction of the questions that you would need to ask for any real change. Do you really want your thoughts to look anything like this on the day? Endless questions, with no time for even considering an answer. No, it's far better to do a little bit of planning.

Realistically, there is absolutely no way you can accurately plan a change without some form of paperwork being raised. Buerocratic though it is, planning your change in writing has a number of benefits;


  1. You don't have to keep every little detail in your head
  2. If you are unavailable, someone else can see the plan
  3. If things do go south, you can prove that you exercised due diligence
  4. The company is able to keep a record of how the change was supposed to happen
  5. It reduces stress on rollout day, by reducing each step to a checkbox


But, you do need to write the plan properly, and include a lot of possibile likely deviations. A large part of the benefits of the plan comes down to correct formatting. Your plan could be many pages long, and you do not want to have to read the entire thing everytime you need reminding of an item on roll-out day.

So we use a logical format, not that different to the plans you made in science class all those years ago.


Title: My Less Stressful Network migration Plan
Document Date: Today
Document Author: Me


Aim: To migrate our Token ring network, consisting of 80PC's to a new Gigabit network, with 80 replacement PC's.

To Complete by: 30 Days time.


So, we've now defined what the plan is for, and set a deadline. Obviously the dates should be written as dates. Note the very short deadline on this plan, we have 30 days to plan the migration, and to actually do it. This may not seem nearly long enough, but keep in mind that we are not planning the implementation, simply how it will be implemented. If you are at the point where you have a date when replacement PC's will be put in, there should already have been discussions about what suitable replacements would be, where they should go etc.

So we are assuming that you have laid all the groundwork, and know where each new PC will go and that the new network cabling has been installed. All this plan focuses on, is how to get PC's into their locations, and users using the new PC's.

The 30 Days time includes your roll-out day, so it's wise to add a 'Key Dates' section;


Section 1 - Key Dates

  1. 15 Days Time - New Network Hardware Activated
  2. 20 Days Time - New PC's Delivered
  3. 21 Days Time - Contractor arriving to install PC's
  4. 28 Days Time - Contractor arriving to securely destroy old hardware
  5. 30 Days Time - Contractor arriving to remove Token Ring Hardware


This means you can, at a glance, confirm when things are happening. It's worth also including a calendar type table in this section, so that you can handwrite new milestones into the plan. These need to be entered onto your electronic copy as soon as possible, but at least if you have one place to write them, they shouldn't be forgotten.


Once you know when key events are happening, you can start planning both for the run-up, the actual date, and any actions arising after the event;

Section 2 - Planning

Date 1 - 15 Days time


Preparation

  1. Ensure that all network points are correctly patched through
  2. Contact Contractor and confirm that there are no delays expected


On the Day

  1. Make contact with Contractor and confirm that all hardware is active, and has been tested


After the event

  1. Check network points are not faulty


Possible Deviations

Deviation Number
Stage
Deviation
Consequences
Preventative Action
Corrective Action
1
Preparation
Not all Points Patched through correctly
Not all new PC's will be able to connect to the network from their designated TAP
Check Patching as planned.
Re-patch erroneous ports
2
Preparation
Delays expected
Hardware will not be activated on the planned date, if delays too great, network will not be active in time for new PC's and data migration.
Confirm timescales with contractors, make them aware of full timeline to highlight the importance of minimising delays
If delay can be rectified in house, do so. If not, then contact relevant parties to try and minimise delays.
3
On the Day
Not all Hardware active, due to fault
If fault is not corrected, substantial sections of the new network may not be active on roll-out day.
None
Liase with contractors to arrange replacement hardware/repairs to hardware.
4
After the event
Some Network points not working.
Some PC's will be unable to connect to network.
Use a CAT-5 tester to check TAPs as part of Preparation stage.
Re-wire/Replace Network sockets.


Create a section like this for each of your key dates, try to include every likely deviation possible. It's impossible to include everything, and there's probably very little justification for adding a row explaining what to do if the Contractor is hit by lightning whilst carrying your new PC's. If anything, this would be covered by a row explaining what to do if a terminal is faulty. Let Health and Safety worry about the Lightning itself!

In the example we are using, there is one deviation that everyone dreads. This appears on Key Date 3, and you should have an entry in the relevant table something like the one below;


Deviation Number
Stage
Deviation
Consequences
Preventative Action
Corrective Action
1
On the Day
Management wish to change the planned location of one or more PC's.
Initial plan no longer reflects the end-result.

Contracts raised may specify where terminals are to be installed, so change may not be possible at this point.

Change at a later date could incur a cost.
Confirm terminal locations with Management at the earliest possible point.

Ascertain whether changes in location are possible under the contract.

Ascertain the cost of moving a terminal at a later date.

Provide Management with both of the above details.
If no movement possible, explain to management that locations have been set in contract, but that they can move terminal locations at a later date - for a cost.

If movement possible, speak to contractor to arrange new locations. Keep a note of the changes and enter into you Project Closure report.


There may be a very good reason why the management want a terminal moved (of course the reason may also not be that good in the light of day), so whilst it can feel a little irritating on the day, work with it. You should have planned for the eventuality, so you should already know how to respond. Odds are high that you are going to receive this kind of request, so make sure you plan for it.

These sections are more or less all you need to create a successful plan, you just need to use some careful thought to envisage as many of the possible deviations as possible. Keep in mind that you will need to plan for errors by the contractor, as well as by yourself and others within the company. Keeping your users well informed of the benefits and issues they will face (don't descend into techy speak!) is well advised. Publishing an FAQ on the intranet may seem like a waste of time, but if you make users aware of it, they are less likely to waste both yours and your colleagues time by asking mundane questions.

No-one wants to be answering questions on why they've chosen a specific version of Windows whilst they are trying to install new terminals, or worse work out what impact the Managerial changes will have.

Similarly, keep the Management informed, the earlier they can propose changes, the less drastic the consequences are likely to be for your project. Pass them a copy of your planning document, it shows that you are taking the project seriously, and may also answer some of the questions they were wanting to ask.

Unfortunately, not every project can go smoothly, but a lot of problems often boil down to bad planning or bad communication. There will always be the risk of that deviation that you could never even imagine happening, but these should be very rare, as a rule planning can only benefit your roll-out.

Despite how it can feel whilst creating the document, project planning is far from being a waste of time!
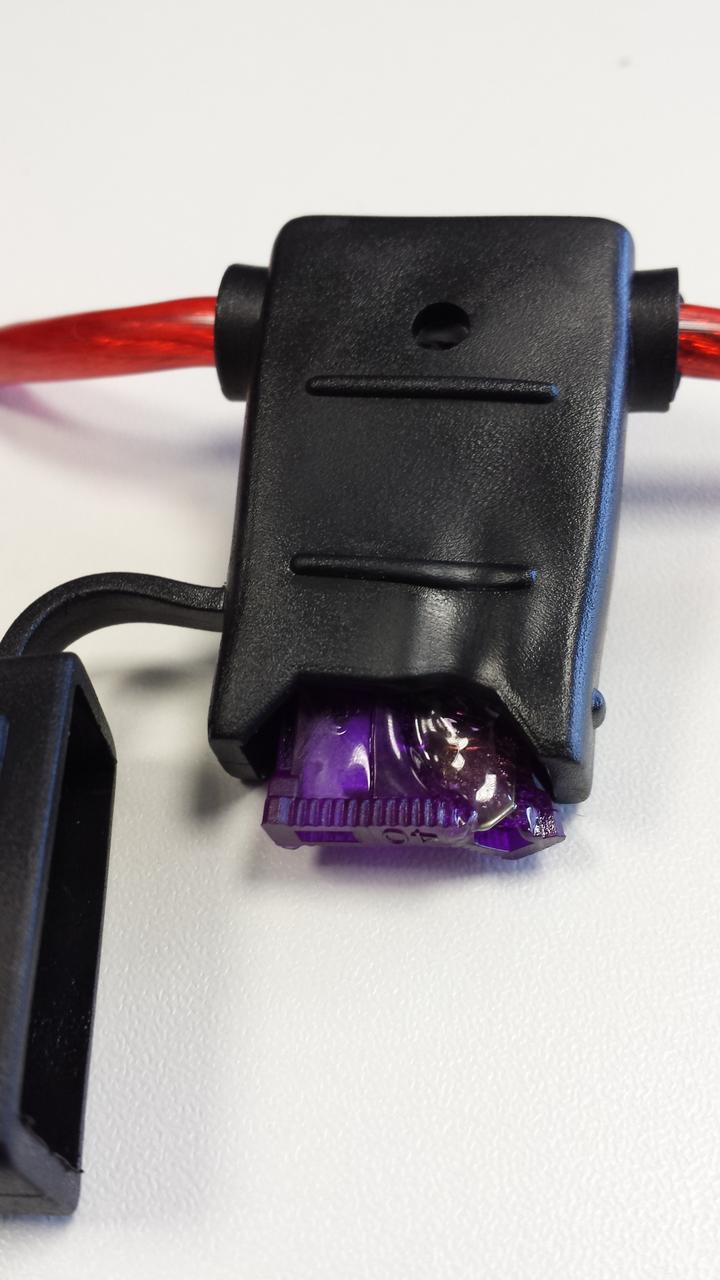
Republished: SV650-S Final Repair and Safety Modification

This was originally posted on benscomputer.no-ip.org in 2009

I wrote recently about issues with the SV650-S misfiring and not charging the batterySV650-S, Birdshit Photoshopped OutSV650-S Bird shit shopped out . Well this is yet another update on the subject. In my post yesterday I mentioned that when I washed the bike the misfire came back (and the battery stopped charging).
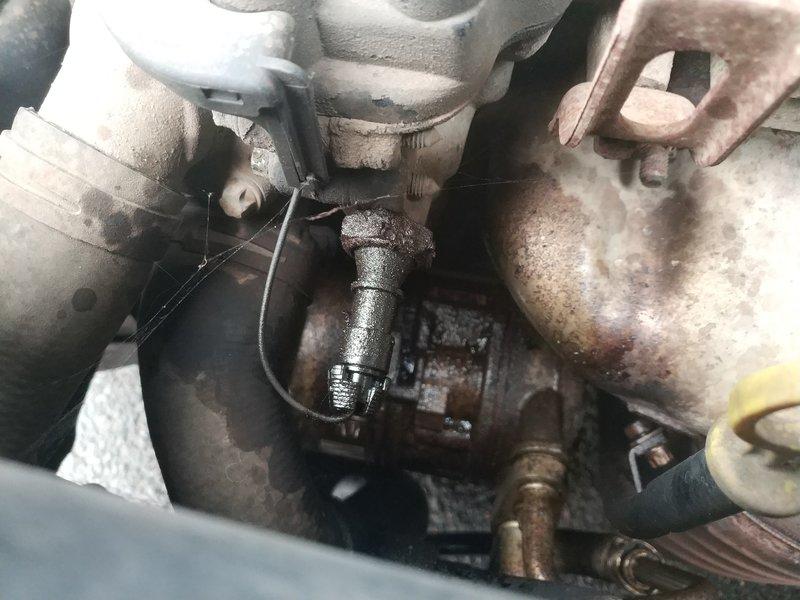
So today I took a drive down to the bike shop, there was quite a lot of condensation on the bike, and it wouldn't run on both cylinders without a spray of WD-40 (incidentally, never spray it on whilst the engine is running, take it from someone who has set his radiator alight!), once I got there I put in an order for a Fenda Extender, and picked up a few other odds and ends. Unfortunately they didn't have a Suzuki Spark Plug Cap in stock (the things are like £20 Each!) So I figured I'd give the NGK version a try.

NGX Spark Plug CapBad Idea!! With the rubber boot on the end the cap will not even fit into the spark plug well, and if you try to risk using it without the boot you will find that it's not actually long enough to actually connect with the spark plug. It's my own fault, no-one told me it would fit, I
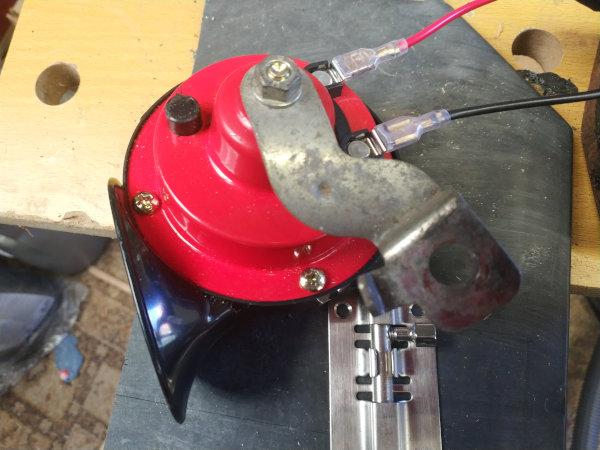
 simply figured I'd try it!
So instead I decided to nick the good cap from the rear cylinder and put the old one onto the back. At least if it plays up, I can access it far more easily. I hadn't noticed until I sat the two caps next to each other, just how badly mis-shapen the rubber seal on the front cap was.

There is a seal about halfway up the cap to help keep water and crap out of the spark plug well. The seal on the rear cap was O shaped whilst the seal from the front was more of an 0.  Given that the wells on both cylinders are the same, I'm guessing that a mixture of heat, road crap and salt had probably led to the seal distorting. It had a really poor seal around the cap itself, let alone the spark plug well. So I  swapped the entire caps.

The rear cylinder gets far less water/crap thrown at it, so it seemed likely that the dodgy seal would have less of an impact.

I also trimmed the HT leads back a bit, the front had some serious signs of corrosion at the end, not exactly condusive to a healthy spark!

Unfortunately replacing the HT leads on the SV involves swapping out the coils, you could trim the lead right back and use an inline coupler, but I've actually been experiencing problems finding anyone who sells HT lead cabling with the same diameter as the stuff already in there.

So having re-connected everything, I hit the starter.

She ran well, so everything was connected properly, or at least seems to be. But then, she ran fine last time until I washed her.

So I dug out the plant sprayer that I use as a poor mans jet wash, adjusted the nozzle to give a fine spray and aimed it at the front cyclinder. Once I'd chucked a Gallon of water at the front cylinder I hit the starter again.......

SHE RIDES!!!!!!!!!!!!!!!!!!!!!!!!!!!!!!!!!

The work actually took less time that I thought, and I only cut my hands once on the Radiator (I must be learning!) so normally I'd have gone out for a spin. But it was rush hour, so I figured Coffee, Fag then more work.

On the old bike, I found that no-one ever pulled out on me. I always figured it was because the exhaust was really loud, unfortunately I don't have the money for a new exhaust system, and I don't think the neighbours would thank me. So the next best thing is probably a really loud horn.

Horn 1 I got 
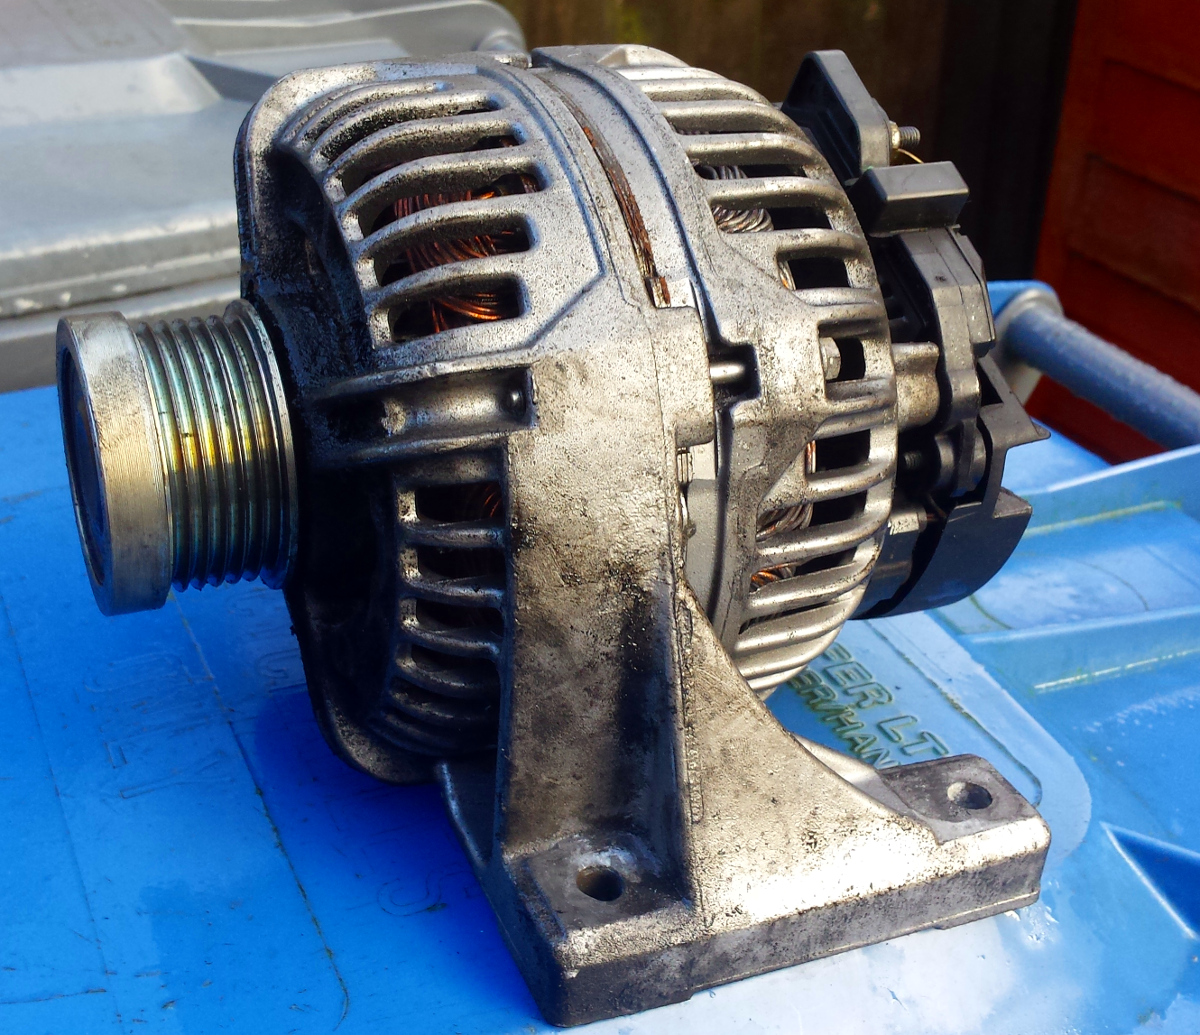
rid of the OEM horn quite a while ago, frankly it was crap and had a horrible tone to it. I initially replaced it with one of a pair of Motrax Hootaz. I'd have liked to connect both, but space really is a bit of an issue. I could have squeezed them in under the seat, but that means a lot of new cable and a muffled sounding horn so it would have been very little benefit.

The horns are rated at 60db each, so it was still louder than the little fuzzbucket that Suzuki supply. Not as loud as I would like, if I hit the horn, I want the other driver to think 'What the F!?k was that???'

If I had the space, I'd like to put in an air horn, if you pull out on me I'll make you think it's a lorry behind you, but it just won't fit!

Horn 2 So I applied a bit of logic, and worked out that I could fit the second Hoota down the side of the engine. Even on the unfaired version, there is a bolt (Allen Key on this one, but I'm sure the old bike had a 10mm bolt) holding the base of the radiator to the edge of the front cylinder.

On the faired version there seems to be plenty of space with, the bolt is a good 7mm longer than is actually needed, the mounting plate for the horn is about 2mm thick, so that still leaves 5mm sticking out of the lock nut. Perfect!

Except that the lead connecting to the horn doesn't reach, and you can only fit one horn into the gap. So I decided it would be best to keep one horn where I had originally placed it (in between the fork legs) and to put the other on the side of the radiator. If only the Radiator had a mounting bolt on both sides, this would have been far easier. Still, it's better than nothing.

You need to create a cable to power the second horn, simply solder it onto the contacts of the first horn (one lead for each contact) and then route the cable down to Horn 2.

My cabling goes down the side of the radiator, and then back through to Horn 2.

NOTE: If horn one is mounted between the fork legs, it will move when you turn the handlebars, make sure you have enough slack in your cable to reach full lock in both directions.

The slack can take a little while to get right, you don't want so little that you can't turn, but you don't want so much that it can foul things like brakes. Once the cable is routed, and the slack is right connect it to Horn 2

As long as you have done your connections properly (don't forget you need to connect the bikes Horn Cable to Horn 1 as well as your cable) when you hit the horn button you should have a very loud horn.

One major issue with the location of both these horns is that they will pick up an immense amount of road crap, they are fairly resilient, but you may have to remove them and take the tops off them to clear some of the rubbish out.

You could mount them so that they are facing backwards, but you will inevitably loose some of the effective volume. You'll also be aiming a set of very loud set of horns in your direction. Not such an issue if you wear earplugs, but do give it some consideration.

Whether this will have any benefit or not I'm not sure, but I applied some vaseline to the exposed section of the contacts on both horns (where the contacts actually go into the horn) I've seen these corrode away to nothing before so figured it should at least help prevent water from doing it again.

SV650-S. Getting rid of this is one of my lifes biggest regrets Obviously, a loud horn will do nothing to protect you if you don't get chance to use it. Allow yourself time when approaching junctions, especially if there is a lot of traffic about. It's better to hit the brakes than the horn, but if you can hit both at once it can be doubly effective. If not then so long as you have avoided the accident, a loud horn is a good way of saying 'F!?k You!!!'

They also seem to be reasonably good at making car drivers jump, they see a bike and equate it to some slow moving vehicle that has has a high pitched 'Meh Meh' horn. When you hit them with 120db of noise, they tend to wake up out of the daze that they all seem to be in. Probably not a good idea to honk at old people walking down the street. A) They might get the wrong idea and B) you could give them a heart attack.

Traffic Wardens are fair game though! Although I'm sure you would live to regret it, they seem to have long memories for things like that.

Ride Safe, or just don't ride.

Republished: An Update on the SV650-S Charging/Ignition Problem

This was originally published on benscomputer.no-ip.org in 2009

As I mentioned previously, the bike was due into the Garage on Friday to sort out the charging problems that it seems to have developed. The symptoms also included a misfire at low revs (anything below about 2500 RPM).
Unfortunately, the Garage found some more urgent repairs that needed doing (Brakes had seized again, amongst other things) so I hit my budget ceiling before they could really take a look at the original problem.

So on Saturday, I got out the toolkit again and had a look.

Left to Right: New, Rear Cylinder, Front Cylinder
I'd completely forgotten to buy a new relay for the bike, so I started from scratch again, checking the Regulator/Rectifier, the generator and the charging voltage (I admit I did initially forget to disconnect the lead I had put between the R/R and the battery, but realised as soon as the Multimeter said that the battery was charging.

There was still a misfire at lower revs, and keeping the revs up whilst braking puts one hell of a strain on your right wrist. This is an issue that needed sorting, so whilst I thought about what the next step might be, I pulled the plugs. The Plug from the rear cylinder looked pretty much like they do when they have been used, albeit a little black. This is normally a sign that the engine is running rich, but as I wasn't entirely sure that the cylinder was firing every time, I kinda figured this was par for the course.

But when I pulled the front plug, I couldn't believe the state of it. The thing about spark plugs is that no matter how long they have been in an engine, the external section always look pretty clean, yet this one was crusted with rust, dirt and all manner of other krud.

In fact it was so bad, that the sealing ring wouldn't sit flush with the rest of the plug (you can just about see it in the picture). Obviously I swapped both plugs for new ones. Once I had re-connected everything, using lots of grease to help seal the front plug, I hit the starter. She ran fine, so I went back to sorting out the charging system. Except.... the battery was charging without my additional wire connected.

My only guess is that between them, the plugs were demanding so much from the Stator that there just wasn't enough trickling through the Regulator/Rectifier, the resistance of the factory cabling between the R/R and the battery is much higher than in my lead, so perhaps this is why the additional lead made a difference.

The boot at the end of the spark plug cap was pretty knackered on the front cyclinder, unfortunately I didn't have a spare,s o for now I've had to put it back in. I'm guessing thats probably why the problem came back this morning after I had washed the bike, but a quick dose of WD40 seems to have returned the bike to a running condition again. Once the bike shop opens on Monday I'm going to grab a new rubber boot, and a Fenda Extenda which should hopefully stop this problem from re-appearing the next time it rains.

So if you are having problems with the SV, it appears Spark plug well can affect much more than you would initially expect, so it's probably worth grabbing a few CR8E's to keep as spares. Make sure Pipe Cleaners are on your consumables list, that way you can keep that drain hole clear, and a Fenda Extenda will do no harm!

There are probably a few who will read this and say, "Spark plugs should be the first thing you check!" but I'd guess they have probably never worked on an SV. Technically the statement is right, but the front plug is an absolute nightmare to get to, especially on the faired version. I've still got grooves in my hand from the radiator yesterday, there just isn't room to get your hands in there, and once you do everything is done by feel. It's actually easier to check the Carbs and the R/R than it is to change one spark plug!

Still, despite that, it should be the first thing you check, as it turns out the gaps would have needed adjusting on the old plugs had I not replaced them.

On the plus side, I learnt a hell of a lot more about the SV's electrical system than I would normally need!

Republished: Battery Not Charging on SV650

Originally published on Benscomputer.no-ip.org Feb 2009.


This page is here as a reference for others experiencing the issues I have been having on my 2002 SV650-S lately.

SYMPTOM: Battery not charging, so bike refuses to start every so often. Misfire in Idle range but not always on the same cylinder.


The first thing to check is whether your battery is actually charging, if it is then you could spend quite a while diagnosing the wrong problem. Take the front seat off the bike to gain access ot the Battery bay, put a multimeter between the +ve and the -ve terminals of the battery and note the voltage.

Next start the engine and put the multimeter across again, even at low revs you should see somewhere between 13 and 14 volts, if not then rev the engine whilst keeping the multimeter on the terminals. If the voltage appears to drop then you may have the same issue as me.

Check the Regulator/Rectifier using the measurements in the service manual, if that seems fine, run a generator no load check.

Disconnect the R/R and start the engine, place your multimeter probes between 2 of the ground wires (there are three yellow or black wires) on AC voltage setting. Run your revs up to 5000, if you are seeing a voltage > 60VAC then the generator is fine.

Chances are you either have a dodgy earth, or like me resistance on the hot wire.

Carefull put a wiere between the negative wire of the R/R and the -ve Battery terminal. Then check to see whether the bike is charging or not, if not then disconnect that and place the wire between the +ve wire of the R/R (Red or Red/Black wire) and the +ve terminal of the battery. Check again if the battery is charging. Mine was, so I made the wiring more permanent and added an inline fuse for safety. Whilst this meant the battery charged the misfire has continued, so I have to keep the revs above about 2500 RPM.

It appears to be a corroded contact on the starter relay, just infront of the rear wheel. This is scheduled for replacement at the end of the week, and I am confident that it will resolve the issue.


Update: Replacement relay resolved issues

Republished: SV650-S Parts Listing

This content was originally posted on Benscomputer.no-ip.org in January 2009

Below you can find a list of part numbers for the SV650-S

Make SUZUKI


Model SV650-S K2


Year 2000


SN Description Part Location Part Number Number Type Stockist Qty in Pack Qty on Bike Rating
1 Air Filter Aircleaner Assy 13780-20F00 OEM N/A 1 1 N/A
2 Filter Retaining Screw Aircleaner Assy 02142-05203 OEM N/A 1 4 N/A
3 Outlet Tube Aircleaner Assy 13881-20F00 OEM N/A 1 2 N/A
4 Carburettor Carburettor 13201-20F20 OEM N/A 1 2 N/A
5 Clutch Plate Clutch 21440-19F00 OEM N/A U/K U/K N/A
6 Clutch Plate Clutch 21451-28C31 OEM N/A U/K U/K N/A
7 Clutch Plate Clutch 21441-37440 OEM N/A U/K U/K N/A
8 Oil Filler Cap Clutch Cover 09259-20008 OEM N/A 1 1 N/A
9 Oil Filler Cap Washer Clutch Cover 09280-17003 OEM N/A 1 1 N/A
10 O-Ring Clutch Cover 11484-19F01 OEM N/A 1 1 N/A
11 Clutch Cover Clutch Cover 11370-19F00 OEM N/A 1 1 N/A
12 Dashboard Cowling 94630-19F00 OEM N/A 1 1 N/A
13 Windscreen Cowling 94611-19F00 OEM N/A 1 1 N/A
14 Oil Filter Crankcase 16510-34E00 OEM N/A 1 1 N/A
15 Oil Drain Plug Washer Crankcase 09168-12002 OEM N/A 1 1 N/A
16 Oil Drain Plug Crankcase 09247-12106 OEM N/A 1 1 N/A
17 Regulator/Rectifier Electrical 32800-14F00 OEM N/A 1 1 N/A
18 Indicator Front Right Electrical 35602-33E30 OEM N/A 1 1 N/A
19 Indicator Bulb Electrical 09471-12045 OEM N/A 1 4 12V 21W
20 Indicator Rear Right Electrical 35604-33E10 OEM N/A 1 1 N/A
21 Indicator Rear Left Electrical 35603-33E10 OEM N/A 1 1 N/A
22 Fuse Electrical 09481-30101 OEM N/A 1 2 30A
23 Spark Plug Cap Electrical 33510-11D00 OEM N/A 1 2 N/A
24 Spark Plug Cap Engine Seal Electrical 33541-23E01 OEM N/A 1 2 N/A
25 HT Lead Seal Electrical 33542-38B00 OEM N/A 1 2 N/A
26 Ignition Coil (Rear) Electrical 33410-19F00 OEM N/A 1 1 N/A
27 Ignition Coil (Front) Electrical 33420-19F00 OEM N/A 1 1 N/A
28 Indicator Front Left Electrical 35601-33E30 OEM N/A 1 1 N/A
29 CamChain Tensioner Engine 12811-19F00 OEM N/A 1 2 N/A
30 CamChain Tensioner Adjuster Engine 12830-19F11 OEM N/A 1 2 N/A
31 Brake Pads Front Brake LH 59301-33850 OEM N/A 2 2 N/A
32 Brake Pads Front Brake RH 59101-33850 OEM N/A 2 2 N/A
33 Fuel Tank Fuel Tank 44100-20F00-Y9H OEM N/A 1 1 15L
34 Frame Cushion Fuel Tank 44559-19F00 OEM N/A 1 2 N/A
35 Foam Shield Fuel Tank 44194-19F00 OEM N/A 1 1 N/A
36 Cap Fixing Screw Fuel Tank 09106-05017 OEM N/A 1 12 N/A
37 Fuel Tank Cap Fuel Tank 44200-33870 OEM N/A 1 1 Lockable
38 Fuel Tank Fixing Screw Fuel Tank 09139-06029 OEM N/A 1 2 N/A
39 Clutch Lever Mount Handlebars 57500-10D01 OEM N/A 1 1 N/A
40 Throttle Grip Handlebars 57110-46E01 OEM N/A 1 1 N/A
41 Brake Lever Handlebars 57300-33E01 OEM N/A 1 1 N/A
42 Grip LH Handlebars 57211-22D01 OEM N/A 1 1 N/A
43 Clutch Lever Handlebars 57620-27A31 OEM N/A 1 1 N/A
44 Headlight Assembly Headlight 35100-20F30-999 OEM N/A 1 1 N/A
45 Cover Headlight 35125-02F00 OEM N/A 1 2 N/A
46 Position Light Assembly Headlight 36110-20F00 OEM N/A 1 1 N/A
47 Headlight Bulb Headlight 09471-12102 OEM N/A 1 2 12V 60/45W
48 Ultra Bright Headlight Bulb Headlight 10031061 RETAILER www.Getgeared.co.uk 1 2 12V 60/55W
49 Position Light Bulb Headlight 09471-12081 OEM N/A 1 1 12V 5W
50 FootRest Assy Pillion LH 43700-19F00 OEM N/A 1 1 N/A
51 FootRest Assy Pillion RH 43600-19F00 OEM N/A 1 1 N/A
52 Brake Pads Rear Brake 69100-21820 OEM N/A 2 2 N/A
53 GearShift Lever RearSet LH 25600-33E00 OEM N/A 1 1 N/A
54 Footrest Bracket RearSet LH 43521-19F00 OEM N/A 1 1 N/A
55 Footrest RearSet LH 43520-02F11 OEM N/A 1 1 N/A
56 Heel Guard RearSet LH 43576-19F00 OEM N/A 1 1 N/A
57 Rear Brake Pedal RearSet RH 43111-33E00 OEM N/A 1 1 N/A
58 Heel Guard RearSet RH 43571-33E01 OEM N/A 1 1 N/A
59 Footrest Bracket RearSet RH 43511-19F00 OEM N/A 1 1 N/A
60 Footrest RearSet RH 43510-02F11 OEM N/A 1 1 N/A
61 Fuel Tank Stand Toolkit 44574-33E01 OEM N/A 1 1 N/A

Republished: Manual Database Retrieval Script for ZoneAlarm

Originally published on Benscomputer.no-ip.org Jun 2008 (Note: Attached Script still works at time of Republishing)


I was browsing the net earlier to try and find an answer to whether it is possible to manually download the ZoneAlarm Anti-Virus signatures. For those wondering why you would want to, standalone machines can't access the net to download the signatures, but are still subject to users with CD's and USB sticks. The easy way would be to update ZoneAlarm on a net connected PC and then copy the files from C:\Windows\System32\Zonelabs\avsys\base\ but if you don't have access to one, but do have a Linux Box then the script I have written will fetch the files for you (there are a lot, but they only add up to about 30 megs at time of writing).


ZoneAlarm gets details of the files from an XML file - Here (if you use Firefox it will throw out a parsing error, just use view source to see the true file) so I needed to parse the file and strip out the unneeded info.

You can download the script - FetchAvUpdate - from here.

Once you have the files transfer them to the standalone (USB key, CD or a pile of floppys, you choose!) and dump them into C:\Windows\system32\Zonelabs\avsys\base\ overwriting any existing files along the way.

ZoneAlarm may not show the date of the latest update, but it will be referencing the new signatures as far as I can tell.

File: FetchAVUpdate