Making a Polished Concrete Table
I've never really played around with creating things using concrete, but you see some awesome polished concrete creations.
We wanted a small coffee table for our decking, it'd need to survive whatever our British weather could throw at it so something concrete seemed ideal.
Although I had a specific use for it in mind, I still considered it experimental - odds are that you'll screw up the first one, so it's worth trying a few things.
This blog post details the process I followed, presented as a "How to".
Forming the top
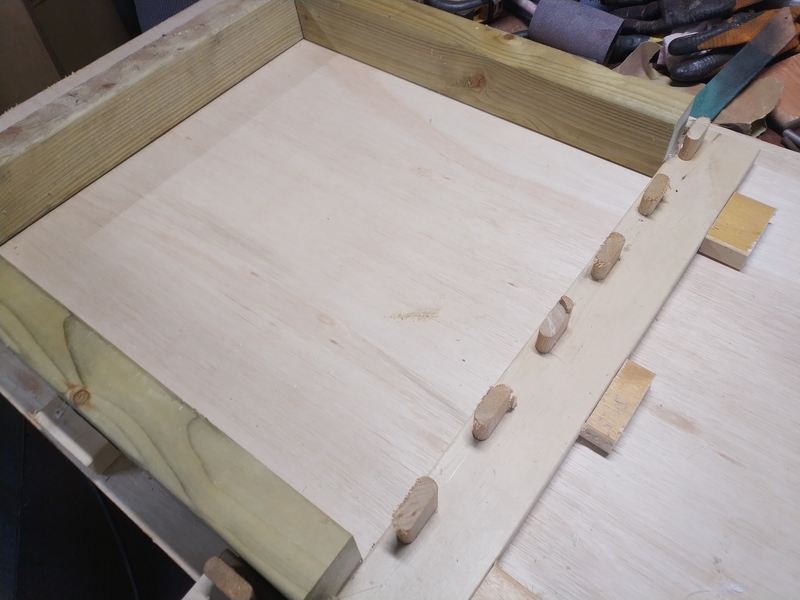
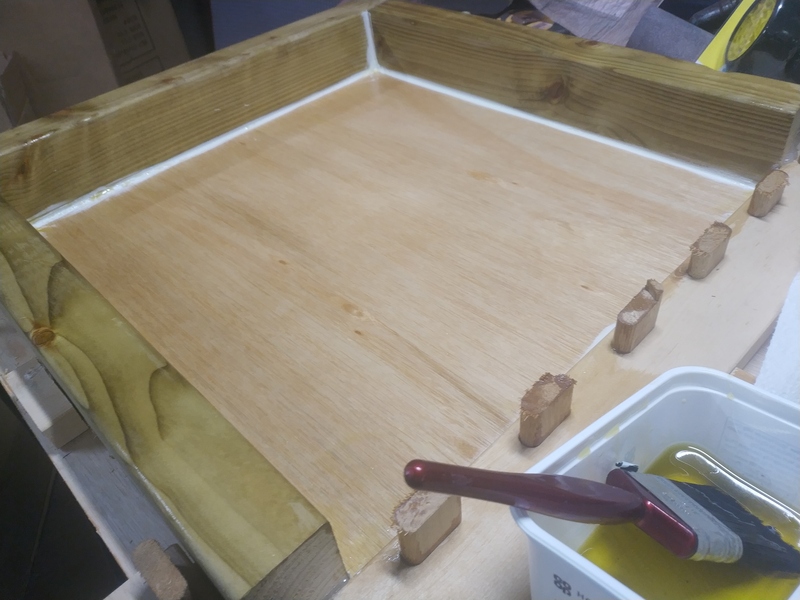
The first thing to do was to make a form and pour some concrete into it.
Apparently Melamine coated board works well for a form, but I didn't have any of that lying around spare - what I did have was some 2x4, so I used that instead

I used a shallower offcut for one side so that I could more easily assess the depth of the concrete when pouring it.
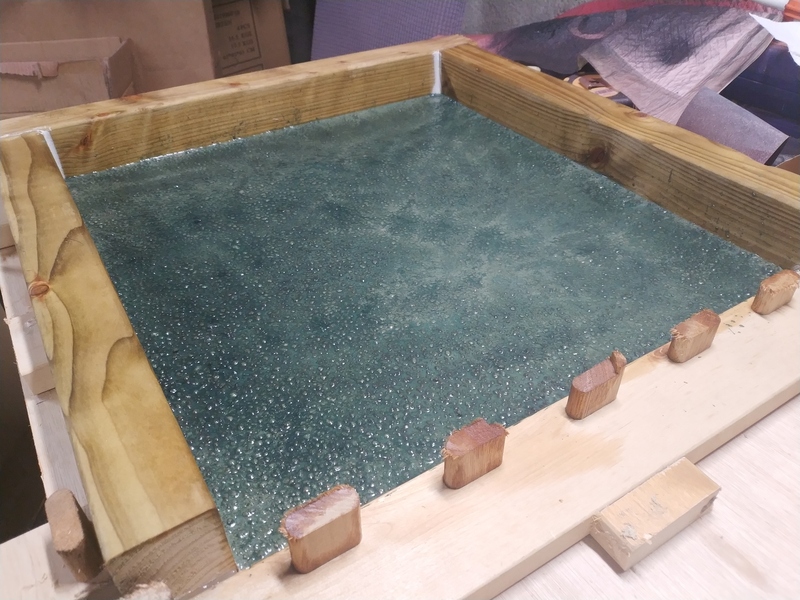
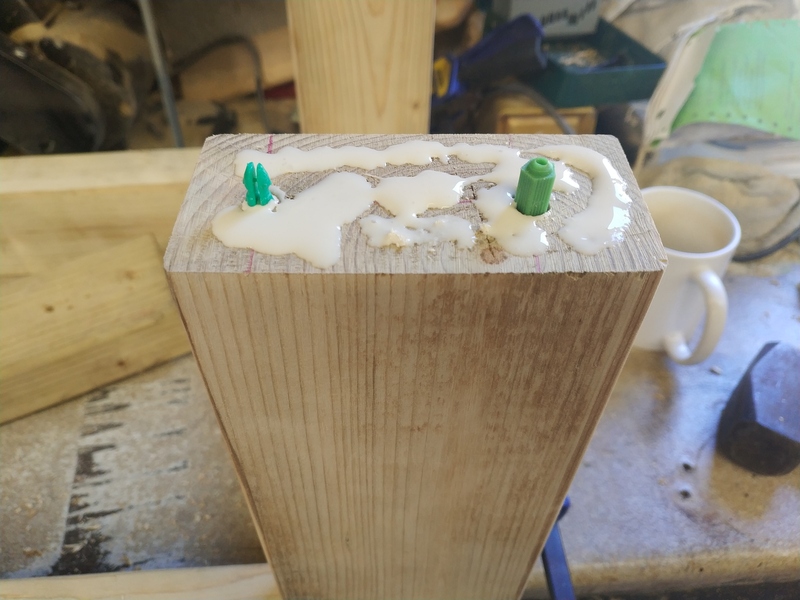
The sides don't get stuck to the base-board (they're going to be hard enough to remove later anyway), instead, once I had them in place I glue-gunned blocks in to hold them in place
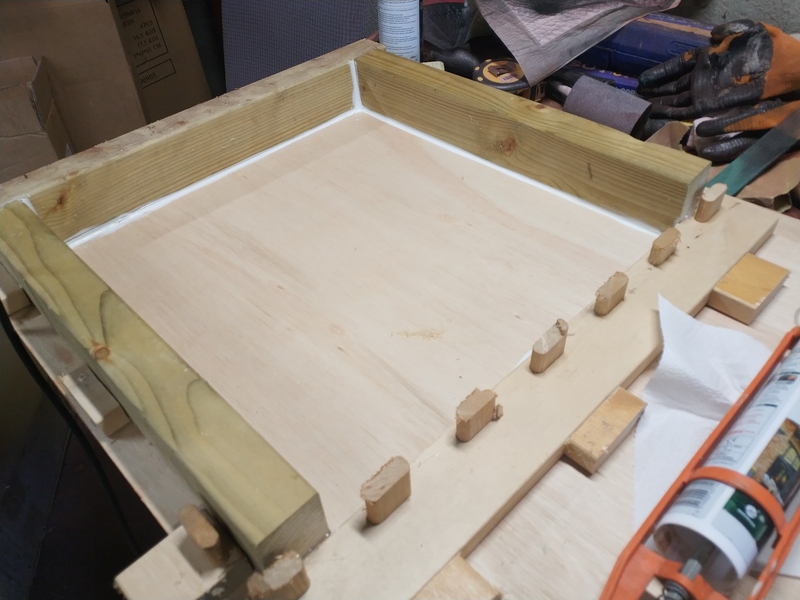
The next step was to seal around corners and edges. This is partly to stop water running off, but also because I didn't want the concrete to have a lip. I used silicon sealant and a caulking gun.
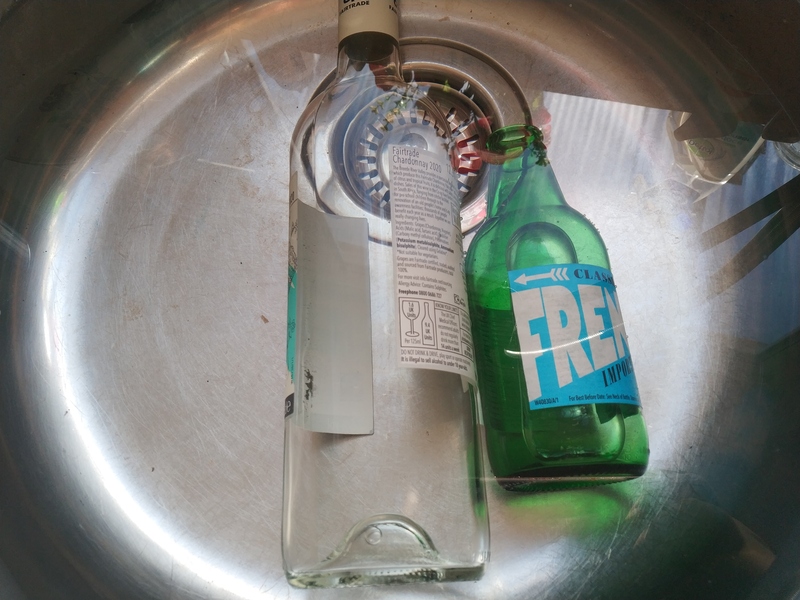
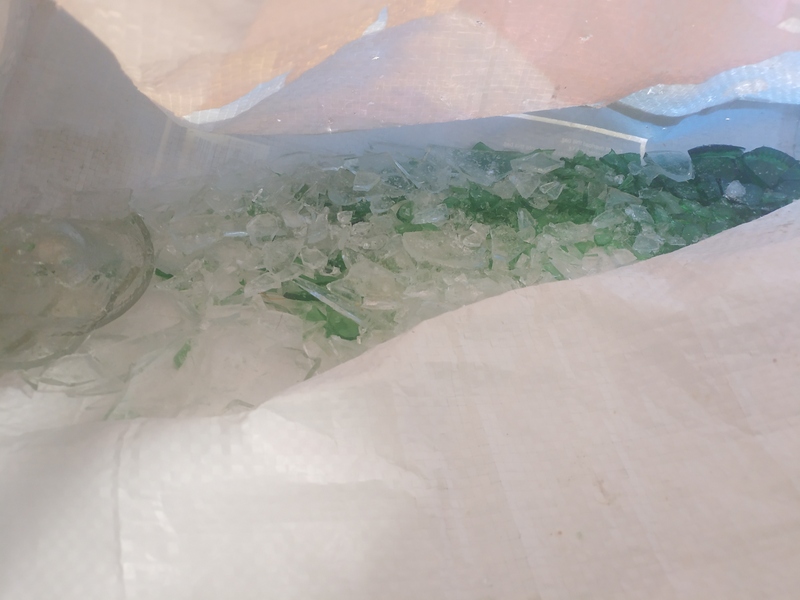
I wanted to see whether I could get a nice surface effect by including some glass. So, I soaked two bottles in the sink (to get labels off), put them in a bag and smashed them down into little chunks
In order to prevent the concrete from sticking (too firmly) to the wood of the form, I painted some Olive oil onto the wood (if you're not the primary kitchen user, don't get caught!).
I brushed a thin layer onto the base and around the sides, waited a few minutes for it to soak in and then painted a second thin coat on
The form was prepared, so it was time to add my glass
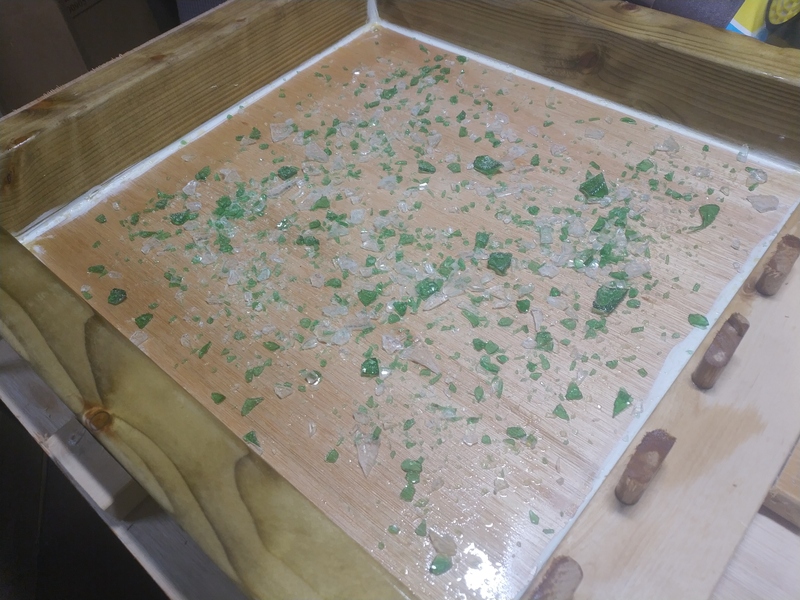
With the benefit of hindsight, I'd probably have benefited from giving it a coat of spray glue (or similar). I put some effort into making sure the glass was quite well distributed, but of course it gets moved about by the concrete when you pour it.
Next up was making the concrete.
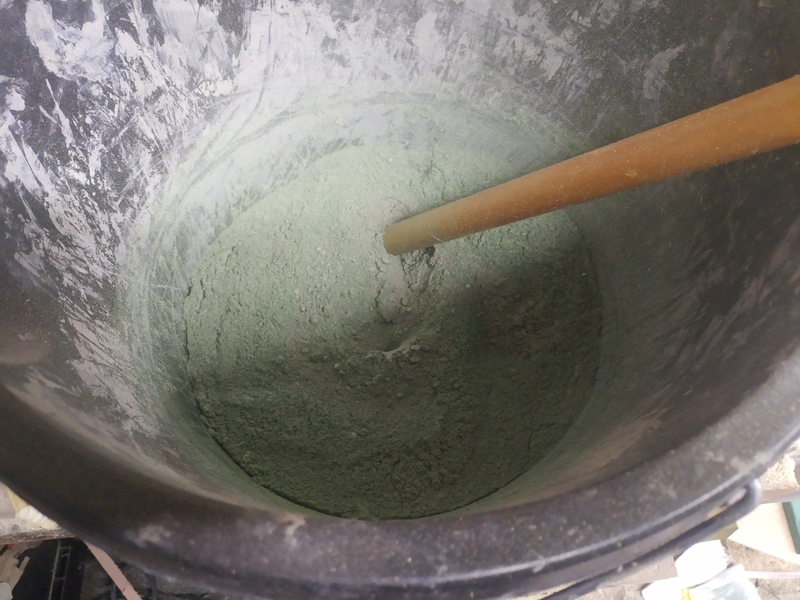
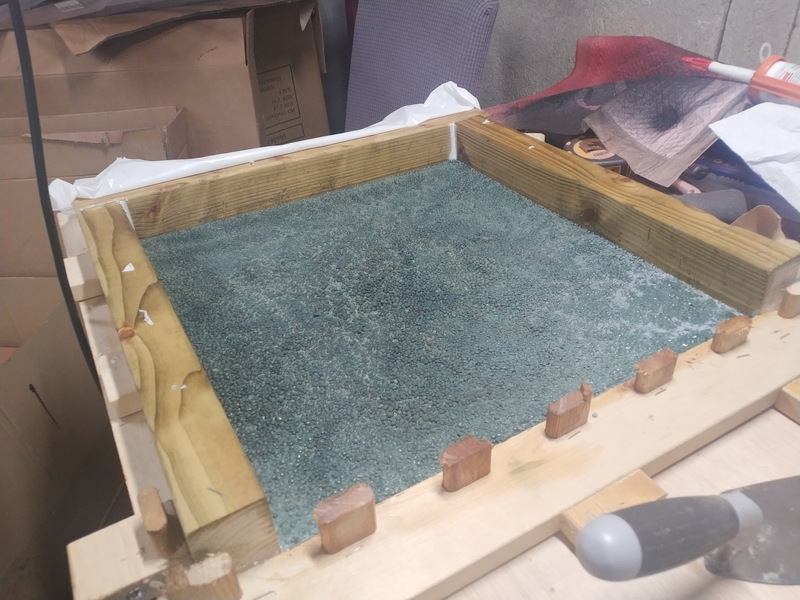
I had ordered some concrete dye so that I could make green concrete - the colour was labelled "Forest green" which, in my head, was quite dark (but looked quite light in the bucket, and I now realise is a lighter shade than I'd pictured anyway).
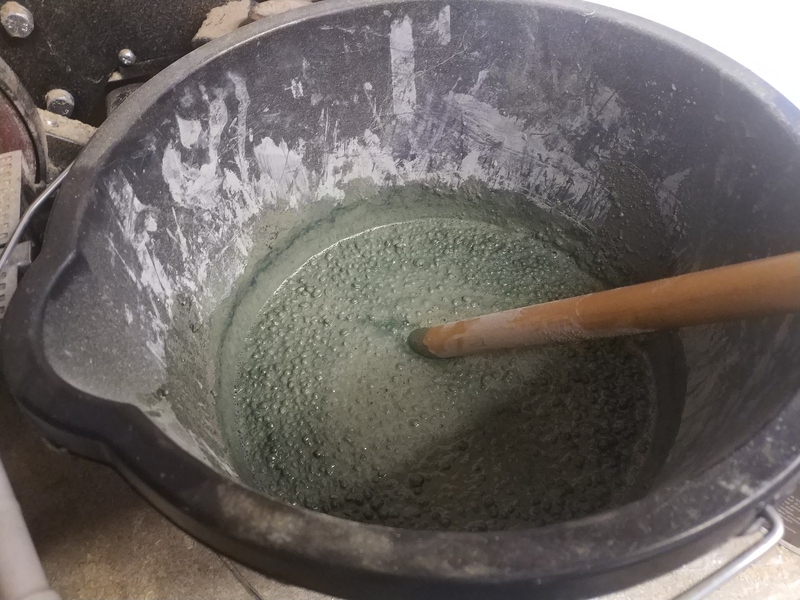
So, I mixed the dye in with some multipurpose concrete (the local Jewson was closed, so I was lazy and ordered a pre-mix from Amazon). I gradually added water until it was the consistency of porridge
Which brings us to the climax of this stage - pouring:
To reduce the amount of air trapped in the mixture I used a trowel to pat the top, and the end of a screw driver to tap the sides - the aim being to vibrate it enough for air to float to the top so that it doesn't set with a bunch of pock-marks in it.
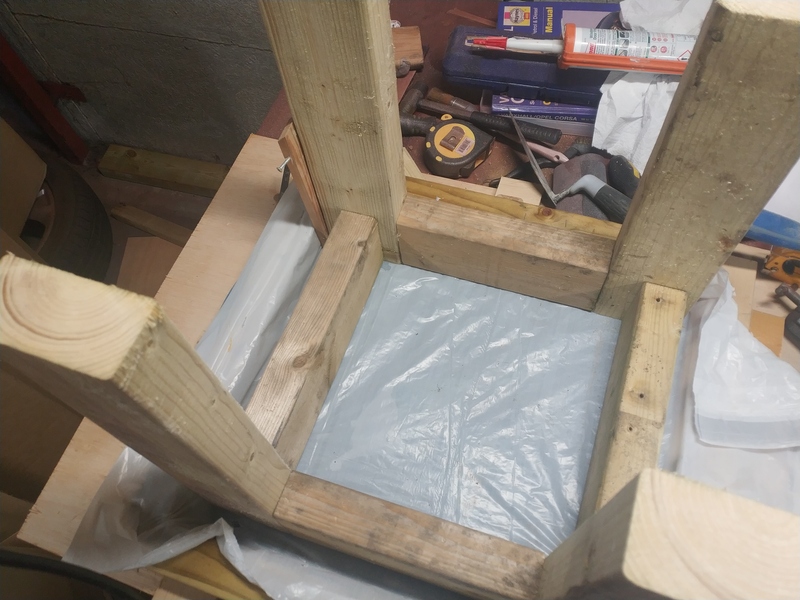
Concrete needs moisture to help it cure properly, otherwise the cement in it dries too fast and you develop cracks. So, to help moisture from escaping I covered the form in plastic
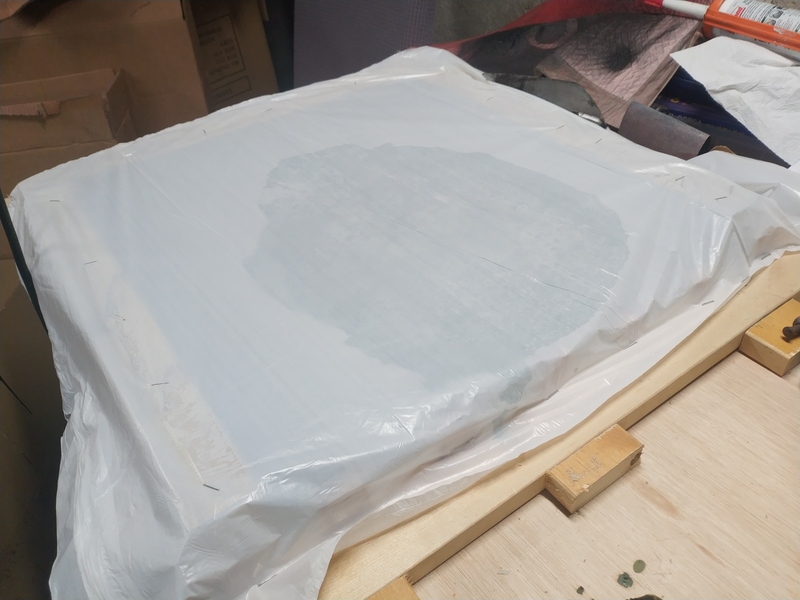
I left it like this for 24 hours, before checking it
It had set nice and hard (so I'd not screwed up the mix), but now needed to cure for a week. So, I sprayed some more water over the top, and re-plasticked it
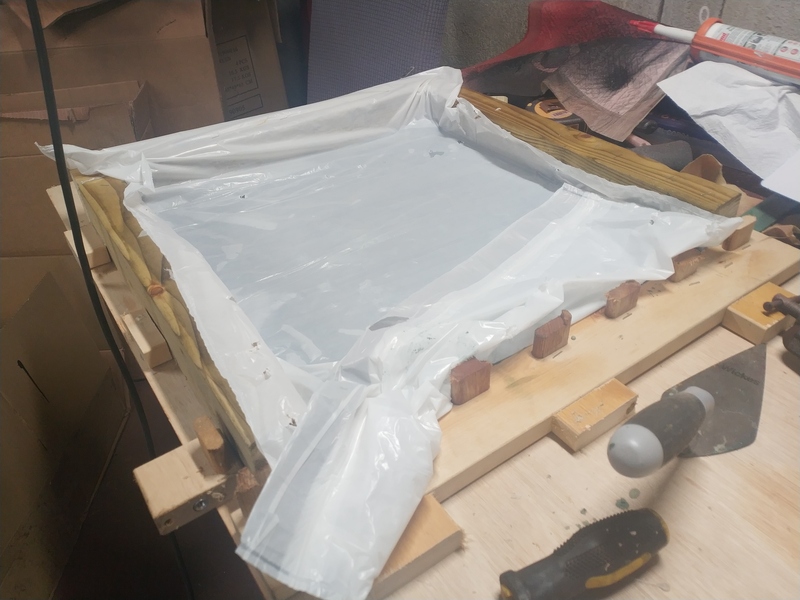
Twice on each of the next seven days, I lifted the plastic, added more water and then put the plastic back.
At the end of the seven day curing period, it was time to break the form, but we'll come back to that in a bit.
Table Legs
What I'd done so far would only give us the table-top - a pretty crucial component, but without legs it's really just a slab on the floor.
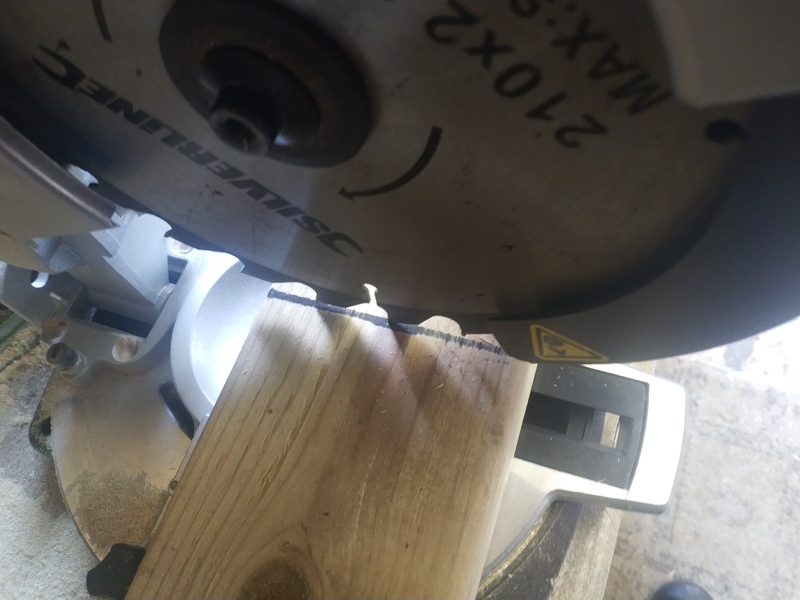
As noted above, most of the off-cuts I have lying around are 2x4 so I started cutting that to length
I laid these out on top of my (still curing) concrete to check sizing - if you look at the top-left leg you can see the bit of wood I was using as a spacer to make sure the legs were central
Happy that I'd cut what I needed, it was time to sand it down. I like my wood to be aged/interesting but there's a difference between that it just being plain grubby.
So, I sanded the worst of it off, whilst trying to leave some of the wood's acquired markings

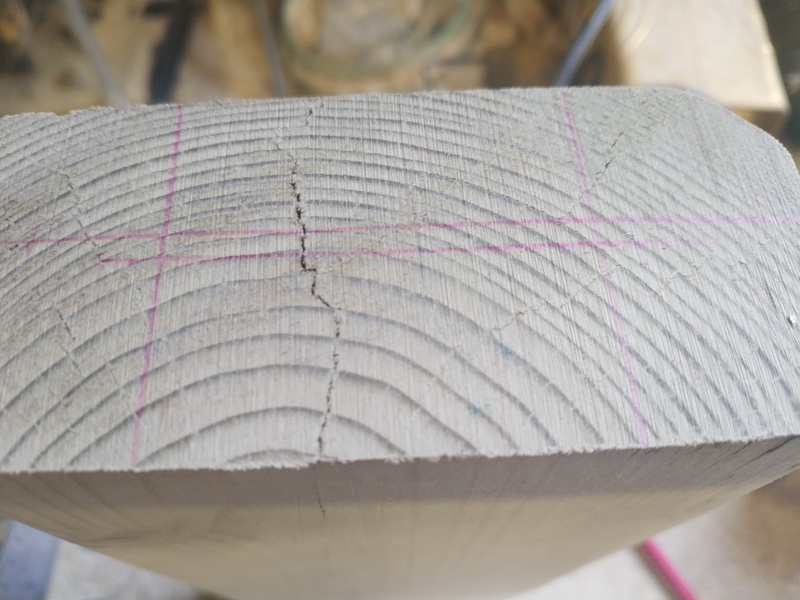
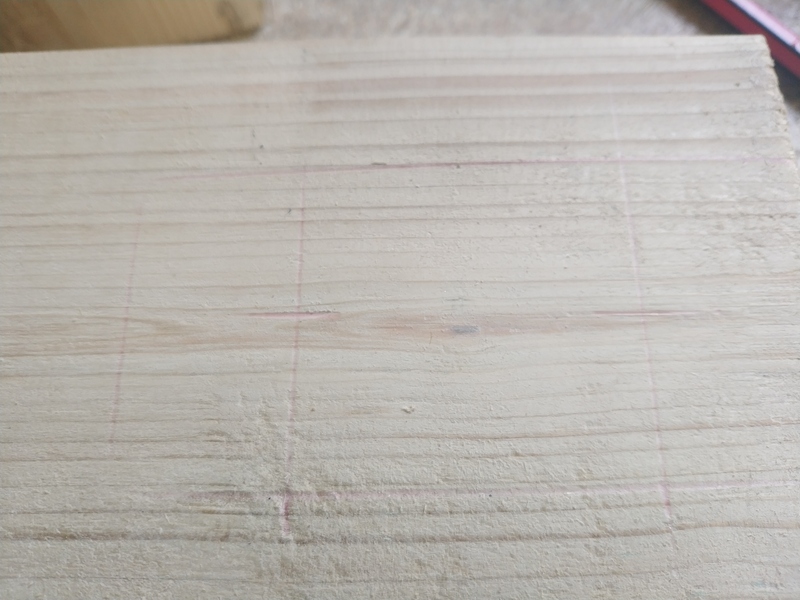
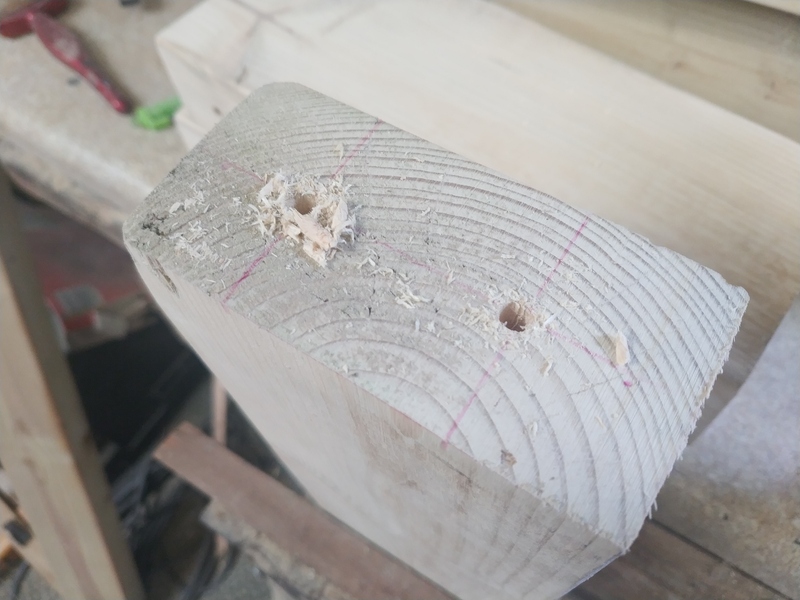
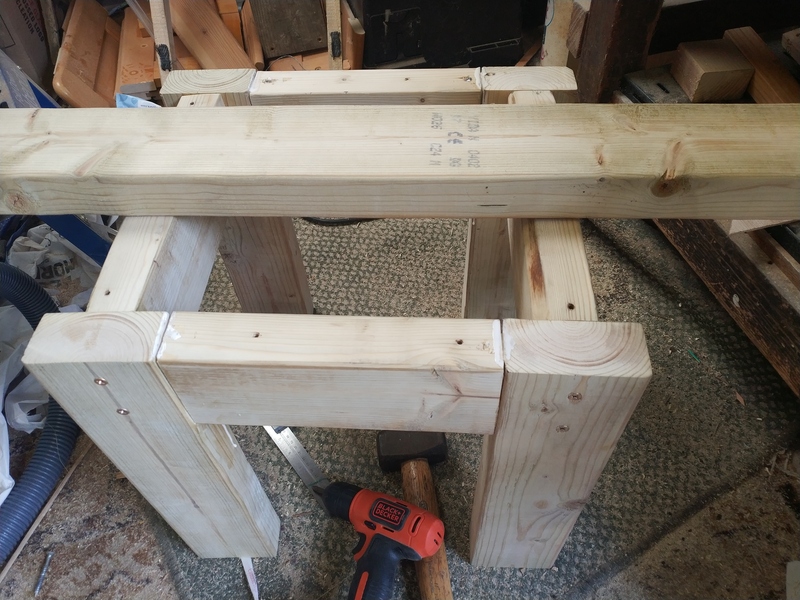
Next, I needed to assemble it, so I carefully measured and marked up
Then drilled pilot holes, and applied some wood glue
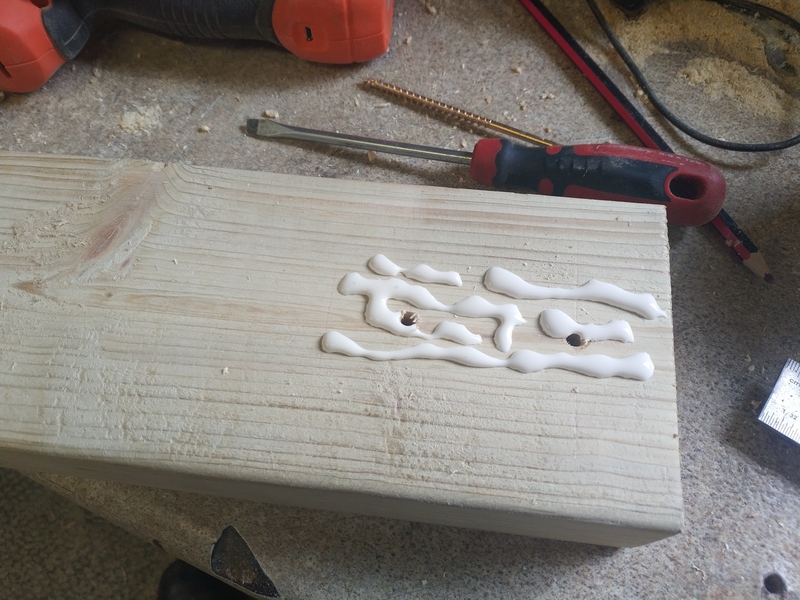
I then put the wood together and put two long screws through - the first end is far more fiddly/messy than the other.
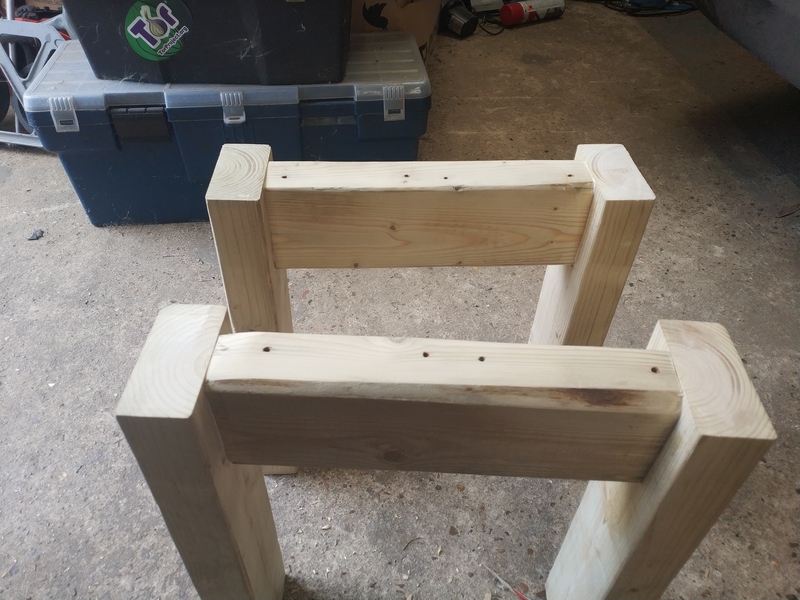
After repeating the process, you end up with 2 pairs of lovely legs
At this point, I was wondering why I hated woodwork so much in school.
The next bit, very quickly, reminded me.
The pairs of legs now need to be joined. Normally you'd use dowels for this, but I didn't have any (or more accurately, couldn't find them - I'm sure they'll turn up as soon as I publish this) so I used some of those cheap useless rawl plugs you get with shelves.
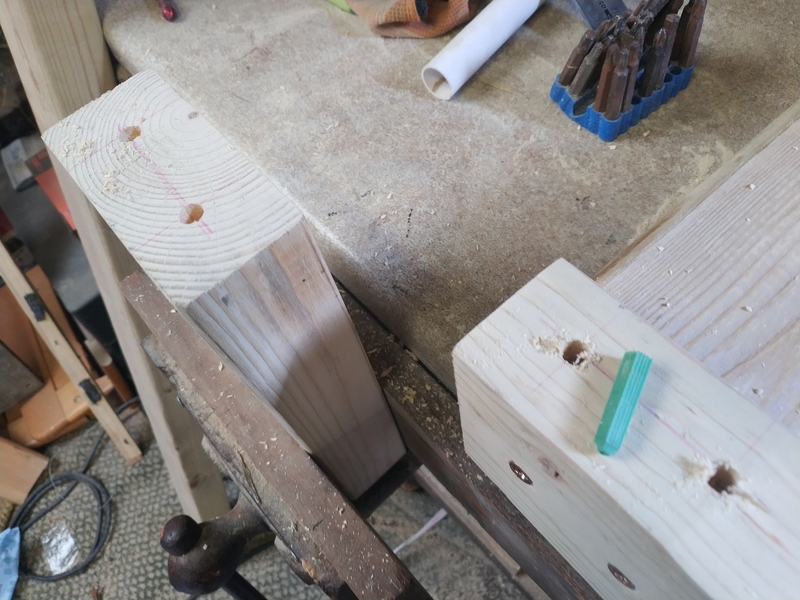
This, however, did not go well.
A combination of me being slightly off in measurements (should've made a template) and rawl plugs not being the right tool for the job, meant that it was fighting quite hard not to stay together.
So, ultimately, I also drove some screws in to help enforce my will (my only other remaining option being to threaten it with a saw and hope it saw sense)
The result isn't likely to win any awards, but I quite like the quirkiness of it. Most importantly.... it's level.
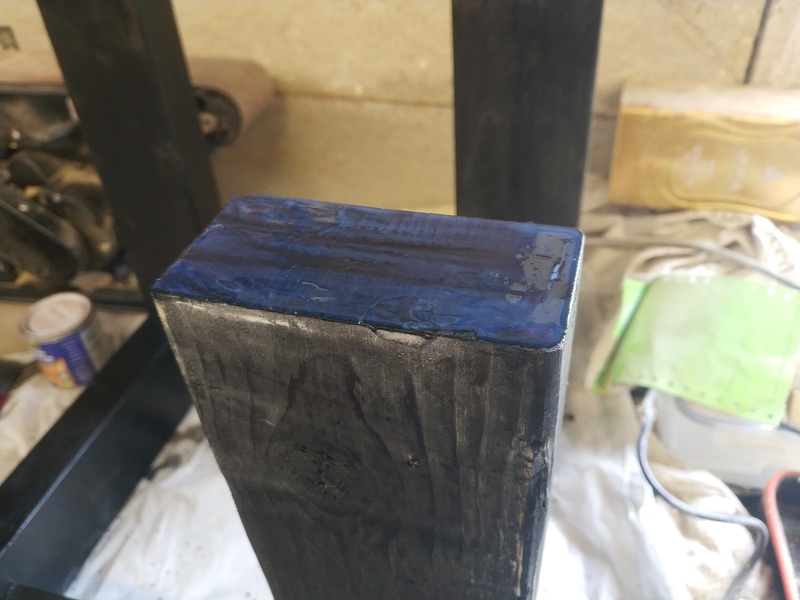
Next, staining - I decided that the wood's natural colour would probably feel a bit incongruent under a polished green concrete top (also, you'd have a highly polished slab with distressed looking wood underneath, I really wasn't sure that would work). I went with black stain because our decking is black.

You can't really see it in the picture, but the grain of the wood still shows through the stain (which is why I prefer stain to paint). I gave it a couple of coats.
The final step of this section was to protect the bottom of the legs - I didn't want them to get damaged if the table's dragged around, and also didn't want water to wick up the grain.
So, I gave the leg bottoms 4 coats of ultra-tough varnish
Polishing the concrete top
After a week of waiting, it was time to remove the concrete from the form and see if I'd screwed it up.
I poked a lever under the sides of the form to lift them upwards and remove them - they came away quite easily, the olive oil had done it's job.
Repeating until I was just left with a slab of concrete
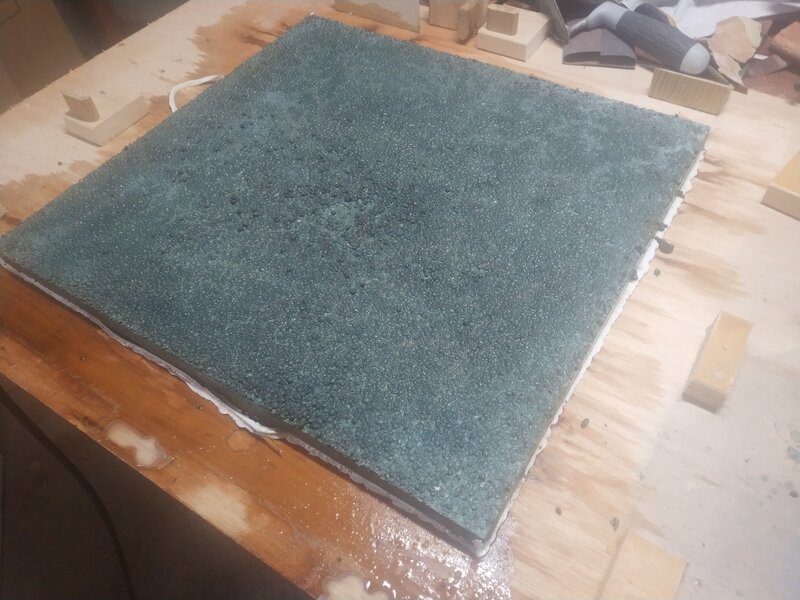
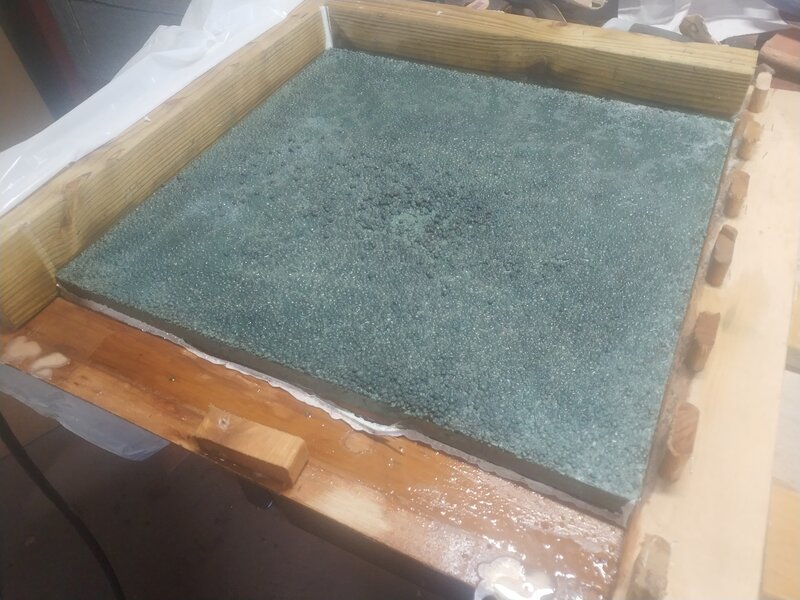
Now for the moment of truth... the bottom of the slab will be the top of the table, so it was time to flip it and see how many air holes there were
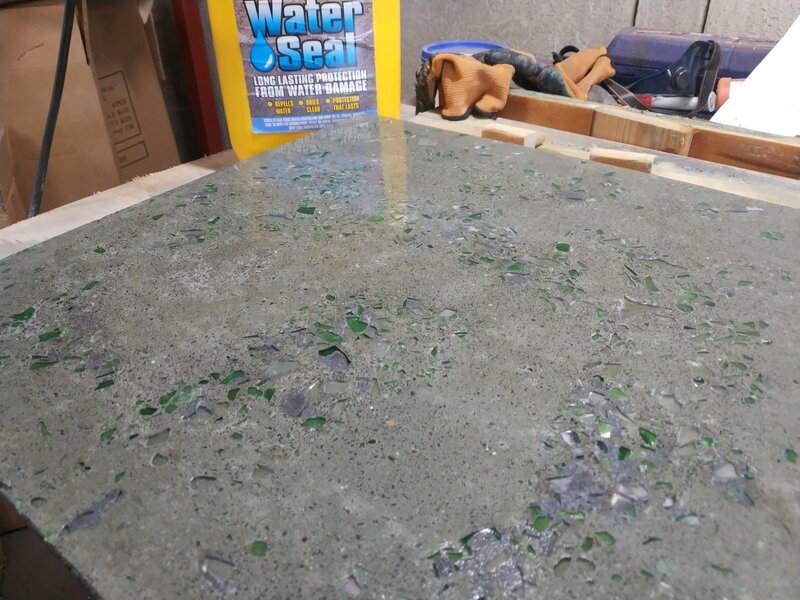
Not too shabby, although a very different shade of green to the one I was expecting.
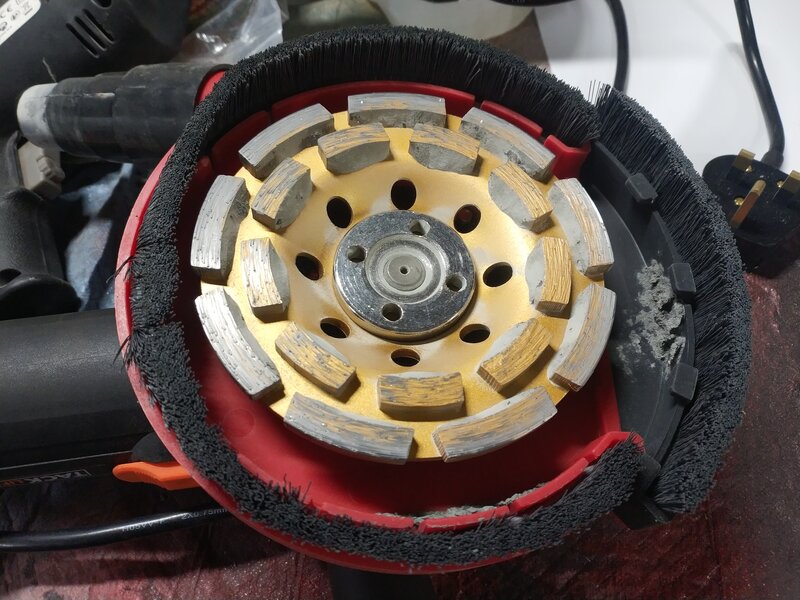
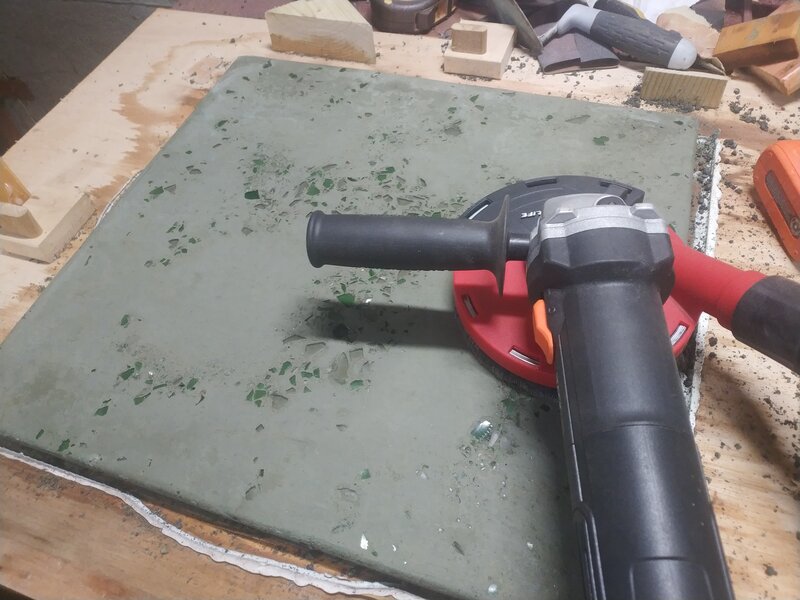
The embedded glass has a layer of concrete over it though, and what holes there are need opening up a little bit so that filler will bite in more easily. I fitted a diamond tipped grinding wheel to my angle grinder
And worked over the top until the glass was exposed - if you're following along, make sure you hook a vacuum cleaner up to the grinder and wear a proper mask, the dust from this is nasty.
(though not the shade I expected, it's not far off the one that was advertised)
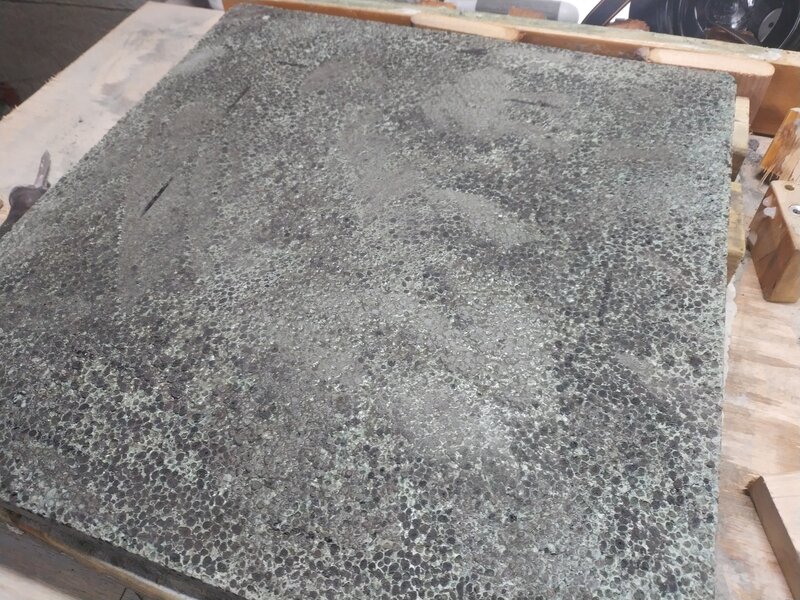
I don't have a picture, but I also used the grinder a bit on the underside (previously the top) in order to remove any loose stones from the concrete - the legs were ultimately going to glued to it, so I wanted to make sure the glue had something solid to stick to. I didn't go to the extent of grinding it down to a polishable surface though.
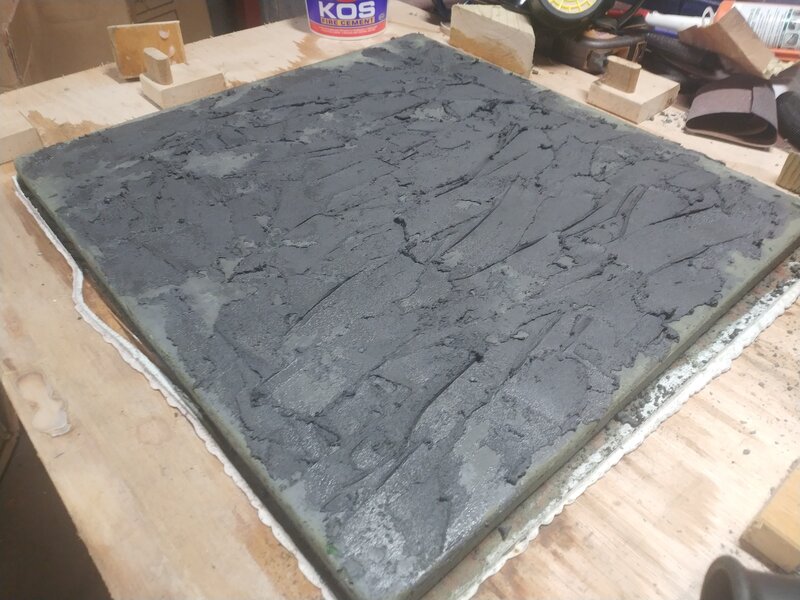
The next step was to fill air holes/depressions. You can make up a fairly watery cement slurry for this, but I'd ordered some fire cement - it dries black and I thought it might look quite nice. With the benefit of hindsight, this was a mistake - it does look quite good, but it's thick and a bit of a pain to work.
Using a trowel, I worked fire cement over the surface, pressing and moving it about to work it down into any divots or holes.
Fire cement needs heat to cure, so I worked it over with a heat gun
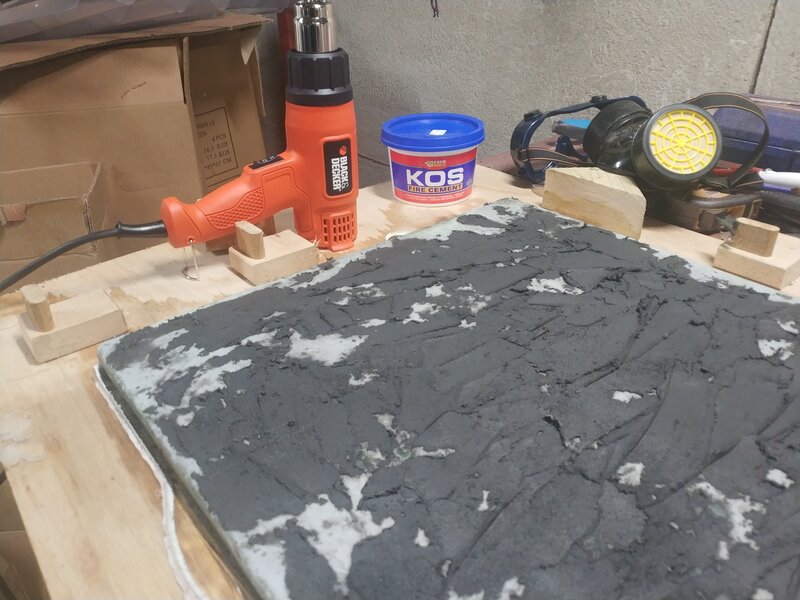
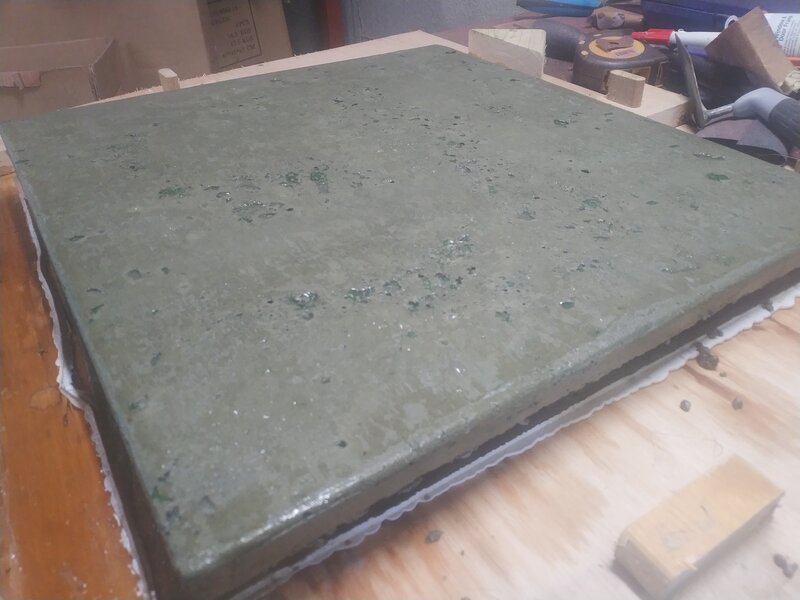
One of the side effects of this, though, was that the top layer of my slab went from green to grey. I wasn't sure, at the time, whether this was just some traces of the fire cement or whether it was the concrete itself.
I left it to sit for 24 hours to make sure it had time to cool properly, and then took the grinder to it
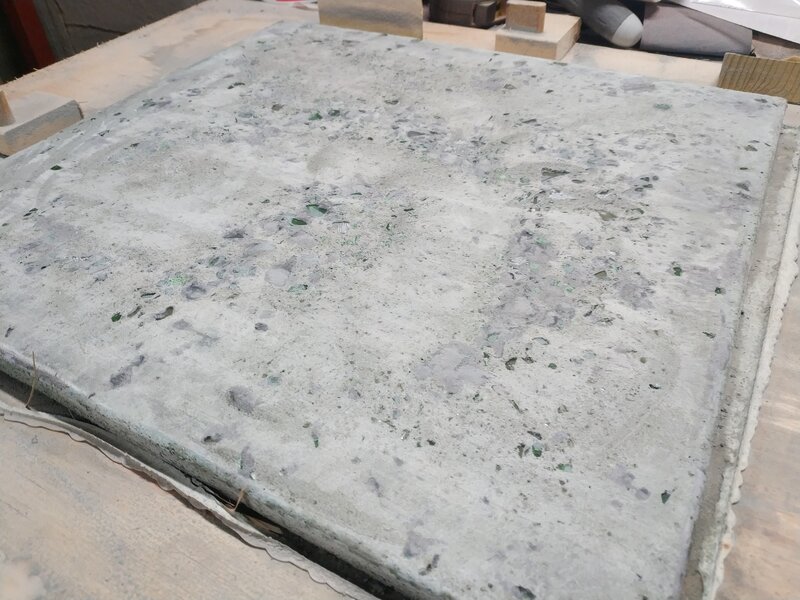
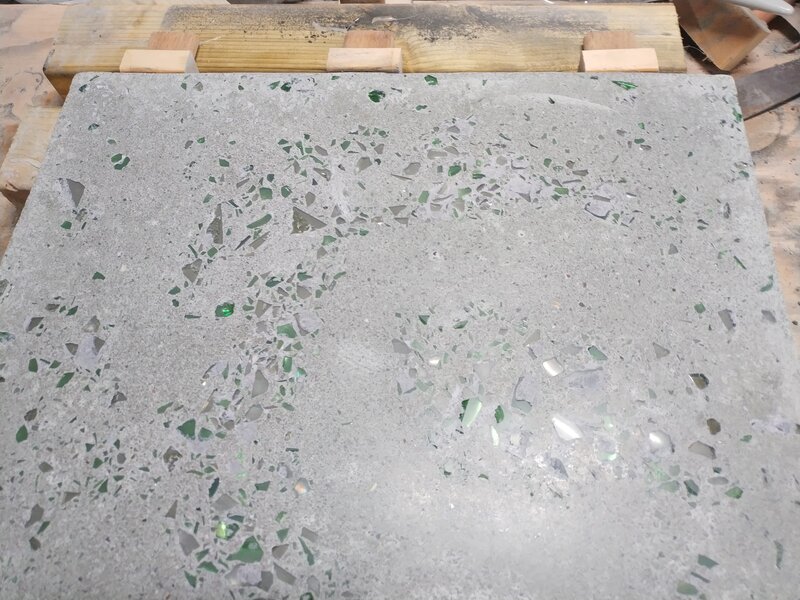
Which gave quite a nice (IMO) flawed surface pattern. But, it is definitely grey rather than green....
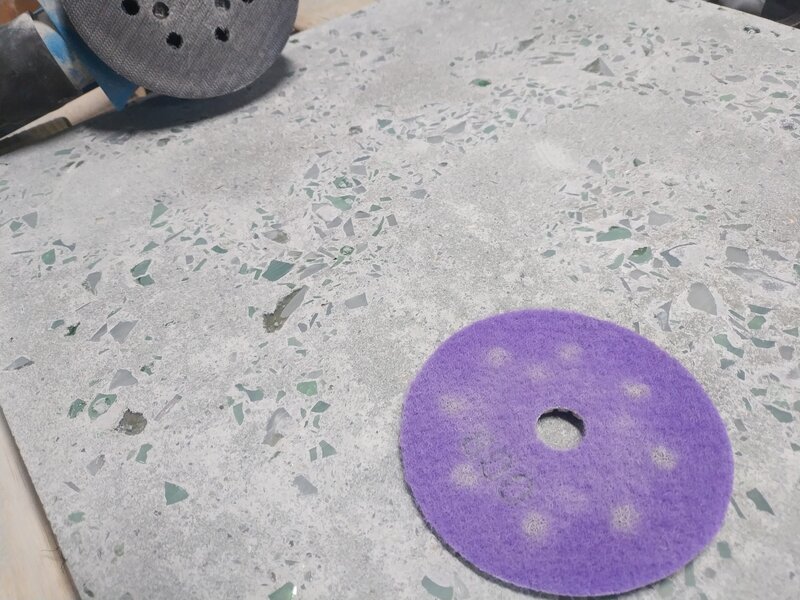
It was time to start actually polishing. In theory you could use the angle grinder bit for this, but it's quite eager to eat stone and so punishes mistakes severely.
Instead, I used some diamond faced polishing pads. I experimented a little initially - you can use them on the end of a drill, but it's quite taxing holding the drill steady and there's a high chance of scuffs/mistakes as a result. Ultimately, I velcro-ed them onto the bottom of my orbital sander.
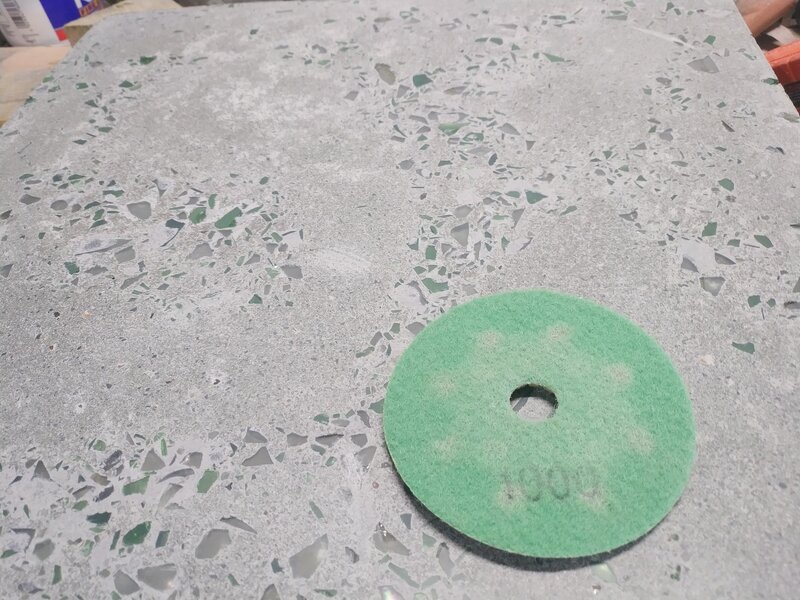
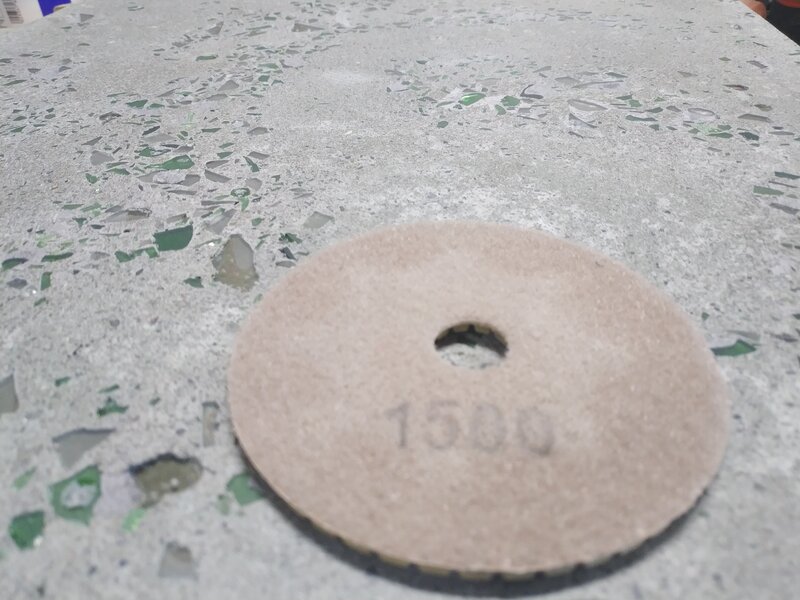
Starting at 50 grit, I slowly worked my way up through the grits I had available.
At 800 grit, you finally start to get an idea of what things are going to look like - it suddenly goes from just sanding to giving a more polished finish (although it's hard to capture in a photo)
It's also a good opportunity to stand back and check the surface - are there sections/depressions that aren't being polished? If there are and you wanted them to be, then now's the time to drop back down to 100 grit and even the surface around them.
Subsequent grits just served to enhance more. I stopped after 1500 grit - the kit had 2000 and 3000 in, but I wasn't sure that the wax would stay on a surface that was polished too smooth
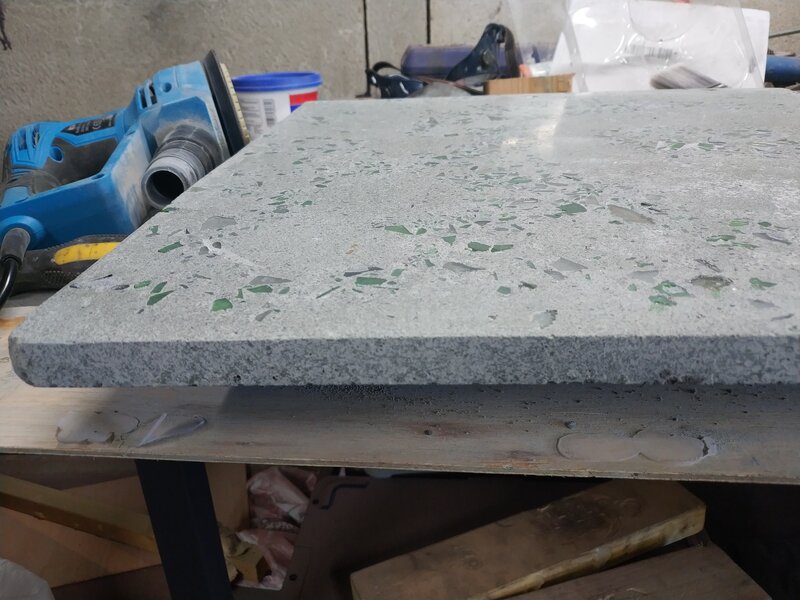
Ultimately giving a nice smooth slab
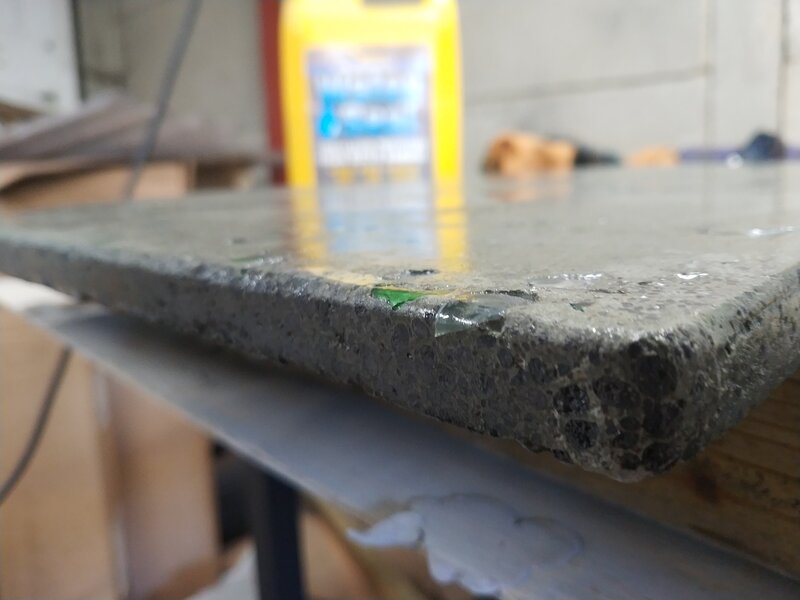
I then repeated the process on each of the edges so that the table-top would have nicely polished sides
Sealing
Having achieved the polished surface, the next step was to seal the concrete - this serves two purposes
- Stop water being absorbed and wrecking the concrete
- Stop the surface turning to powder/dust
I had some sealer left over from other work, so I used that. You can, though, get high gloss sealer specifically for worktops.
Application is simple, you get a brush and paint it on, let it soak in for a bit, and then paint another coat on. I sealed all sides/edges
Assembly
Although the top still needed polishing with wax, I decided to assemble first - there was always the possibility that I was going to scratch the top whilst putting everything together, so it made more sense to retain the ability to take the polishing disks back to it if needed.
There was nothing overly exciting about the assembly stage - I used an industrial adhesive called Stixall (and boy does it deserve that name) to glue the parts together.
I ran the glue around the top of the wooden frame
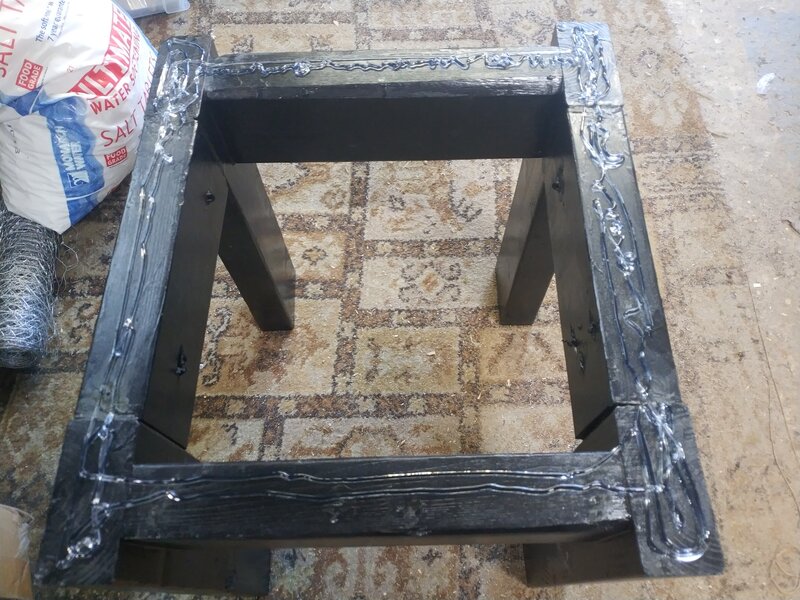
Then placed the frame onto the concrete top (which, obviously, was laying face down).
If you're doing similar and using StixAll, a word of caution: try and line the wood up well when you put it down, you've about 1s before it grabs and adjustment is hard.
I then flipped the table to check that the top was level
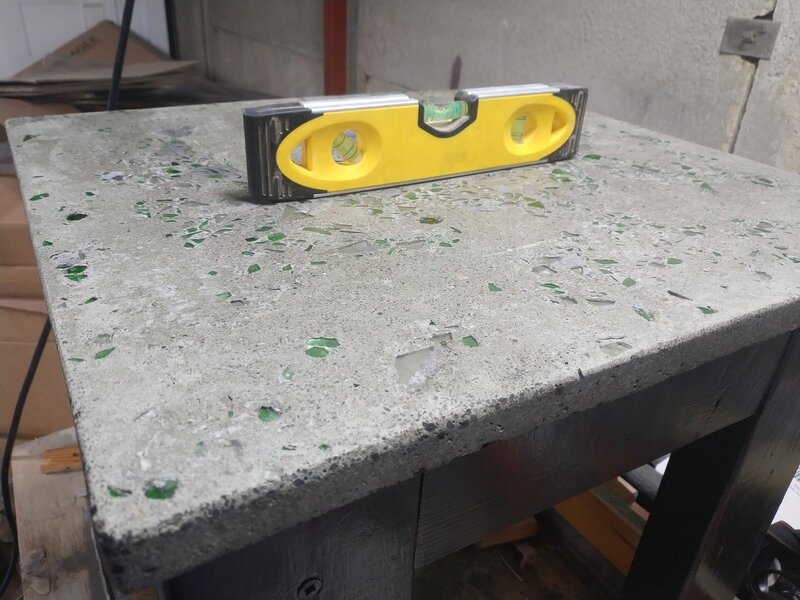
Although the Stixall grabs fast, it can take up to 24 hours to cure and I didn't want to risk knocking it off level, so I left it overnight.
Finishing
The final thing to do, then, was to polish it.
For that, I used a (lovely smelling) concrete wax. Nothing much to it really, you rub it on with a cloth, wait a while and then buff it. I cheated a little, and rather than buffing by hand, stuck a buffing pad to the bottom of my orbital sander.
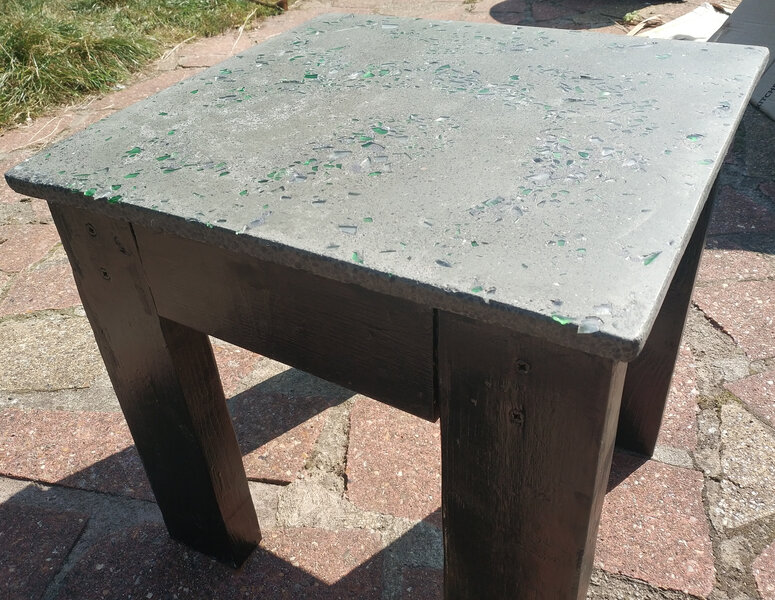
Which just left taking photos of the finished piece
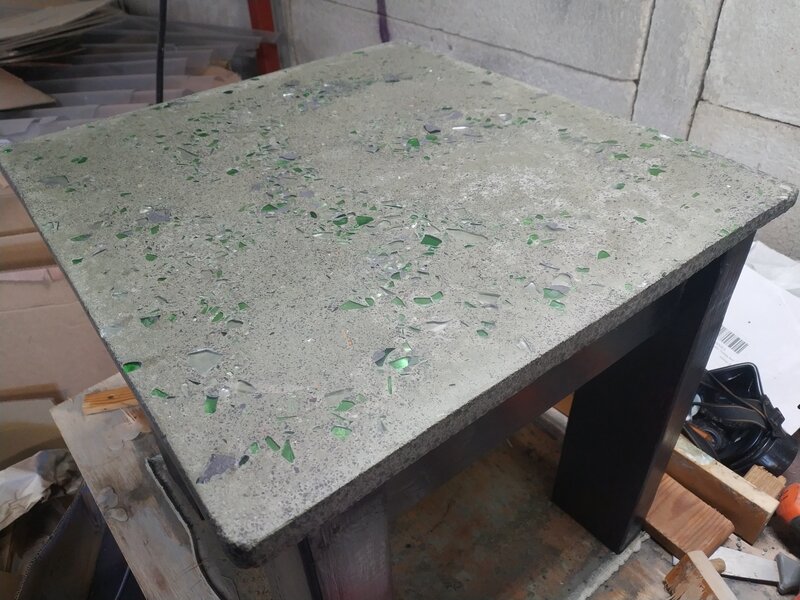
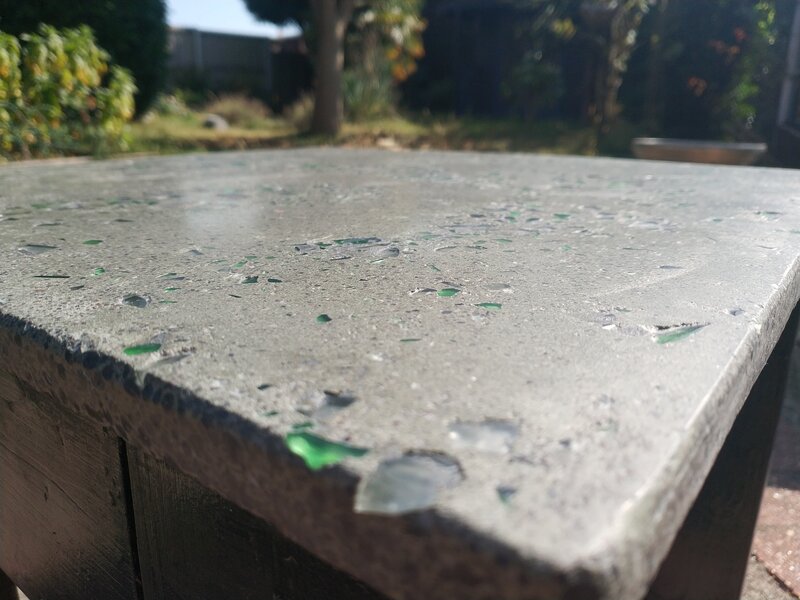

It was only at this stage that I realised that the concrete does still have traces of green to it - it's subtle, but definitely there.
Conclusion
As my first foray into polished concrete, this was always going to be fairly experimental. Whilst the result is, by no means, perfect, I'm pretty happy with it. As pictured above, it holds my tea just fine - which is all anyone could ever ask for.
I have learned a few lessons for next time too.
- If embedding glass/something glue it in place so that the concrete doesn't shift it (although I do quite like the many islands effect it's created)
- That concrete dye probably isn't worth the money
- Fire cement isn't a good choice of filler for the top - it's hard to work, and the heat changes the look of your concrete
It's also a bit of a strange project pacing wise. The first stage is very slow - you've got to let the concrete cure for 7 days - as a result the later stages feel like they're happening way too fast, almost like you're rushing through.